


Chapter 4 Configuring StorNext
Windows Configuration Utilities
StorNext 3.5 Installation Guide 71
Client Configuration 4
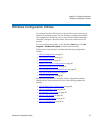
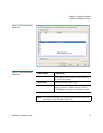
The Client Configuration utility lets you view and modify properties for
the StorNext client software. Use the utility to specify mount points and
mount options, set various cache settings, and configure a distributed
LAN server or a distributed LAN client.
To run the Client Configuration utility, on the Windows Start menu, click
All Programs > StorNext File System > Client Configuration.
The Client Configuration utility includes four tabs:
• Mount Point on page 71
• Distributed LAN on page 73
• Advanced Mount Options on page 75
• Advanced Cache Options on page 79
Click a tab to view or modify StorNext client properties. After making
changes on one or more tabs, click
OK to save the changes. A message
appears prompting you to restart the system. Click
Yes. Most changes do
not take affect until the system is restarted.
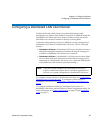
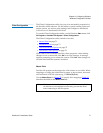
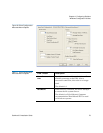
Mount Point 4
StorNext file systems can be mapped to a drive letter or to a folder. When
mapping to a folder, the folder must be empty or non-existent, and must
exist within an NTFS file system (e.g., C:\Mount\MySnfs).
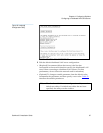
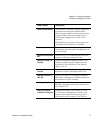
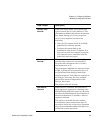
Use the Mount Point tab (figure 37) to specify drive mappings. Table 15
describes the fields on the Mount Point tab.
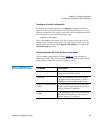
Note: Make sure the host list is the same for all clients on the SAN.
An incorrect or incomplete host list may prevent the client
from connecting to the file system.