


!!%"#$
support.dell.com Rack Installation Guide 1-11
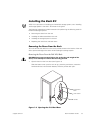
Replacing the Rack Doors
The following subsections describe procedures for replacing the rack doors on the
42-U rack and the 24-U rack.
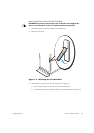
Replacing the Rack Doors on a 42-U Rack
CAUTION: To prevent personal injury due to the size and weight of the
doors, never attempt to remove or replace the doors by yourself.
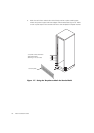
1. Lift the front door into position and align the hinges with the holes in the rack as
shown in Figure 1-3.
2. Slide the hinges into the holes in the rack until the hinge release levers lock the
hinges into position.
3. Close the door latch by rotating the handle counterclockwise until it stops, push
in the handle until it locks in position, and then slide the button cover down over
the push button.
4. Repeat steps 1 through 3 to install the back door, but turn the handle clockwise.
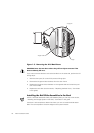
Replacing the Rack Doors on a 24-U Rack
CAUTION: To prevent personal injury due to the size and weight of the
doors, never attempt to remove or replace the doors by yourself.
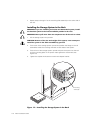
1. Lift the front door into position and align the hinges with the holes in the rack as
shown in Figure 1-5.
2. Line up the door hinges and then press them down.
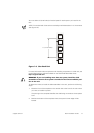
3. Close the door latch by rotating the handle counterclockwise until it stops, and
then push the handle in until it locks in position.
4. Repeat steps 1 through 3 to install the back door.
This completes the rack installation for the PowerVault 660F and 224F storage
systems.