


Operation32
3. To restore the picture to its original size, press AUTO. You can also press D. ZOOM -.
When the key is pressed again, the picture is further reduced until it is restored to the
original size.
• Using the OSD menu
1.
Press Menu/exit and then press Left or Right until the Display menu is highlighted.
2. Press Down to highlight Digital Zoom.
3. Press Mode/enter and press Up to magnify the picture to a desired size.
4. Press Mode/enter to activate the Pan functionality.
5. Use the directional arrows ( , , , ) on the projector or remote control to
navigate the picture.
6. To reduce size of the picture, press Mode/enter to switch back to the zoom in/out
functionality, and press AUTO to restore the picture to its original size. You can also
press Down repeatedly until it is restored to the original size.
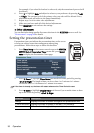
Selecting the aspect ratio
The 'aspect ratio' is the ratio of the image width to the image height. Most analog TV and
computers are in 4:3 ratio, which is the default for this projector, and digital TV and DVDs
are usually in 16:9 ratio.
With the advent of digital signal processing, digital display devices like this projector can
dynamically stretch and scale the image output to a different aspect than that of the image
input source.
You can change the projected image ratio (no matter what aspect the source is) by entering
DISPLAY > Aspect Ratio. Select an aspect ratio to suit the format of the video signal and
your display requirements. There are four aspect ratios available:
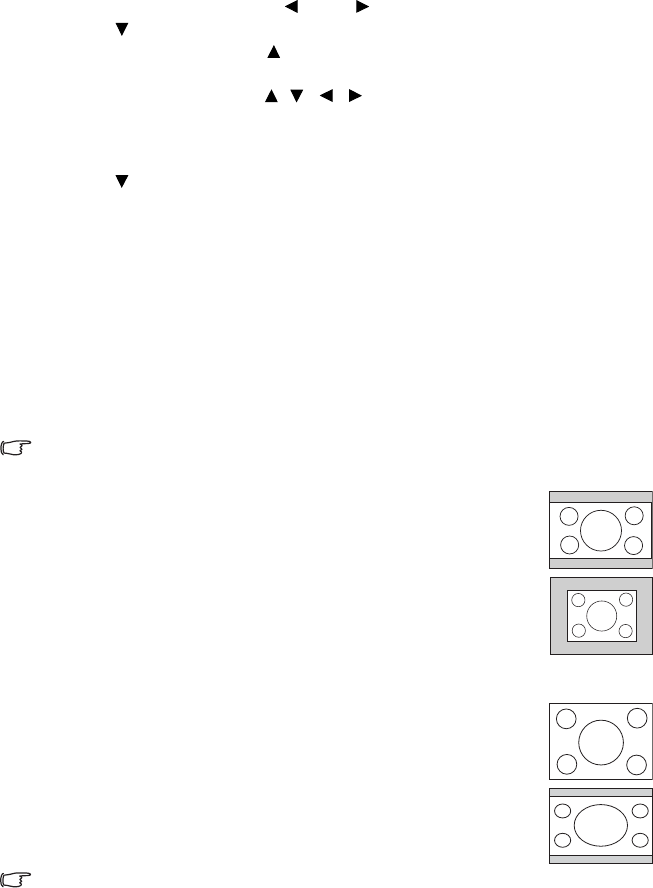
In the pictures below, the black portions are inactive areas and the white portions are active
areas.
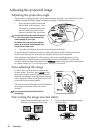
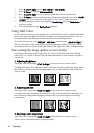
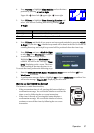
1. Auto: Scales an image proportionally to fit the projector's native
resolution in its horizontal width. This is suitable for the incoming
image which is either in 4:3 nor 16:9 and you want to make most use
of the screen without altering the image's aspect ratio.
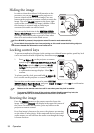
2.
Real: The image is projected as its original resolution, and resized to
fit within the display area. For input signals with lower resolutions,
the projected image will display smaller than if resized to full screen.
You could adjust the zoom setting or move the projector towards the
screen to increase the image size if necessary. You may also need to
refocus the projector after making these adjustments.
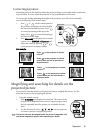
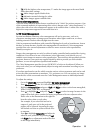
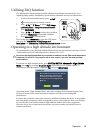
3. 4:3: Scales an image so that it is displayed in the center of the screen
with a 4:3 aspect ratio. This is most suitable for 4:3 images like
computer monitors, standard definition TV and 4:3 aspect DVD
movies, as it displays them without aspect alteration.
4. 16:9: Scales an image so that it is displayed in the center of the screen
with a 16:9 aspect ratio. This is most suitable for images which are
already in a 16:9 aspect, like high definition TV, as it displays them
without aspect alteration.
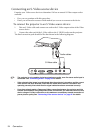
16:9 aspect ratio is only sourced through the Component Video input when
being fed an appropriate 16:9 aspect signal. See "Connecting a Component Video source
device" on page 23 and "Obtaining a preferred projected image size" on page 17 for details.