3-53
CrossPoint / MAV Matrix Switchers • Operation
Selecting Lock mode 2 or toggling between mode 2 and mode 1
N
If the switcher is in Lock mode 0 or mode 1, this procedure selects mode 2.
If the switcher is in Lock mode 2, this procedure selects mode 1.
TogglethelockonandoffbypressingandholdingtheRGBHV(CrossPointUltra)
orVideo(MAVPlus)buttonandtheAudiobuttonforapproximately2seconds
(gure3-76).
I / O
VIDEO AUDIO
I / O
VIDEO AUDIO
Press and hold the RGBHV /Video and Audio
buttons simultaneously to turn on Lock mode 2
or to toggle between mode 1 and mode 2.
2 seconds
The RGBHV/ Video
and Audio buttons
blink twice to indicate
the mode change.
Release the buttons.
Figure 3-76 — Toggle front panel lock between mode 2 and mode 1
Performing a system reset from the front panel
The front panel reset is identical to the
E
ZXXX
}
SIScommand(seechapter4,
“Programmer’sGuide”).Asystemresetperformsthefollowingfunctions:
•Clearsalltiesandpresets
•Clearsallvideoandaudiomutes
•ResetsallI/Ogrouping
•ResetsallRGBdelayto0seconds
•Resetsallinputaudiolevelstounitygain(0dB)
•Setsalloutputvolumelevelsto100%(0dBofattenuation)
N
The system reset clears most image and audio adjustments. If you want to save
these settings, use the Windows-based Matrix Switchers Control Program and
the File > Save MATRIX settings as... selection before you perform this reset
(See chapter 5, “Matrix Software”).
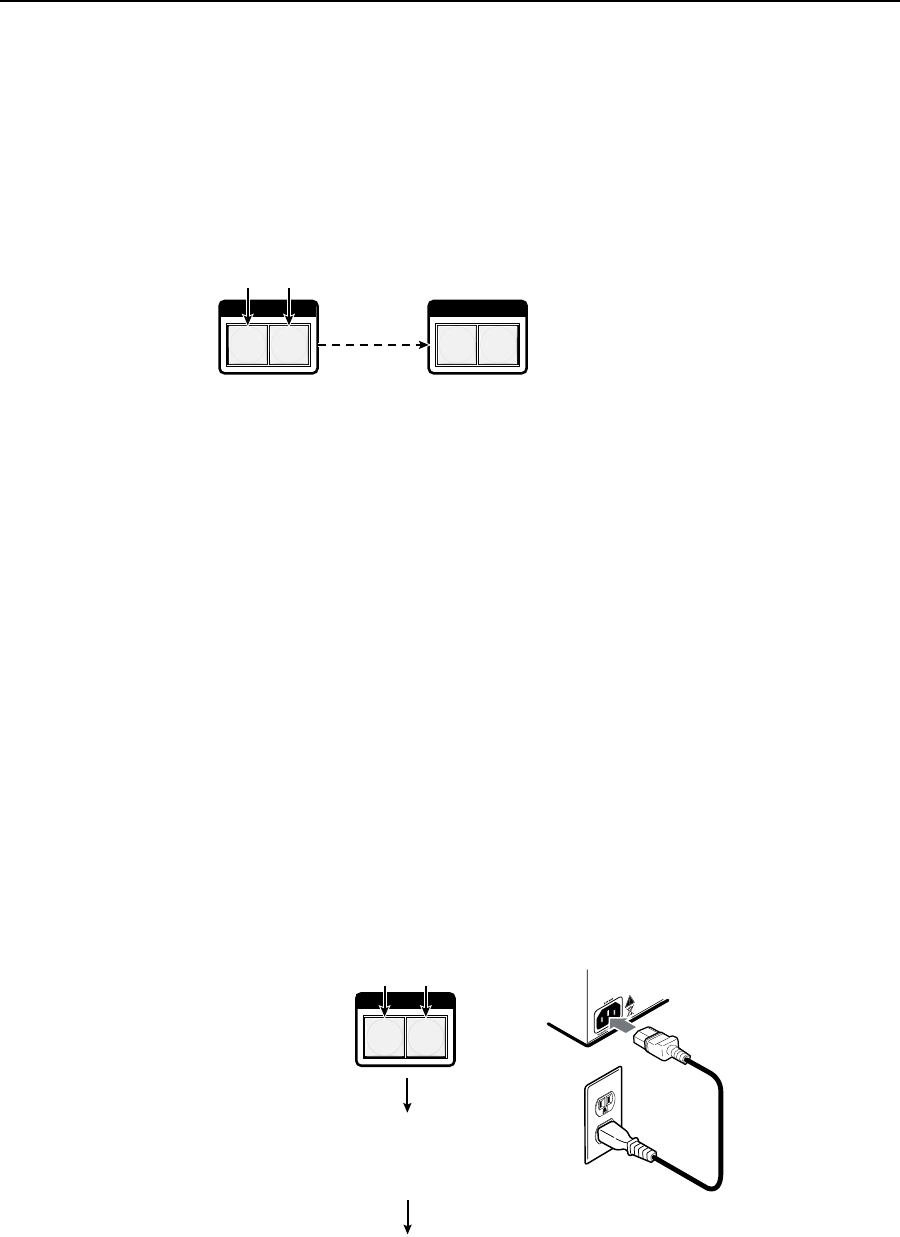
Reset the switcher to the factory default settings by pressing and holding the
RGBHV(CrossPointUltra)orVideo(MAVPlus)buttonandAudiobuttonwhile
you apply AC power to the switcher (figure 3-77).
N
System reset does not reset the Internet protocol (IP) settings or replace user-
installed firmware.
I / O
VIDEO AUDIO
Press and hold the RGBHV/Video and
Audio buttons while you apply power to
the switcher.
Release the RGBHV/Video and Audio buttons.
Power
The switcher flashes
the button indicators
and then turns them off.
Continue to hold the RGBHV/Video and
Audio buttons until all input and output
buttons return to either unlit or to
background illumination and the RGBHV
or Video and Audio buttons turn on.
Figure 3-77 — System reset


