12
· English
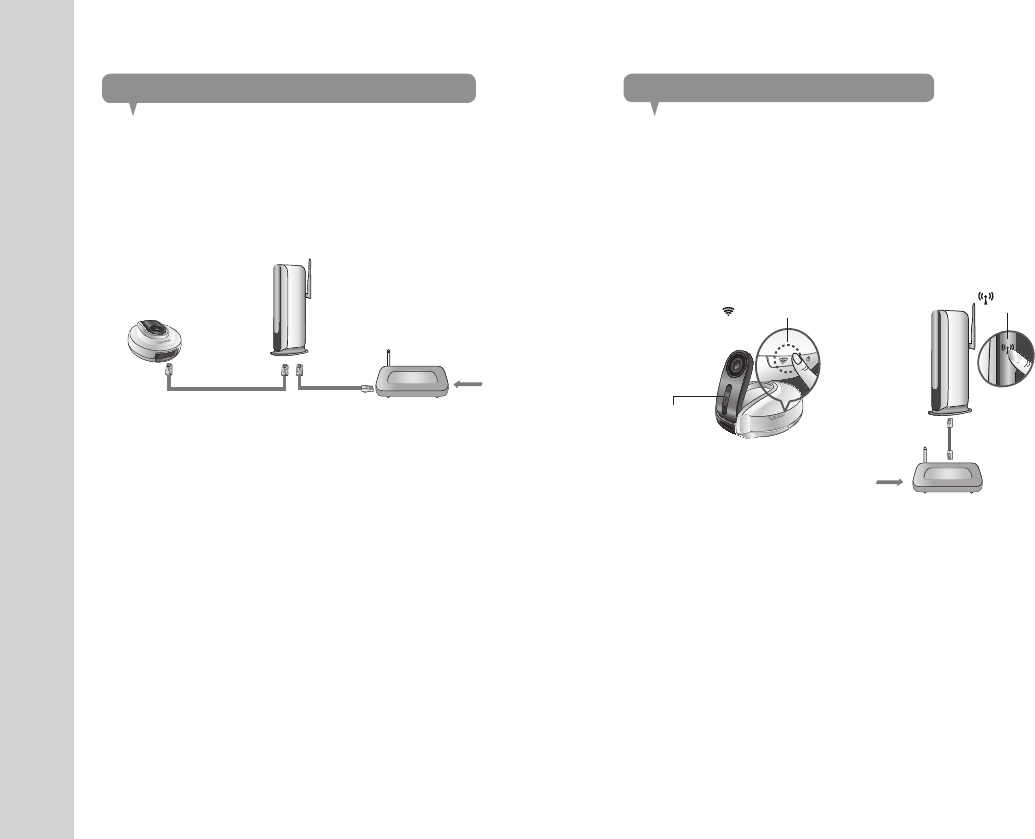
If you want to connect the camera using a non-WPS Wireless Access Point, change
the network setting to Wire and try the wireless network.
Use the network cable (LAN cable) to connect the LAN port of the unit to the
LAN port of the Wireless Access Point.
Register and select the camera according to guide of 03. Monitoring.
Set your wireless network environment using the guideline <Wireless
Network> on page 22.
When the wireless network settings are completed, remove the LAN cable.
If you fail to connect to the Internet service, contact the service provider for
details.
1.
2.
3.
n
`
`
<Modem>
<Wireless Access Point>
What is WPS?
WPS enables to make connection between the camera and the Wireless Access
Point with a simple click of the button.
When you apply the power, the power status LED is lit red, and it will change
to white when the booting is completed.
Press the WPS button on the camera for 3sec and the WiFi status LED will flash rapidly.
Press the WPS button on the Wireless Access Point within 2min.
WPS Button
WPS Button
<Modem>
<Wireless Access Point>
Wi-Fi
Indicator LED
The WiFi status LED will become steady white once the camera is connected
to the Wireless Access Point. (may take up to 30sec).
If the WiFi status LED (white) is not lit, repeat steps 2 through the end and
check it again.
If the Wireless Access Point do not support WPS or you do not have wirelss
router, please go to Wired Connection.
If no WPS button is displayed or visible on the display, see the Wireless Access
Point’s manual or contact the manufacturer of your Wireless Access Point for
technical assistance.
On some routers, you may need to log in to the web interface and click on an
on-screen button to activate the WPS feature.
If you fail to connect to the Internet service, contact the service provider for details.
1.
2.
3.
4.
n
`
`
`
`


