


2
Type
1
Features
Type
1
Features
2
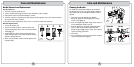
Forward-Facing Installation
26
Locking Lap-Shoulder Belt Installation
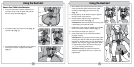
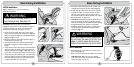
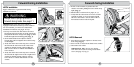
Figure 1 illustrates a typical forward-facing
installation using the vehicle’s locking lap-
shoulder belt.
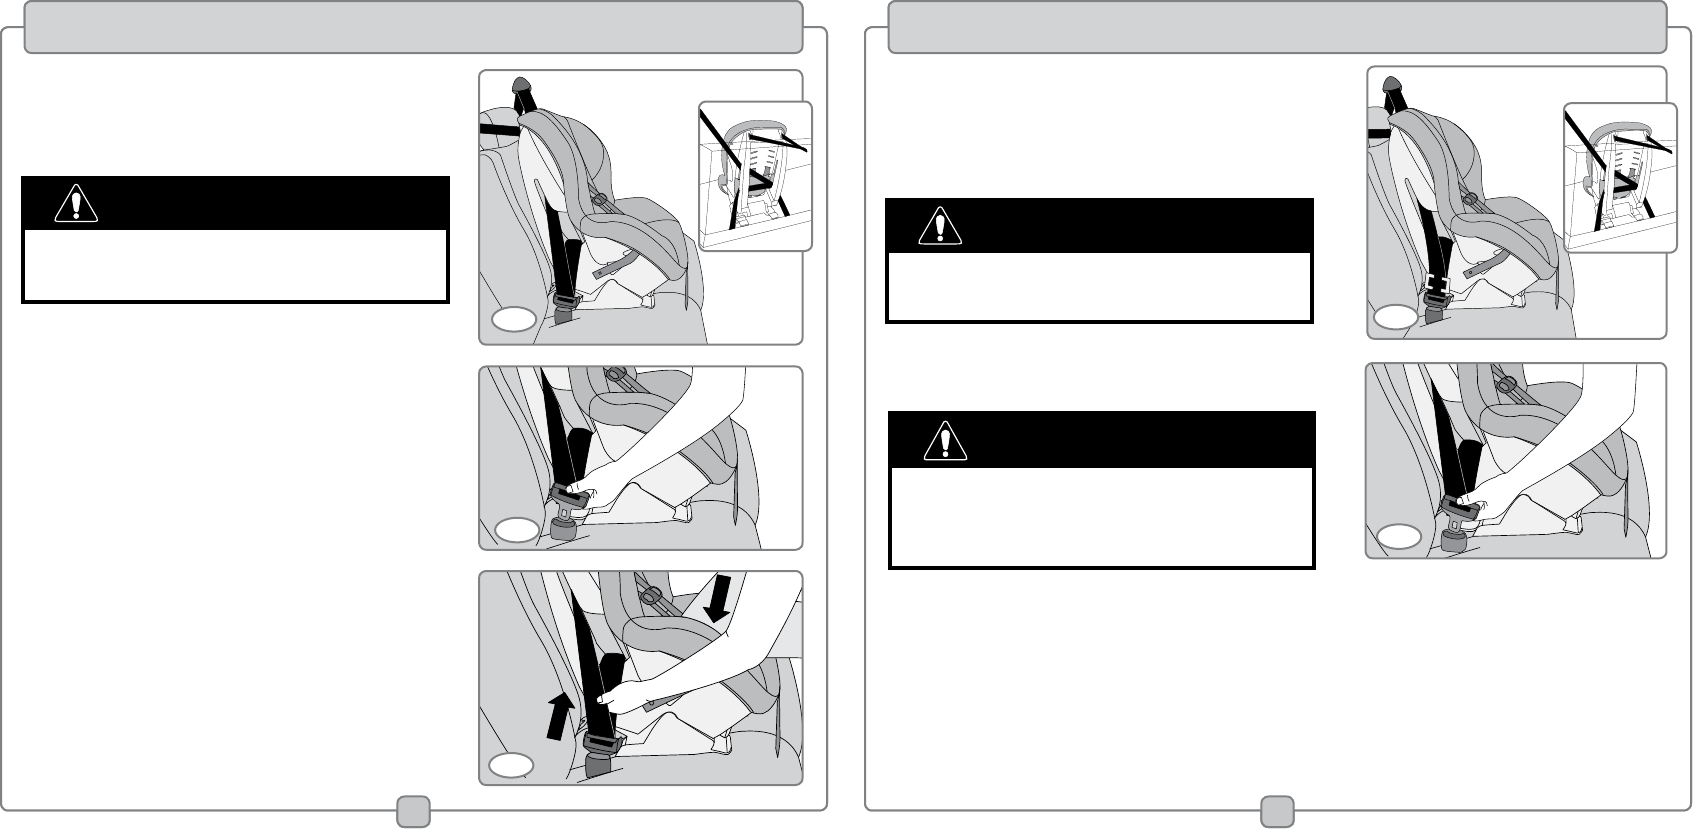
IMPORTANT! When installing the restraint with
vehicle belts, store the lower hooks in storage
slots under cover (see page 16, Fig. 2).
1. With the restraint in the upright position, place
it forward-facing in the vehicle seat.
IMPORTANT! Installation can be improved by
using the tether (see pages 32–33).
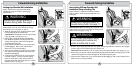
2. Pull to fully extend the vehicle lap-shoulder
belt. Hold the shoulder and lap portion of the
vehicle belt together and route through the
forward-facing belt path.
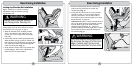
3. Verify that the vehicle belt is not twisted, then
buckle
(Fig. 2). Pull on the vehicle belt to
make sure it is securely buckled.
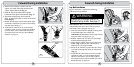
4.
Kneel on the restraint to push it into the vehicle
seat while removing slack from the vehicle lap-
shoulder belt
(Fig. 3).
5. Verify that all connections are secure and the
restraint is stable. A secure restraint should
allow no more than 1 inch of side-to-side or
forward movement at the belt path
(see “Check
Buckle Position” on page 30).
1
3
2
27
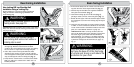
Forward-Facing Installation
1
Non-Locking ELR Lap-Shoulder Belt
Installation Using a Locking Clip
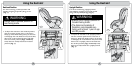
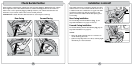
Figure 1 illustrates a typical forward-facing installation
using the vehicle’s non-locking lap-shoulder belt and a
locking clip.
IMPORTANT! When installing the restraint with
vehicle belts, store the lower hooks in storage slots
under cover (see page 16, Fig. 2).
Do not install this restraint using
a non-locking ELR vehicle belt,
unless a locking clip is used.
WARNING
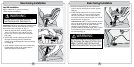
2
Always use in upright position in
forward-facing mode. See page 11.
WARNING
Always use in upright position in
forward-facing mode. See page 11.
WARNING
1. Remove the locking clip from the user guide storage bag. With the restraint in the upright
position, place it forward-facing in the vehicle seat.
IMPORTANT! Installation can be improved by the using the tether (see pages 32–33.)
2. Pull to fully extend the vehicle lap-shoulder belt. Hold the shoulder and lap portion of the
vehicle belt together and route through the forward-facing belt path.
3. Verify that the vehicle belt is not twisted, then buckle (Fig. 2). Pull on the vehicle belt to
make sure it is securely buckled.