


ASSEMBLY INSTRUCTIONS
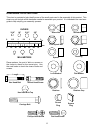
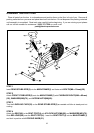
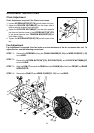
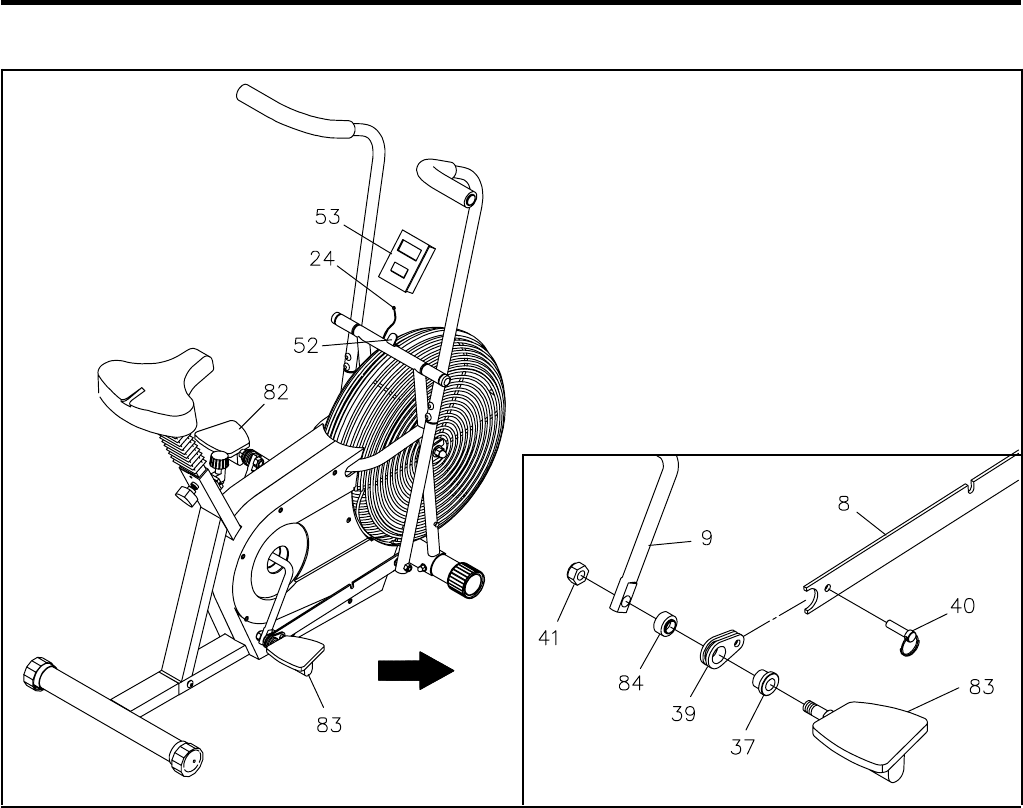
Push PEDAL BUSHINGS(37), with SHOULDER facing outside, into LINKAGE CONNECTORS(39).
Insert PEDAL SHAFTS of PEDALS(82, 83) through SHOULDER side of PEDAL BUSHINGS(37).
Slide SPACERS(84) onto PEDAL SHAFTS.
WARNING: SPACER(84) must be between PEDAL BUSHING(37) and CRANK(9) so that there will be
enough clearance between LINKAGE(8) and CRANK(9).
Thread PEDAL SHAFTS of PEDALS(82, 83) into CRANK(9) and tighten.
Hold PEDAL SHAFTS and thread THIN NUTS(1/2")(41) onto PEDAL SHAFTS.
Tighten PEDAL SHAFTS and THIN NUTS(1/2")(41) until THIN NUTS(1/2")(41) are tight against CRANK(9).
Connect the LINKAGES(8) to the LINKAGE CONNECTORS(39) with the LOCKING PINS(40).
a.
b.
c.
d.
e.
f.
g.
The RIGHT PEDAL(83) has R marked on the bottom side of the pedal. The LEFT PEDAL(82)
has L marked on the bottom side of the pedal. Both PEDALS(82, 83) have RIGHTHAND
THREADS. Tighten both
PEDALS(82, 83) by turning clockwise.
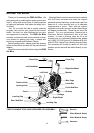
STEP 8
NOTE:
IMPORTANT STUDY THE ABOVE ILLUSTRATION AND READ ALL OF STEP 8 "a" through "g"
BEFORE ATTACHING PEDALS AND CONNECTING LINKAGES.
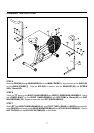
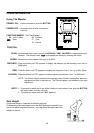
STEP 9
Open the MONITOR(53) to Install two AA batteries. Run the SPEED PICKUP WIRE(24) through the
hole on the Back Cover of the
MONITOR(53) and plug into the MONITOR(53). Insert MONITOR(53)
into the Back Cover. Attach the MONITOR(53) to the BRACKET(52) on the MAIN FRAME(1).
8