


6
SETTING UP THE S curve 231
SETTING UP THE S curve 231
Setting up your S curve 231 Graphic Equalizer is a simple procedure which takes only a few minutes:
1. Remove all packing materials (save them in case of need for future service) and decide where the unit is to be
physically placed—it can be used free-standing or mounted in a standard 19" rack.
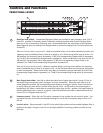
2. Make sure the power to all mixers and amplifiers in your audio system is off. On the front panel of the S curve
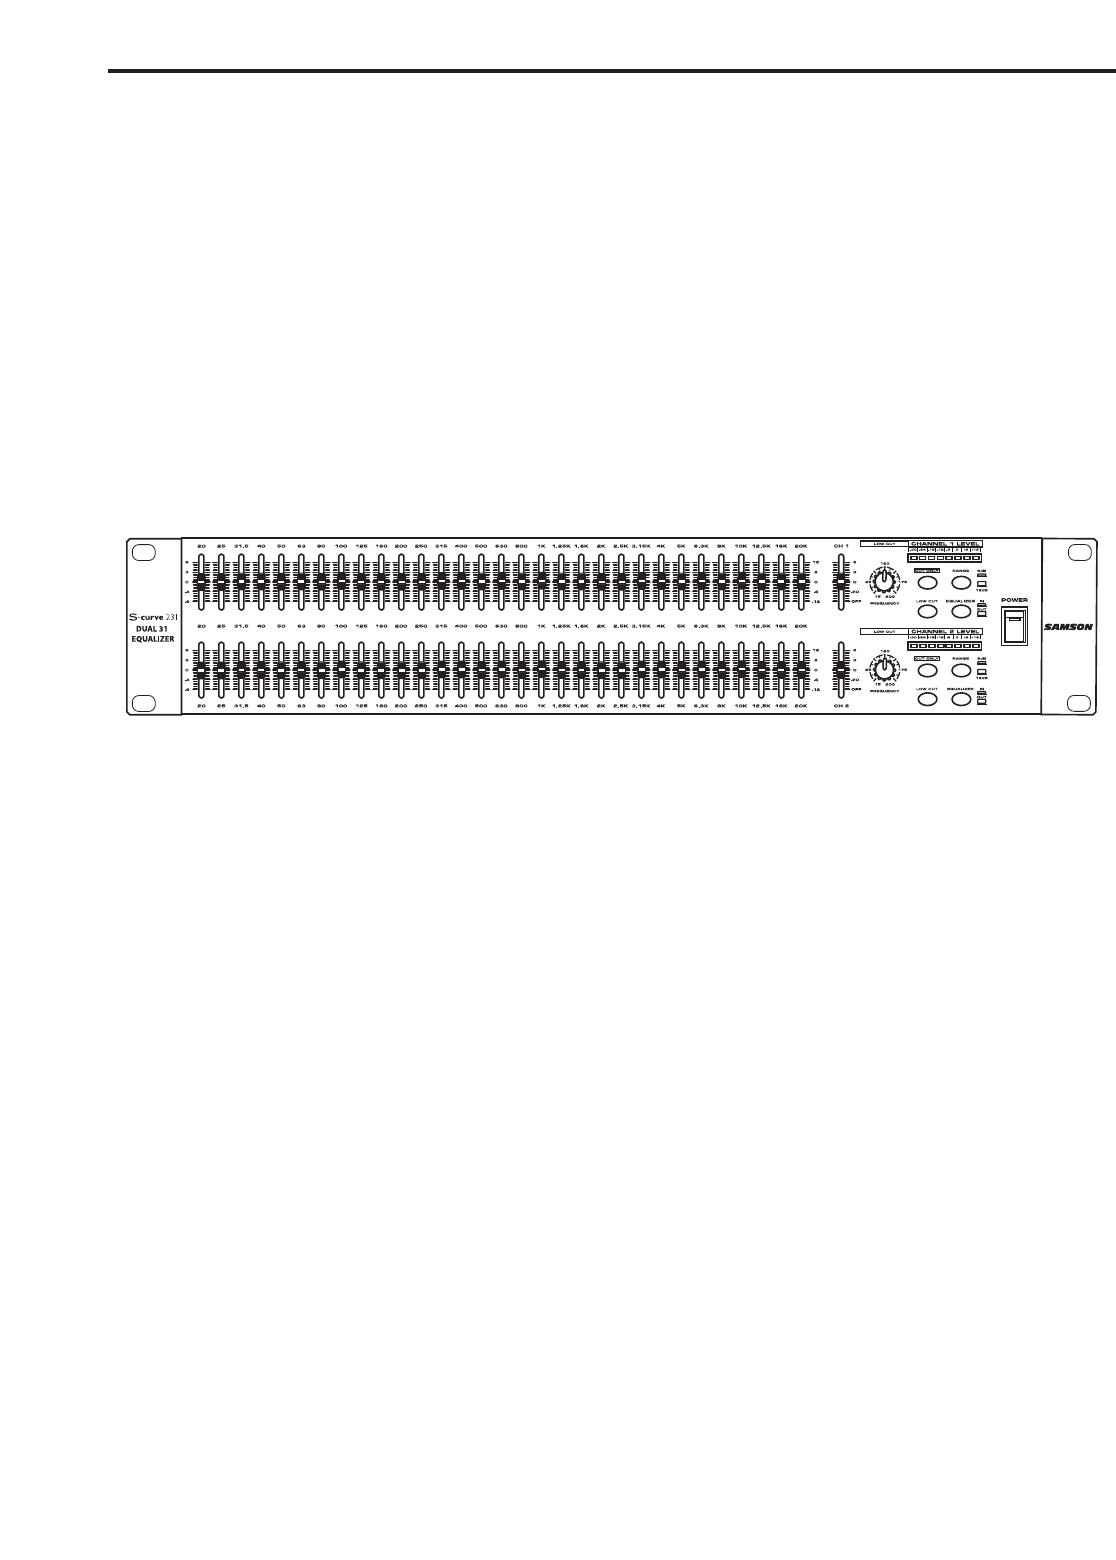
231, place the Bypass switch to it’s out (off) position and set the Main Level slider to it’s bottom-most “OFF”
setting.
3. Set all Equalizer sliders to their flat (“0”) center detented position.
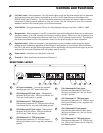
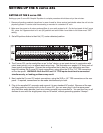
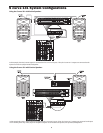
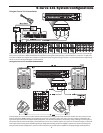
4. The S curve 231 can be used either as an “in-line” device, as an insert device (in conjunction with
mixer insert points), or in an effects send-return loop. The illustrations on pages 8-10 show each of
these typical configurations. Choose the configuration that is best for your application and then
begin by making the S curve 231 input connections, using either the XLR or 1/4" TRS connectors
on the rear panel. WARNING: Both the XLR and 1/4" TRS inputs should not be connected
simultaneously, or loading problems may result.
5. Next, make the S curve 231 output connections, using the XLR or 1/4" TRS connectors on the rear
panel. If required, connections can be made simultaneously to both.
6. Plug in the supplied AC connector and connect it to any standard AC socket. Because of the spe-
cial relay power-on circuitry built into the S curve 231, you can even plug it into the same power
strip that other audio devices (such as a mixing console) are connected to. You can then turn on all
devices at once with the single power strip on-off switch, without generating speaker “thumps”.