


PAGE 8 — B-SERIES TROWEL — PARTS & OPERATION MANUAL — REV. #1 (12/03/01)
B-SERIES TROWEL — INSTRUCTIONS
Putting Into Service
Before packing and shipping, this Power Trowel was run and
tested at the factory. If there are any problems, please let us know.
Fill out and send the warranty-registration card supplied with the
machine. All warranties are void unless this card is on file with
us.
Before putting your new finisher into service, read all manuals
and instructions carefully. Improper setup, use or maintenance
of your equipment could result in personal injury or damage to
equipment.
The purpose of this section of the manual is to explain the
intended setup, use and maintenance of this equipment.
Assembly
Note: READ THESE INSTRUCTIONS CAREFULLY BEFORE
ATTEMPTING TO ASSEMBLE ANY COMPONENTS.
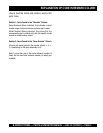
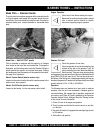
HANDLE ASSEMBLY — QUICK PITCH™
The QUICK PITCH handle is spring loaded, personal injury or
damage could result from improper handling or installation.
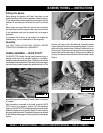
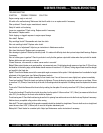
Attach the handle tube as shown (Step 1). Bolts are to be inserted
from the bottom side of the handle. Note that the bolt on the engine
side must have a washer between the gearbox and the nut. The
second bolt carries the auxiliary lift handle bracket in the place
of a washer.
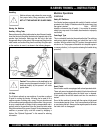
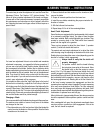
After the handle is connected to the trowel, grasp the QUICK
PITCH control from operator’s position. Pull the adjustment
trigger on the QUICK PITCH handle and push the entire handle
towards the engine as far as possible (Step 2). This will compress
the spring inside the handle. Considerable force may be required
to do this! Release the trigger to lock the spring in this compressed
position.
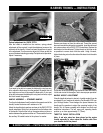
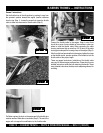
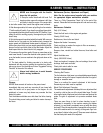
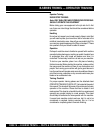
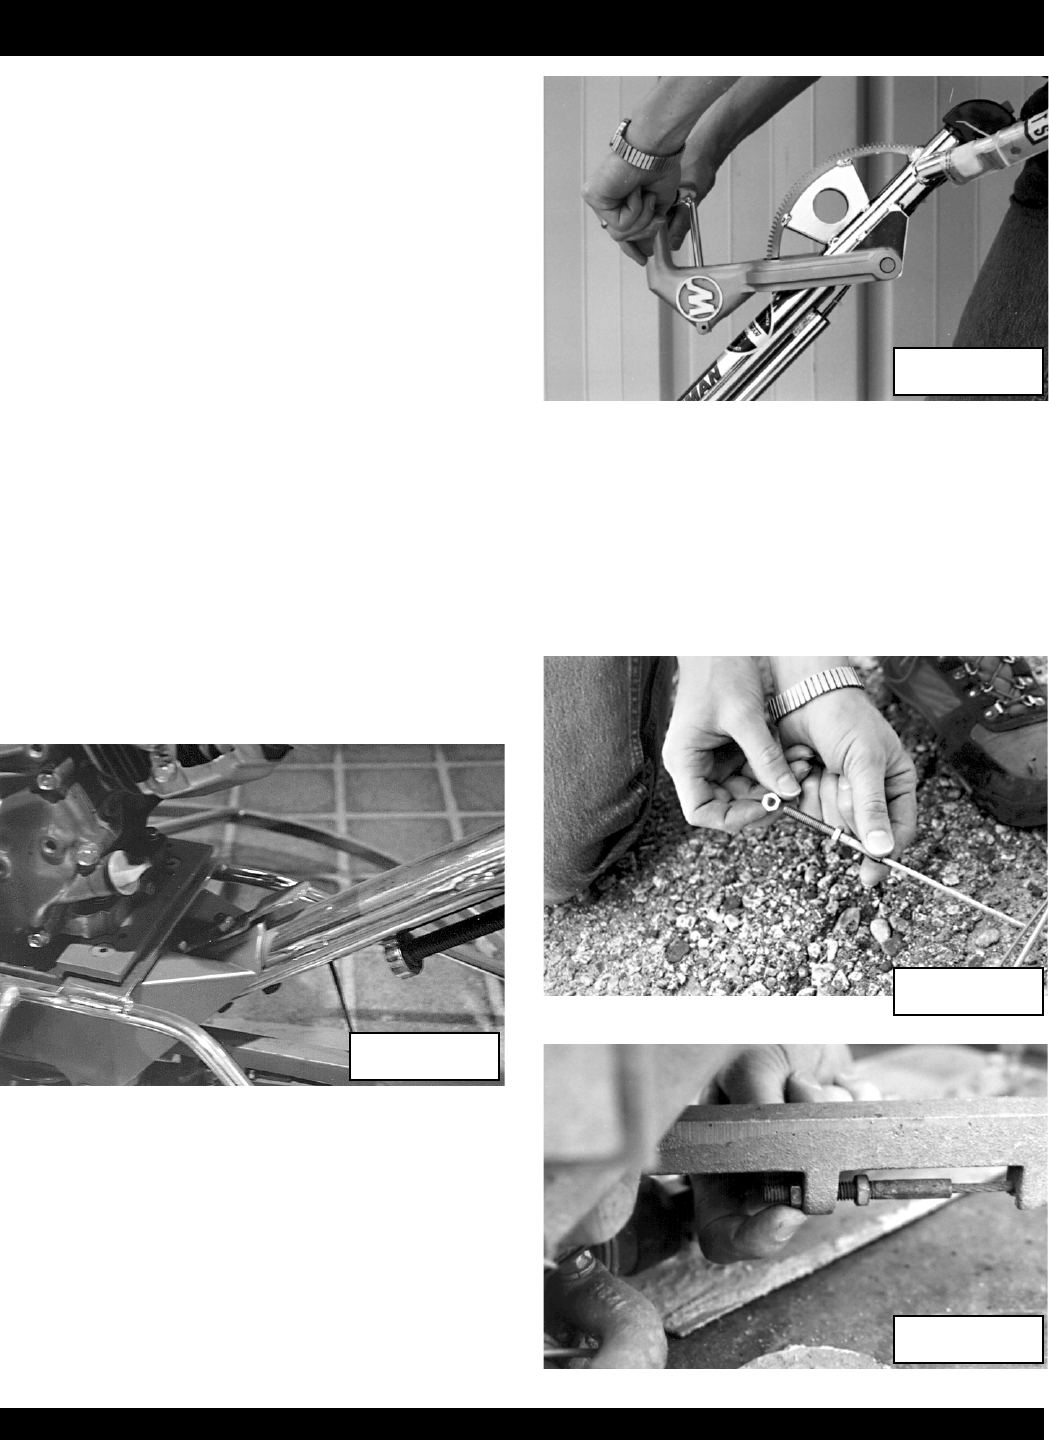
Remove one brass nut from the cable end. Thread the second
brass nut towards the cable as far as possible (Step 3). Insert the
cable end into the yoke as shown. Replace the brass set nut on
the cable end. Tighten the set nut by hand as far as possible to
remove slack from the cable (Step 4). Using a wrench, tighten the
locking nut on the other side of the boss to lock the cable in place
(Step 5).
STEP 1STEP 1
STEP 1STEP 1
STEP 1
STEP 3STEP 3
STEP 3STEP 3
STEP 3
STEP 2STEP 2
STEP 2STEP 2
STEP 2
STEP 4STEP 4
STEP 4STEP 4
STEP 4