


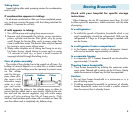
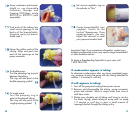
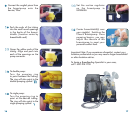

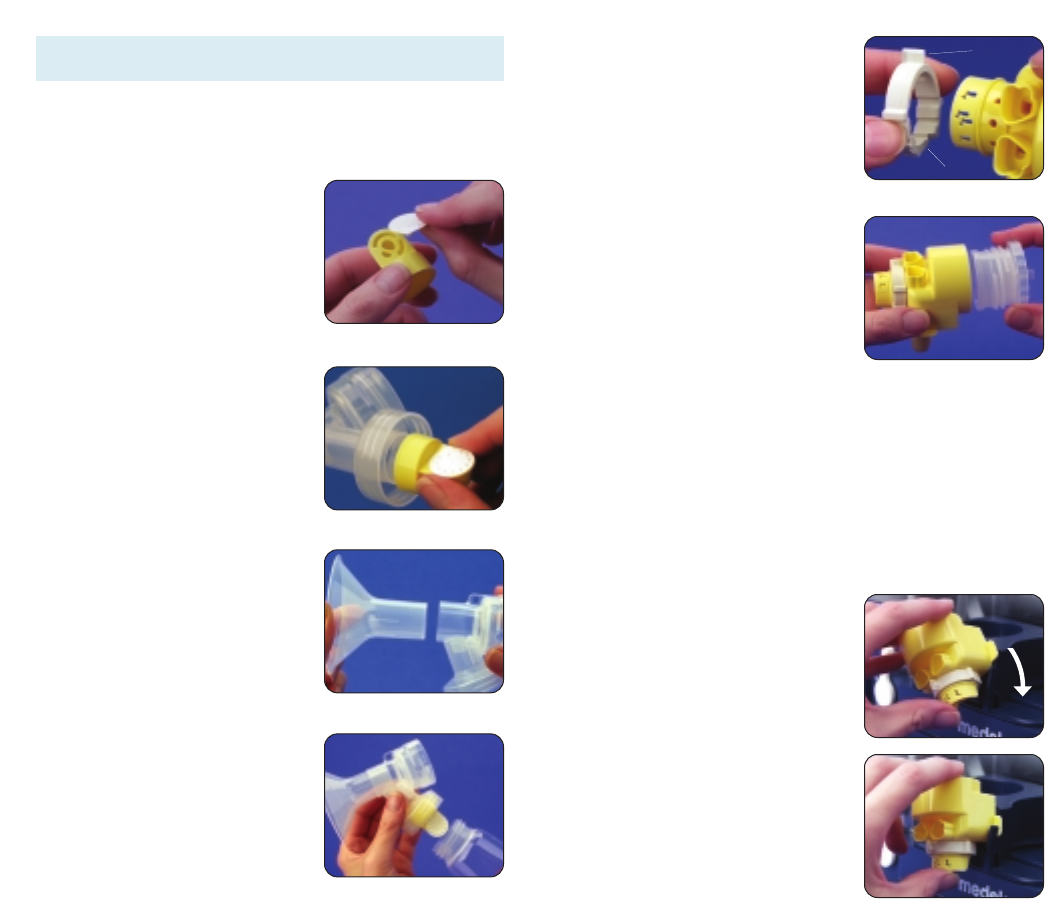
55 Slip pumping ring onto the
pump connector. The knob on
the ring points up and the cut-
out faces in.
66 Screw barrier/filter into pump
connector until snug.
NOTE: The barrier/filter is
designed to inhibit overflow
into the Classic
™
Electric
Breastpump. The filter is
hydrophobic; air will pass
through the filter, but liquid will
not. If liquid comes in contact with the filter, it will
become impermeable and will work again only after it
has been washed and dried. You may clean the filter by
rinsing it in warm water. DO NOT USE SOAP TO
CLEAN THE FILTER. DO NOT USE ANYTHING ABRA-
SIVE. DO NOT TOUCH THE WHITE FABRIC PART OF
THE FILTER. Air drying the filter will take approximately
2-3 hours. A hair dryer reduces drying time to approxi-
mately 10 minutes.
77 Push the pump connector into
the opening on the container
holder. If your pump does not
have a container holder, go to
step #9.
88 Rotate the pump connector to
the right, making sure the tab
on the pump connector fits
securely into the container
holder slot.
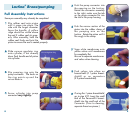
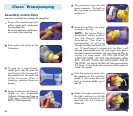
Assembly Instructions
Some pre-assembly may already be completed.
11 Snap white membranes onto
yellow valves until membranes
lie completely flat.
Be sure to separate membranes
and valves when cleaning.
22 Push valves into place on the
Connectors.
33 If using the 1-piece breast-
shield, go to step #4. Insert the
small end of the PersonalFit
breastshield into the small end
of the Connector. (Prior to
cleaning, separate these two
pieces.)
44 Screw Containers onto breast-
shield or use disposable
Collection Storage and Freezing
(CSF) Bags, article #87010 or
#87013 (Sold separately).
Classic
™
Breastpumping
1514
Cut-out
Knob