79
Performing with a computer
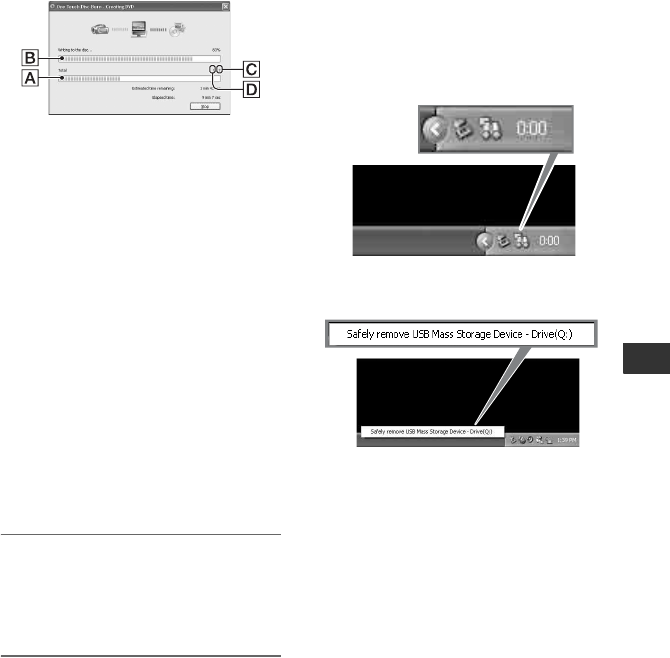
ACurrent status of all DVD creation
BCurrent status per DVD
CNumber of DVDs required
DNumber of DVDs being created
When the DVD creation is completed,
the disc tray opens automatically.
b Notes
• During DVD creation, do not apply vibration to
the camcorder. The DVD creation may be
terminated.
• Make sure no other USB devices are connected
to your computer.
z Tips
• When you insert a burned DVD-RW/DVD+RW
in the DVD drive in step
3, a message appears,
asking if you want to delete data saved on a
DVD.
• When you cannot store all the recordable data
on a DVD, follow the on-screen instructions,
then insert a new DVD onto the DVD drive.
8 Once the completion dialog for
DVD creation appears, click
[Close] on the computer screen.
To create another DVD, click [Copy].
z Tips
• You can also create a DVD by selecting [DISC
BURN] on the [USB SELECT] screen of your
camcorder (p. 80).
• You can also create a DVD by selecting [One
Touch Disc Burn] in the HDD Handycam
Utility (p. 80).
To disconnect the USB cable
1 Touch [END] on the LCD screen of
your camcorder.
2 Click the [Unplug or eject hardware]
icon on the task tray.
3 Click [Safely remove USB Mass
Storage Device].
4 Touch [YES] on the LCD screen of your
camcorder.
5 Disconnect the USB cable from the
Handycam Station and the computer.
b Notes
• Do not disconnect the USB cable while the
ACCESS lamp is lit.
• Before turning off your camcorder, disconnect
the USB cable following the proper procedures
described above.
• Disconnect the USB cable using the proper
procedures described above. Otherwise, files
stored on the hard disk of your camcorder or in a
“Memory Stick Duo” may not be updated
correctly. Also, disconnecting the USB cable
improperly may cause a malfunction of the hard
disk of your camcorder or of the “Memory Stick
Duo.”


