Wireless network setup
33
2. Using a Network-Connected Machine
3
Insert the supplied software CD into your CD-ROM drive.
If the installation window does not appear, click Start > All programs >
Accessories > Run.
X:\Setup.exe replacing “X” with the letter, which represents your CD-
ROM drive and click OK.
• For Windows 8,
If the installation window does not appear, from Charms, select
Search > Apps and search for Run. Type in X:\Setup.exe, replacing
“X” with the letter that represents your CD-ROM drive and click OK.
If “Tap to choose what happens with this disc.” pop-up window
appears, click the window and select Run Setup.exe.
4
Read and accept The software End User License Agreement and
Using Enhanced Features and Participating in Printer Usage
Information Collection Program (optional). Then, click Next.
5
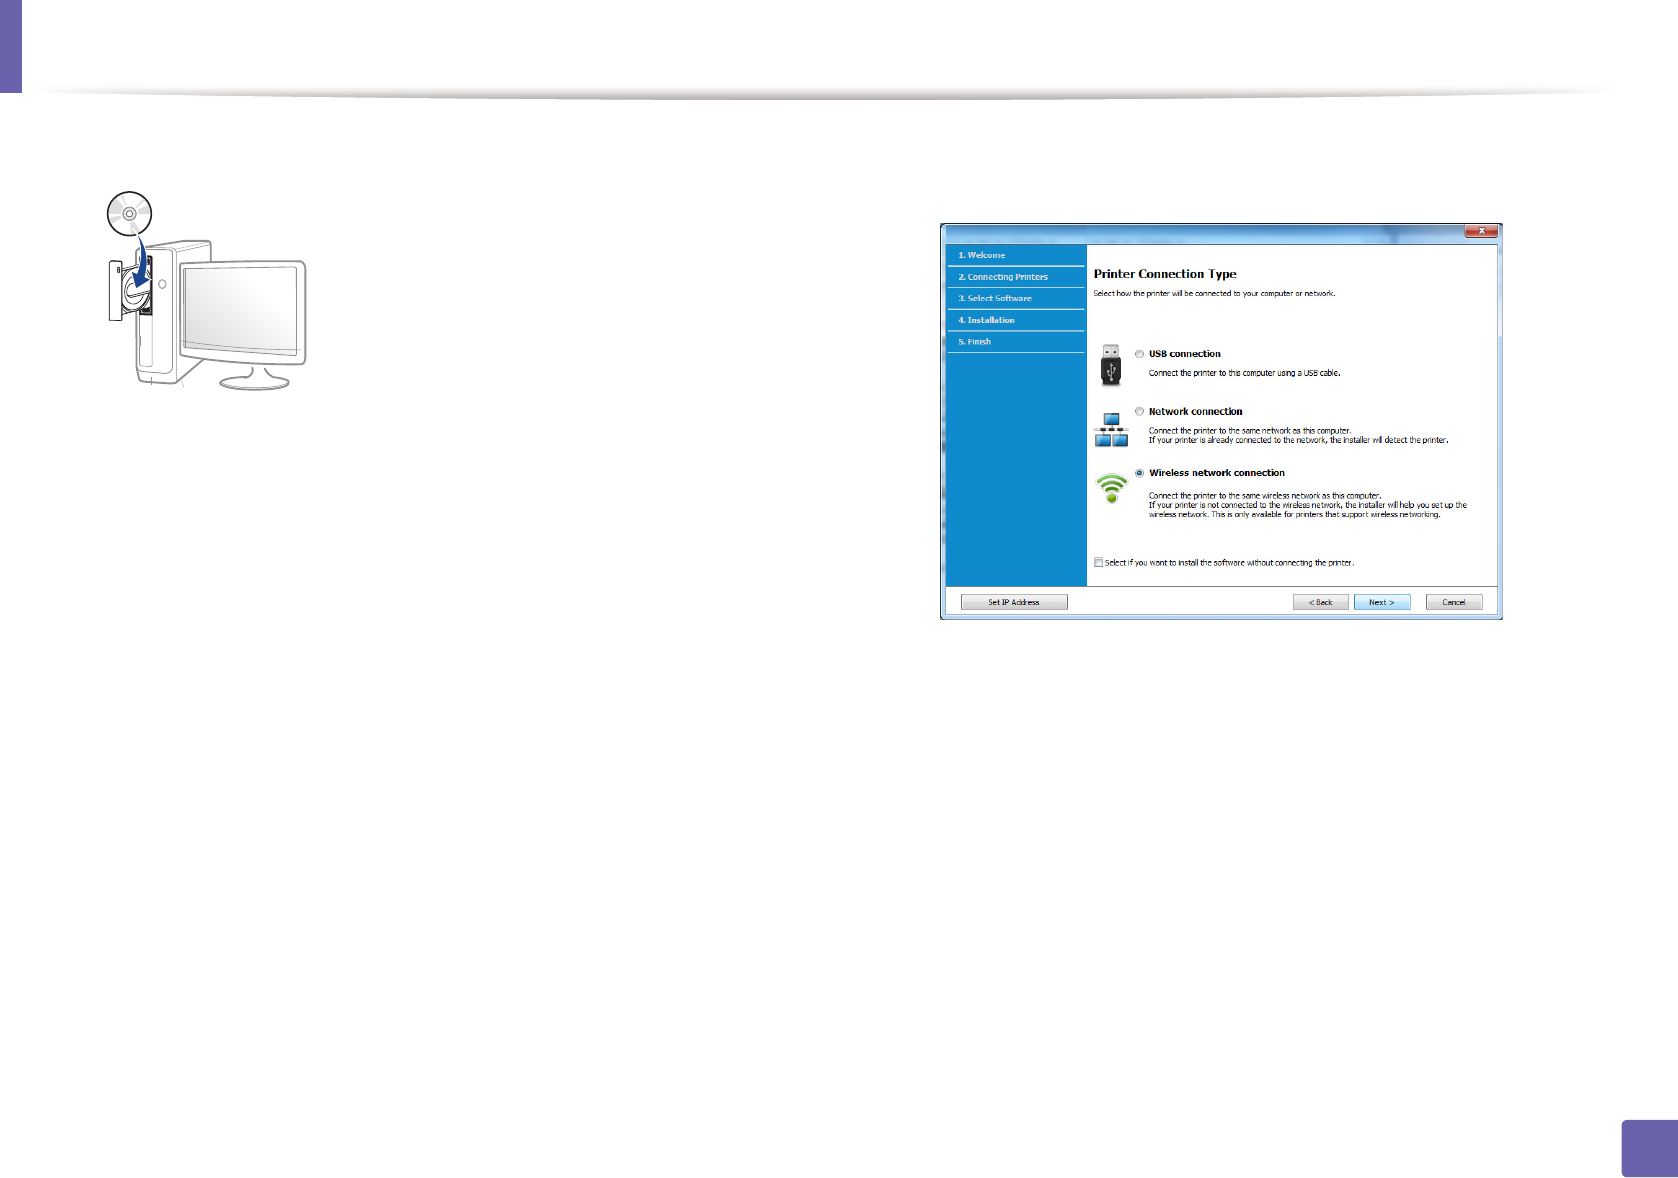
Select Wireless network connection on the Printer Connection Type
screen. Then, click Next.
6
If Select the Wireless Setup Method screen appears, select Using a
USB cable and click Next.


