Chapter 9 Remove/Replace Procedures
75
A
B
C
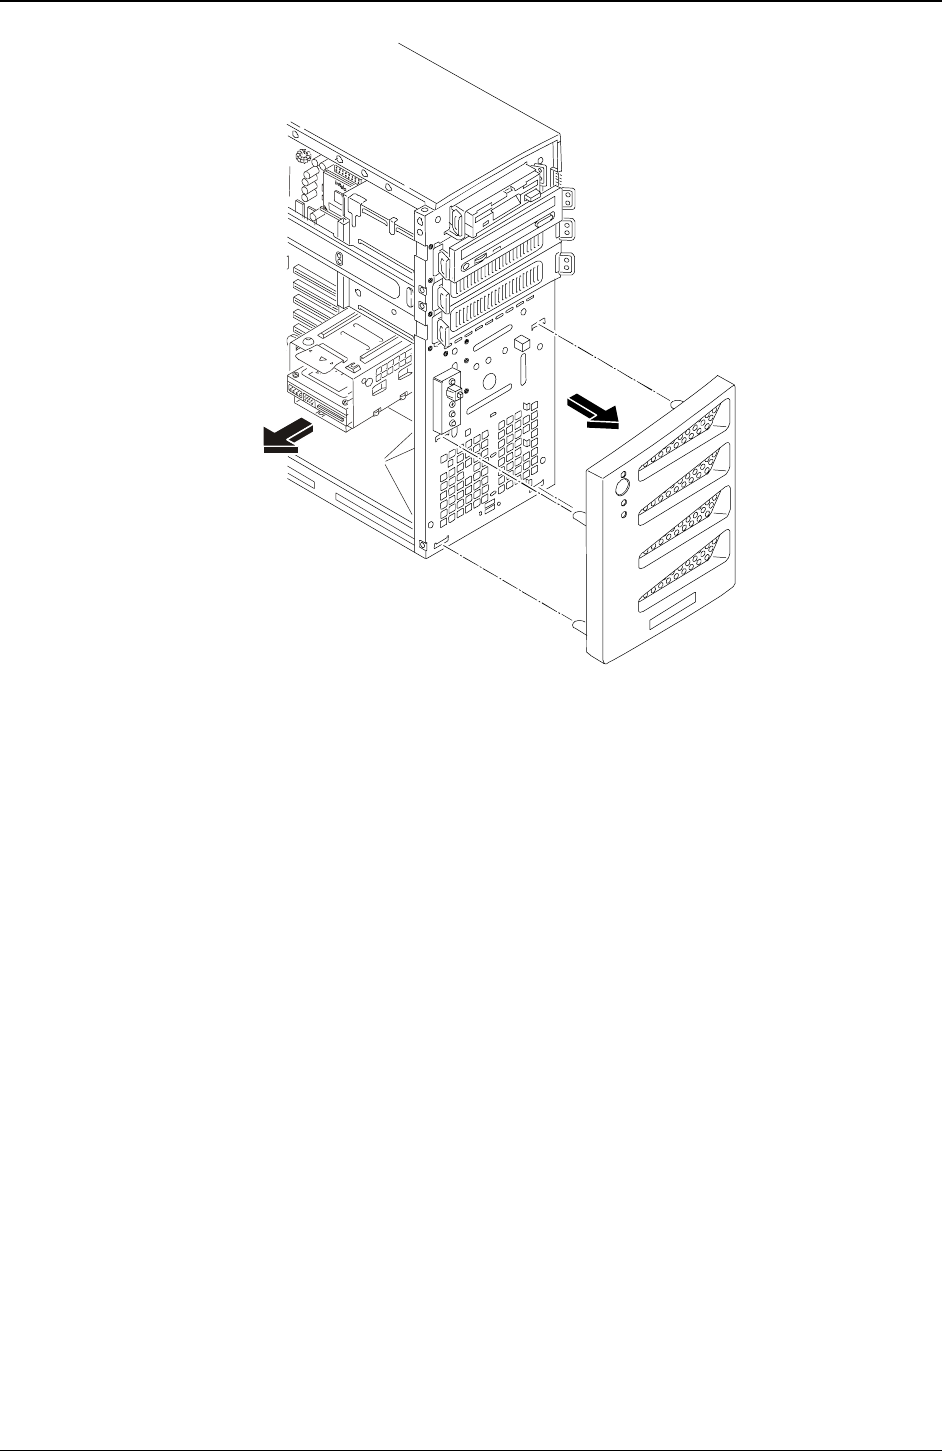
Removing the Lower Bezel
Replacing the Lower Bezel
1. If the Server is operating, power down the Server.
Refer to Chapter 2, “Controls, Ports, and Indicators” for instructions.
2. Disconnect the power cord and any external cables connected to the Server.
If necessary, label each one to expedite re-assembly.
3. Remove the left side cover.
4. Remove the upper bezel.
5. Position the lower bezel over the four slots mating with the four plastic tabs in the front of the chassis.
6. Press the lower bezel onto the front of the chassis.
7. If you removed the drive cage and/or the connectors attached to the drives in the drive cage, replace the
drive cage and connector to the correct drives.
8. Replace the upper bezel
9. Replace the left side cover.
10. Restore power to the Server and verify the drives in the drive cage are working properly.
Status Panel Assembly
Removing the Status Panel Assembly
1. If the Server is operating, power down the Server.
Refer to Chapter 2, “Controls, Ports, and Indicators” for instructions.


