GNC 420(A) Pilot’s Guide and Reference
11-24
SECTION 11
ADDITIONAL FEATURES
190-00140-20 Rev. K
Displaying NEXRAD Data on the Map Page
When NEXRAD data is received, it is displayed on the
Map Page, in addition to the Weather Page and the Default
NAV Page.
Customizing NEXRAD Data on the Map Page
The pilot can customize NEXRAD data on the Map
Page by using the Page Menu.
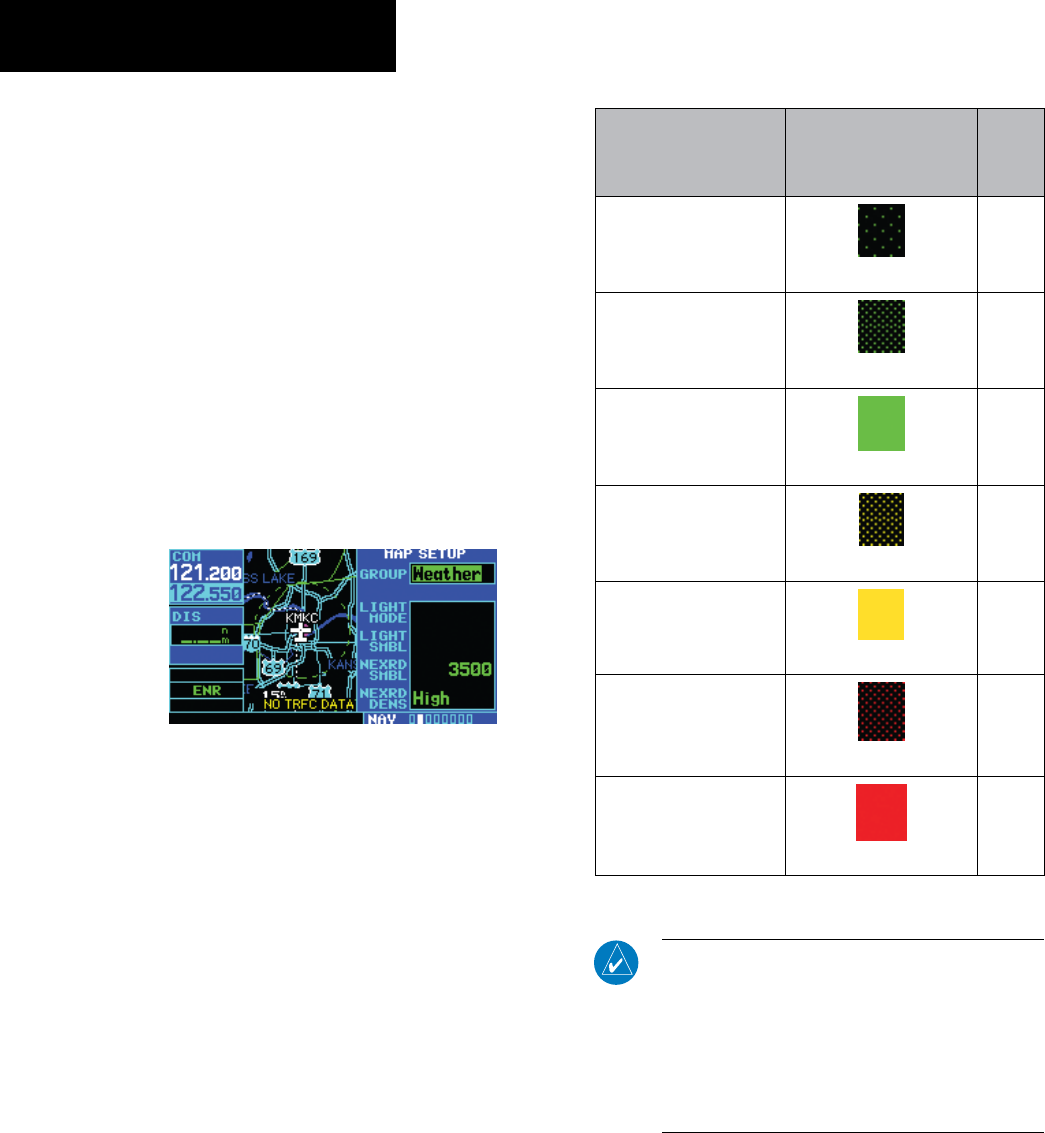
Customizing the Map Page:
1) Go to the Map Page in the NAV Page Group.
2) Press the MENU Key and select ‘Setup Map?’
from the page menu.
3) Select ‘Weather’ from the GROUP field in the
Map Setup window (Figure 11-35).
Figure 11-35 Map Setup Window
4) Highlight the NEXRAD Symbol field, and use
the small right knob to set the desired map
range at which to overlay NEXRAD data. The
range values are ‘Off’ to 2000 nm miles. Press
the ENT Key for the desired range selection.
Press the CLR Key to go back to the Map
Page.
5) Highlight the NEXRAD Density field, use the
small right knob to set the density desired
(i.e., the transparency, see Table 11-7) of the
NEXRAD cells. The density values are LOW-
MED-HIGH. Press the ENT Key to make the
selection then press the CLR Key to go back
to the Map Page.
Precipitation
Intensity – Map
Configuration
Pattern Color
Light Precipitation –
Low
(sparse dotted area fill)
Green
Light Precipitation –
Medium Density
(dense dotted area fill)
Green
Light Precipitation –
High Density
(solid area fill)
Green
Moderate Precipitation
– Low & Medium
Density
(dense dotted area fill)
Yellow
Moderate Precipitation
– High Density
(solid area fill)
Yellow
Heavy Precipitation
– Low & Medium
Density
(dense dotted area fill)
Red
Heavy Precipitation –
High Density
(solid area fill)
Red
Table 11-7 NEXRAD Density Patterns
NOTE: If the pilot changes the NEXRAD Density
and/or NEXRAD Symbol fields, these settings
changes also affect the Weather Page. For
example, if the pilot selects ‘Low’ NEXRAD
Density, both the Weather Page and the Map
Page display the NEXRAD graphics in the ‘Low’
mode.


