8
TASCAM DR-44WL
7 Level meter guide display
This is a level meter guide for adjusting the
input and output levels.
It is displayed at the “−12 dB” position on the
scale.
8 Level meter
These show the levels of the input or playback
audio.
9 File status display
The file state is displayed in different ways,
depending on the type of file to be played
back.
: Stereo file
: Mono file ×2
0 Elapsed recording time
The elapsed recording time of a recorded file is
shown as hours : minutes : seconds.
q Remaining recording time
The remaining recording time until the selected
maximum file size is reached is shown (hours :
minutes : seconds). If the remaining recording
time on the SD card is less, that will be
displayed instead.
w Peak value in decibels (dB)
The peak value of the input level is shown in
decibels.
e Auto punch in/out function on/off status
or master track loading status (MTR mode
only)
No icon: auto punch in/out function off
: auto punch in/out function on
: master track loaded
Adjusting the input level
1.
Press the INPUT LEVEL button on the right
side panel to show the
INPUT LEVEL
setting screen on the display as a pop-up.
2.
Press the TRACK/INPUT button to select a
channel to adjust the input level for.
3.
Use the INPUT LEVEL volume of the right side
panel to adjust the input level.
When the input sound is too loud, the PEAK
indicator of the top panel is lit in red.
A tg mark is visible at the “−12 dB” position
on the level meter.
Set the input level so that the level changes
near this mark without causing the PEAK
indicator to light in red.
4.
When finished, press the 8/HOME button to
return to the Home Screen.
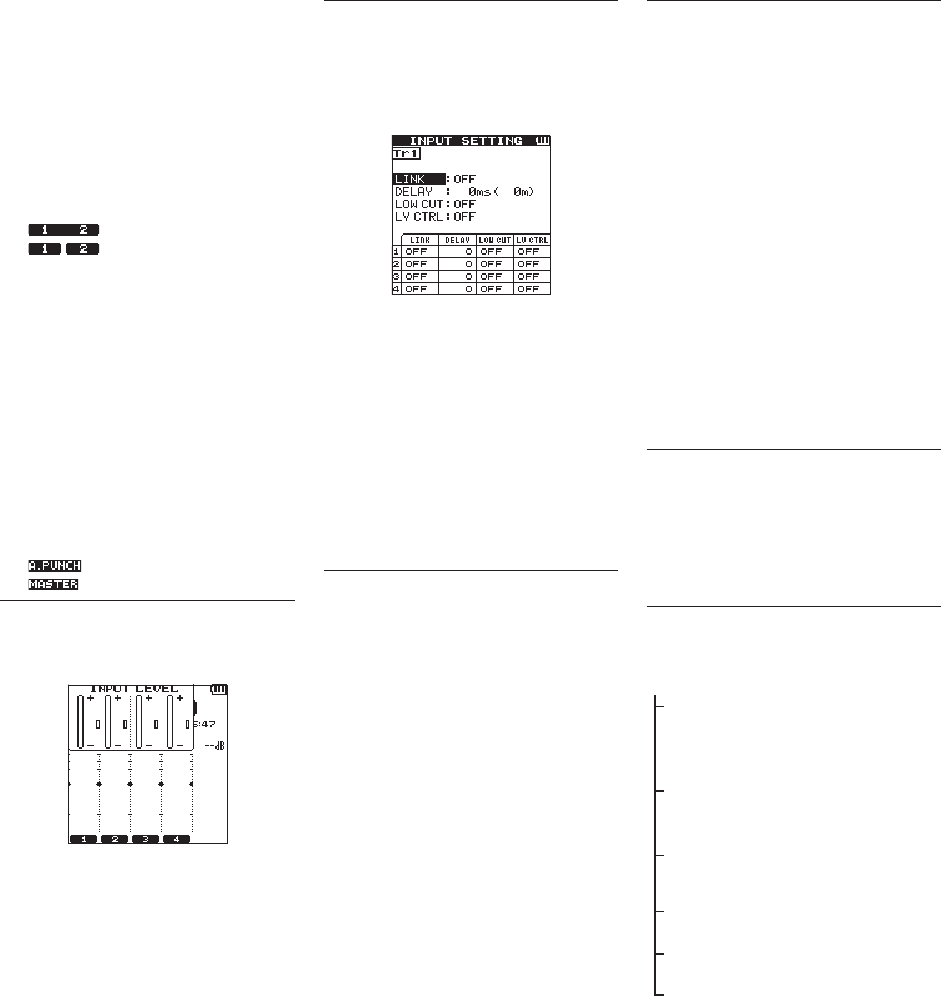
Set the low-cut filter
Set the low-cut filter if you want to cut noise and
other sounds at low frequencies. This function can
be used to reduce air-conditioning noise, unpleasant
wind noise, etc.
1.
Press the INPUT button to show the
INPUT
SETTING
screen on the display.
2.
Press the TRACK/INPUT button to select a
channel to set the low-cut filter for.
3.
Use the wheel to select (highlight)
LOW
CUT
, and then press the ENTER/MARK
button or / button to display setting items
as a pop-up.
4.
Use the wheel to set the cut-off frequency of
the low-cut filter for microphone input.
Setting values:
OFF
,
40 Hz
,
80 Hz
,
120 Hz
,
220 Hz
5.
When you press the ENTER/MARK or .
button, the pop-up disappears and the function
is enabled.
As the number (frequency) becomes larger, low
frequencies across a wider band can be cut.
Using the level control function
You can set the level control function for recording
through a microphone.
1.
Press the INPUT button to show the
INPUT
SETTING
screen on the display.
2.
Press the TRACK/INPUT button to select a
channel to set the level control function for.
3.
Use the wheel to select (highlight)
LEVEL
CTRL
, and then press the ENTER/MARK
or / button to display setting items as a
pop-up.
4.
When you use the wheel to select (highlight)
the desired function and then press the ENTER/
MARK or . button, the pop-up disappears
and the function is enabled.
PEAK REDUCTION
This function is used to automatically lower the
recording level to a more appropriate one when an
input sound is too loud. You can raise the recording
level manually. This function is useful for recording
music with volume changes that affect the sound
negatively. Even if this function is turned off after it
has been set, the set level is retained.
LIMITER
This function prevents distortion due to sudden and
excessive input. This is useful when you do not want
to change the recording level.
In this mode, you can change the recording level
manually even during recording.
Record
This recorder can record sounds in two modes: 4CH
and MTR modes.
In the 4CH mode, up to four tracks can be recorded
simultaneously from the built-in microphones and
the external input terminal.
In the MTR mode, sounds can be recorded over an
already recorded file in addition to recording of up
to four tracks.
1.
Press the RECORD [0] button to enter
recording standby.
You can check recorded file names shown on
the display before you start recording.
2.
Press the TRACK/INPUT button to select a
channel for recording.
3.
Press the RECORD [0] button.
Normal recording starts.
4.
Press the 8/HOME button to finish recording.
To pause the recording, press the RECORD
[0] button. When you press the RECORD
[0] button again or press the 7/9 button,
recording in the same file resumes.
When you press the 8/HOME button after
pausing the recording, an audio file of the
sound recorded up to pausing is created.
About the recording standby
state
This unit has a recording standby state like that of a
recorder for professional use. In this standby state,
you can perform operations such as configuring
input level settings and then start recording quickly.
In the recording standby state, the REC indicator
blinks and the recording screen is shown.
Recording menu structure
You can configure various settings using the
REC
SETTING
item on the
MENU
screen.
REC SETTING
FORMAT Set the file format
BWF: 16/24 bit
WAV: 16/24 bit,
MP3: 32 - 320 kbps
SAMPLE Set the sampling frequency
44.1 kHz, 48 kHz, 96 kHz
(96 kHz for BWF/WAV only)
PRE REC Set the pre-recording
function
OFF, ON
SELF TIMER Set the self timer
OFF, 5 SEC, 10 SEC
DUAL REC Set the DUAL REC function
MODE, DUAL FORMAT
MS MIC Set the MS microphone
function
MS DECODE, SOURCE


