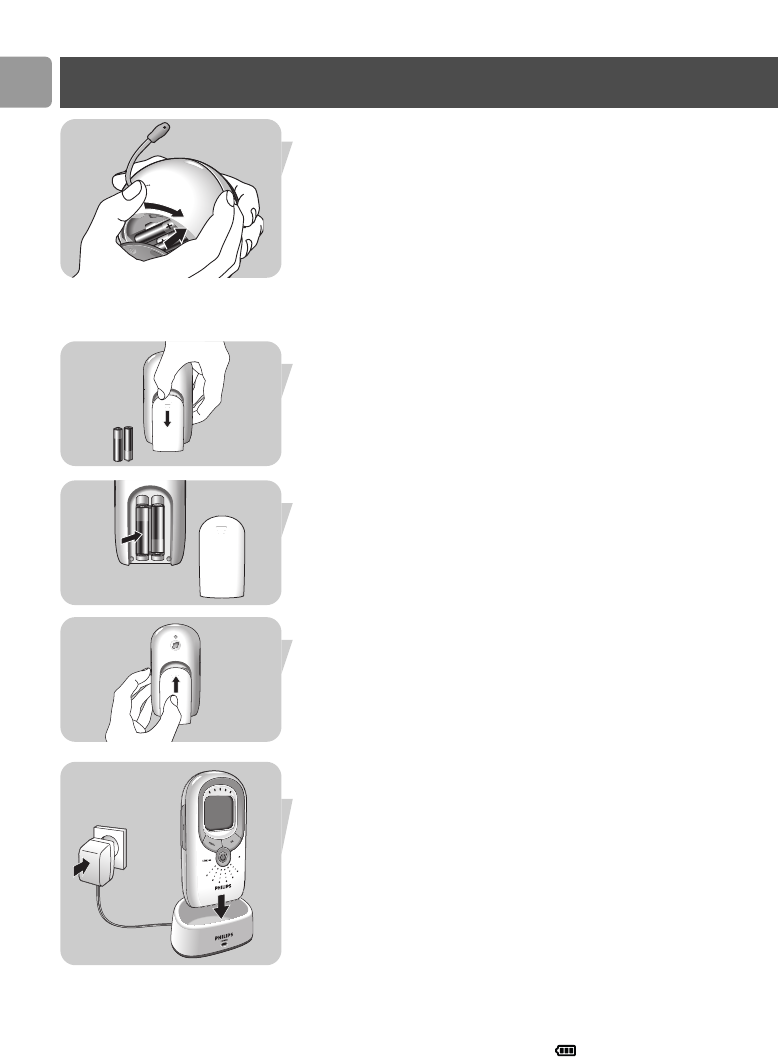
3 Put the battery compartment cover (A-12) back in place.
Close the compartment by turning the cover (A-12) to the
right (CLOSE B), using the palm of your hand.
Note:When the units are switched off, in case of battery
operated use, the batteries will still discharge slowly.
➜Thebabyunit isnow ready for battery operateduse!
Parent unit
1 Open the battery compartment by sliding the cover (B-12)
downwards.
2 Insert the two 1.2V AAA size NiMH rechargeable batteries
(supplied), noting the + and – configuration inside the battery
compartment.
3 Put the battery compartment cover (B-12) back in place.
Close the compartment by sliding the cover (B-12) upward
until it clicks in position.
4 Connect the AC power adapter (B-14) of the charging base
(B-15) to a wall outlet.
5 Place the parent unit in the charging base (B-15).
> The POWER light (B-16) lights up red.
6 Leave the parent unit in the charging base until the batteries
are fully charged (at least 16 hours).
> The POWER light (B-16) will stay red, even when batteries
are fully charged.
> When the batteries are fully charged, the parent unit can be
taken out of the charging base and used cordlessly for at
least 8 hours.
> When the battery indicator ( ) in the display (B-8) is
empty and the parent unit beeps, battery power is low.
Place the parent unit in the charging base (B-16) to
recharge the batteries.
10
EN
+
+
+
+
+
+
+
+
+
+
Preparing your baby monitor


