


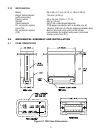

4
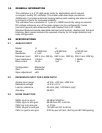
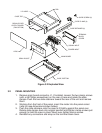
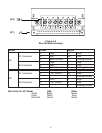
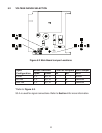
Figure 3.2 Exploded View
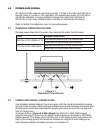
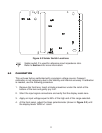
3.2 PANEL MOUNTING
1. Remove main board connector J1, if installed. Loosen the two clamp screws
(with a #8 Phillips screwdriver) on the rear of case and rotate the slide
clamps. Push the two slide retainers toward the rear of the unit and remove
them.
2. Working from the front of the panel, insert the meter into the panel cutout
(refer to case dimensions shown below).
3. Push the slide retainers onto the case to fit tightly against the panel rear.
Rotate slide clamps back into original position and tighten clamp screws just
enough to hold the case in place. Never over-tighten clamp screws.
4. Reinstall any connectors and snap on the terminal block cover.
I.D. LABEL
CASE, TOP
PARALLEL BCD
OUTPUT BOARD
(F2N OPTION)
LENS
SPAN ADJUST
TAB
SLIDE RETAINER (2)
TERMINAL
BLOCK
COVER
SIGNAL INPUT
POWER INPUT
MAIN BOARD
CASE, BOTTOM
SLIDE CLAMP (2)
SLIDE SCREW (2)