3
Before You Begin
The Dapper Tom is an interesting model for
beginner and expert alike. This kit contains a
solid hull which has been machine-car
ved
from select, medium-hard, fine-grained bass-
wood. This style hull provides a quick and
easy lesson in the basic shapes and pr
opor-
tions of hull design and helps to develop
woodwor
king skills. Although the exterior of
the hull has been carved close to the hull
lines as shown on the plans, further carving
is necessary for reasons of accuracy. (Carving
and finishing the hull to its final shape are
discussed in the instructions.)
Constructing the
Dapper Tom model also
will provide you with the opportunity to
develop some scratch-building techniques.
During construction, you may want to sub-
stitute some of the kit fittings with your own
creations. By all means try them, especially if
you think you can improve the model.
I
f you are a beginner, completing this model
will prepare you for a more complicated
model such as the Pride of Baltimore II,
which is outfitted with a plank-on-bulkhead
hull. In the meantime, happy modeling!
Working with the Plans & Parts
Before starting model construction, examine
the kit and study the plans carefully. Familiar-
izing yourself with the kit will serve two
purposes. First, it will let you determine that
all parts have been supplied as listed. And sec-
ond, you’ll be surprised at how quickly
handling the parts allows you to better under-
stand the kit requirements. Try to visualize
how every part will look on the completed
model. Also, determine ahead of time what
must be done first. The instructions will help
you in this regard, but a thorough knowledge
of the plans at the outset is essential.
It is also suggested that all small fittings and
hardware be sorted into labeled boxes or
compartments to avoid loss during the
building process.
Two Plan Sheets and One Template Sheet
are provided:
1. Hull Templates - 1 sheet of heavy stock
2. Hull Plan-Sheet 1
3. Masting and Rigging Plan-Sheet 2
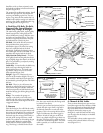
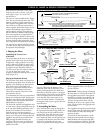
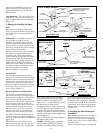
In addition, a set of sketches appears
thr
oughout the instr
uction manual to fur
ther
illustrate the various stages of construction.
The
D
apper
T
om
kit is manufactur
ed to a
scale of 5/32” = 1’0” and matches the plans.
Consequently
, most of the dimensions can
be lifted directly from the plans using a “tick
strip”. This is simply a piece of paper (a roll
of calculator paper tape works very well).
M
ar
k a dimension fr
om the plan onto the
tick strip and transfer it to the model.
The
Dapper Tom model is designed to be dis-
play
ed without sails. Much of the
reconstructed rigging was developed using
references from well-known books, such as
those by David Steel and Darcey Lever. (A
bibliography of references appears at the end
of this manual.) These texts provide many of
the details, but lack some of the unique char-
acteristics of the schooner rig. Consequently,
in designing the plans, additional references,
along with contemporary paintings and
etchings also were used. Even so, many
design decisions were made using good com-
mon sense: “If I were designing back then,
what would I have done?” There is always
doubt; no one can say for sure how the ship
was actually rigged.
The Dapper Tom kit is supplied with Britan-
nia metal, brass, as well as wooden fittings to
eliminate problems in making such parts
fr
om scratch. Because the Britannia metals
contain no lead, there are no possible corro-
sion pr
oblems. Many of these fittings will
require final finishing before installing on
the model.
Before painting the cast-metal fittings, clean
them up by removing all the mold-joint flash.
To do this, use a No. 11 hobby blade to cut
the flash, then sand with fine sandpaper. It is
also suggested that you clean the fittings thor-
oughly with warm soapy water before applying
primer. Make sure they are rinsed thoroughly
and allowed to dry before painting.
What You’ll Need To Start
The following tools and supplies are recom-
mended for the construction process.
Modelers who have built before may have
their own favorites. Almost all are available
from Model Expo, a division of Model Ship-
ways, Inc., at www.modelexpo-online.com.
A. Knives and Saws
1. Hobby knife with No.11 blades
2. Razor saw (especially for cutting gun-
ports out of the bulwarks)
B. Files
Set of needle files
C. Sharpening Stone
N
ecessar
y to keep the tools razor sharp
D. Clamps
1. A few small C-clamps
2. S
ev
eral wooden clothespins
3. Rubber bands
E. Tool Set
A small car
ving tool set and chisels for
shaping the hull.
F. Boring Tools
1. Set of miniature drills: #60 to #80
2. Larger bits for mast holes, bo
wsprit
hole, and hawse pipe holes
3. Pin vise
G. Miscellaneous
1.
Tack hammer
2. Tweezers (a few)
3. Small fine pointed scissors
4. Miniature pliers
a. Small round b. Flat nose
5. B
ench vise (small)
6. Soldering iron
a. S
older
b
. Flux
Note: soldering is not essential for this par-
ticular model if the kit fittings are used.
7. Sewing thread (for seizings; other
rigging is supplied)
8. Beeswax block (for treating rigging lines)
9. 1/2” or 3/4” masking tape
10. Wire cutters (for cutting fine wire and
strip metal)
H. Sandpaper
Fine and medium grit garnet or aluminum
oxide sandpaper (#100 to #220 grit)
I. Finishing:
1. P
aint brushes
a. Fine point for details
b. 1/4” to 1/2” flat square for hull
J. Supplies: (will be covered in detail in
the Painting & Staining section and
throughout instructions)
1. Paints
2. Primer
3. Stain and Varnish
4. White or Carpenter’s (yellow)
Wood Glue
5. Five-minute epoxy
6. Contact or model airplane acetate
cement
7. Cyanoacrylate (Super) Glue
Note about glues: White or Carpenter’s yel-
low wood glue will suffice for most of the
model. Five-minute epoxy provides extra
strength for gluing fittings. Because white or
y
ellow glues will tend to warp the scored-
sheet decking, use a contact cement or
model airplane type acetate cement. Cyano-
acrylate (Super) glue, called CA glue for
short, such as Zap is excellent for quick
adhesion and is ideal for dabbing onto a rig-
ging seizing to hold it in place. The best CA
glue for most applications is a medium vis-
cosity gap-filling type. The watery-thin type
is r
ecommended only to fill a narrow crack
b
y capillar
y action. For CA glue, you can
also pur
chase a liquid accelerator such as Z
ip
Kicker. A spray or drop of the accelerator
will instantly cure the glue. This is handy to
eliminate clamping parts for long periods of
time and waiting for glue to har
den.
Use CA glue with caution. You can easily
glue your fingers or eyelids together and the
fumes can burn y
our ey
es. It would be a
good idea to hav
e a bottle of CA debonder
on hand.
This pr
oduct will dissolv
e the glue
if you do get it on your body.


