


SWR • SWC • SWD Swing Gate Operator Installation Guide - 5 - 227965 Revision X13 3-28-2008
Gate Arm Installation (Cont.)
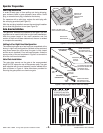
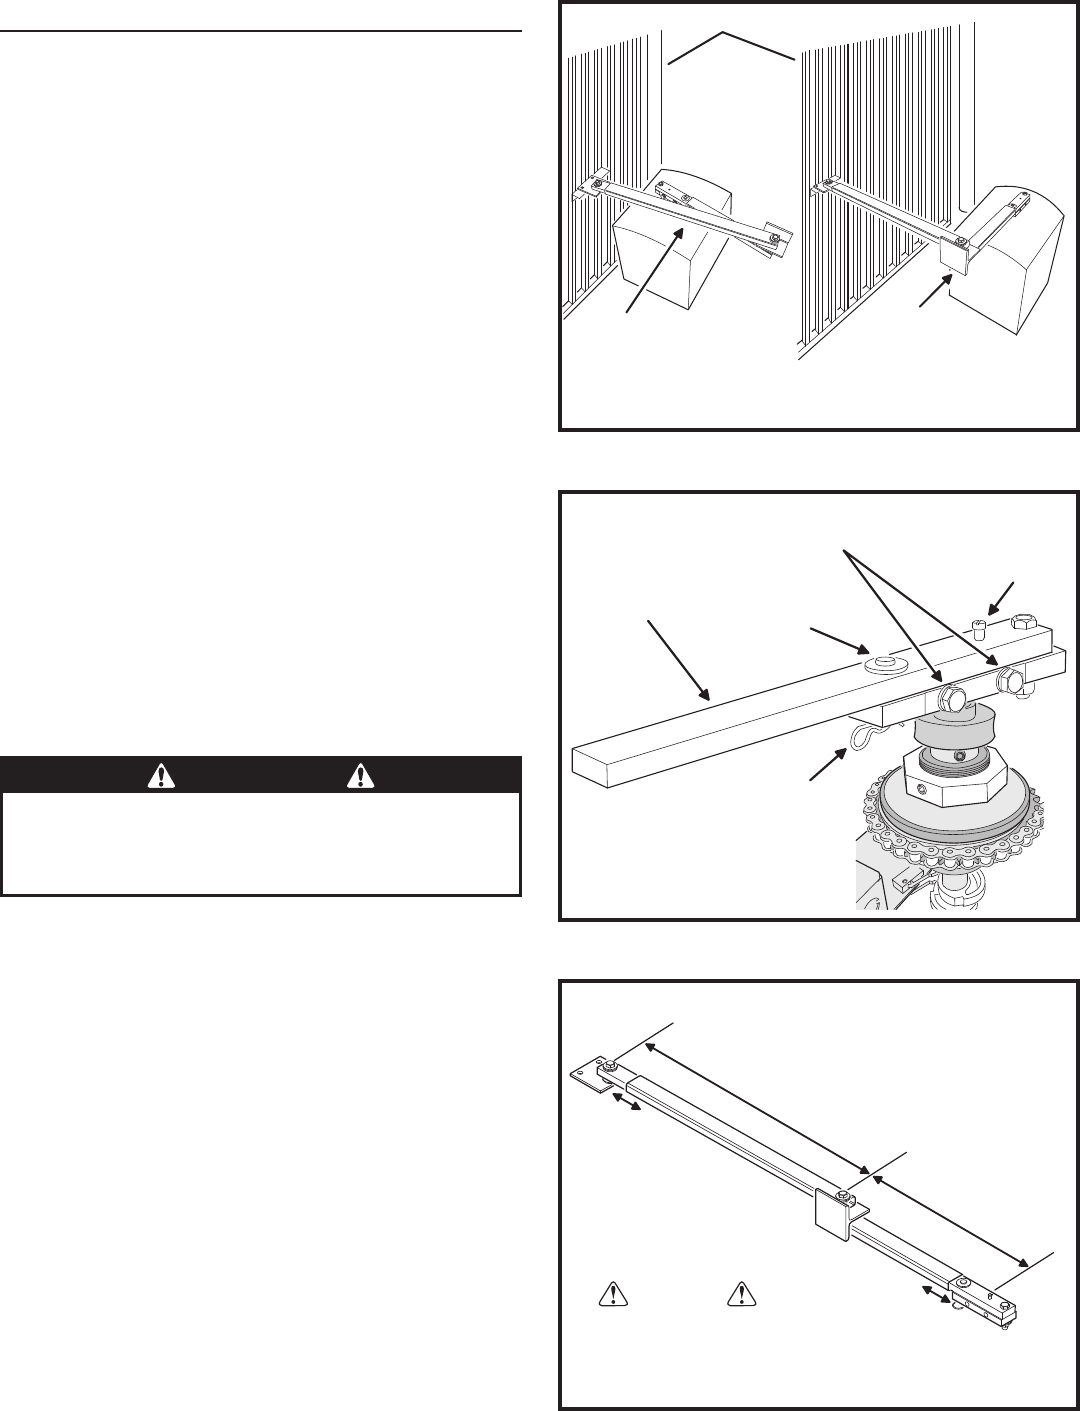
Choosing Good Harmonics
Good harmonics are necessary to minimize wear and tear
on the operator. The gate will have smoother starts and stops
when the arm is installed with good harmonics. Figure 5
shows an example of good and bad arm harmonics.
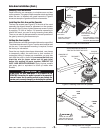
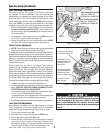
Installing the Gate Arm on the Operator
The hex cap screws (see Figure 6) in the side of the crank
assembly are shipped loose for placement on the operator
drive shaft. Once in place, tighten these cap screws in place
by applying 75 ft-lbs of torque. If it becomes necessary to
remove the crank, you can do so by loosening these bolts.
The arm can also be disconnected for manual operation of
the gate by removing the disconnect pin.
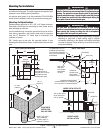
Setting the Arm Lengths
Most installations will use the standard dimensions specifi ed.
The dimensions shown in Figure 7 can be used to adjust and
set the arm. If non-standard mounting is required, contact
the factory for information.
Once the arm lengths have been determined, use clamps
to temporarily attach the solid bars to their sections of
rectangular tubing. If clamps are unavailable, you may also
tack weld the parts in place. It is recommended that you
check the arm for proper action and full gate travel
before fully welding the parts together. REMOVE THE
GATE ARM BEFORE WELDING! Apply Krylon
®
metallic
gold spray paint or equivalent to touch up welds when
fi nished.
Figure 7. Setting Gate Arm Lengths
A
B
C
SET LENGTH
AND WELD
SET LENGTH
AND WELD
CLAMP OR TACK WELD,
THEN TEST ARM ACTION
BEFORE FULLY WELDING
CAUTION!
36-1/2"
TYPICAL
22"
TYPICAL
LINK
ARM
CRANK
ARM
Figure 5. Gate Arm Harmonics
GOOD
HARMONICS
BAD
HARMONICS!
GATES SHOWN OPEN
GATE ARM FOLDS
OVER ITSELF
GATE WILL HAVE SOFT
STARTS AND STOPS
CRANK END OF
GATE ARM PARALLEL
TO OPEN GATE
GATE ARM JERKS AT START
AND WILL TRANSMIT FORCE
INTO GATE AND HARDWARE
Figure 6. Installing Gate Arm on Operator
CRANK END OF
GATE ARM
DISCONNECT
PIN
PULL
PIN
RAIN CAP
SHOLDER BOLT
ALIGN CRANK ARM ON OPERATOR
THEN TIGHTEN THESE TWO BOLTS
CAUTION
DO NOT WELD THE GATE ARM WHILE IT IS ATTACHED TO THE
OPERATOR! Connecting the welder’s ground to the operator’s
frame will cause the arc welding current to pass through the
operator parts, severely damaging or destroying the operator.