


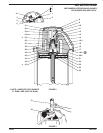
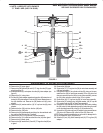
FIGURE 4
Q NOTE: LUBRICATE WITH PARKER
‘‘O” RING LUBE (ARO P/N 36460).
46
26
27
28
17 Q
30
29 Q
47
Q 20
50
51
52
48Q 49
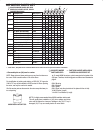
PAGE 5 OF 86564XĆX
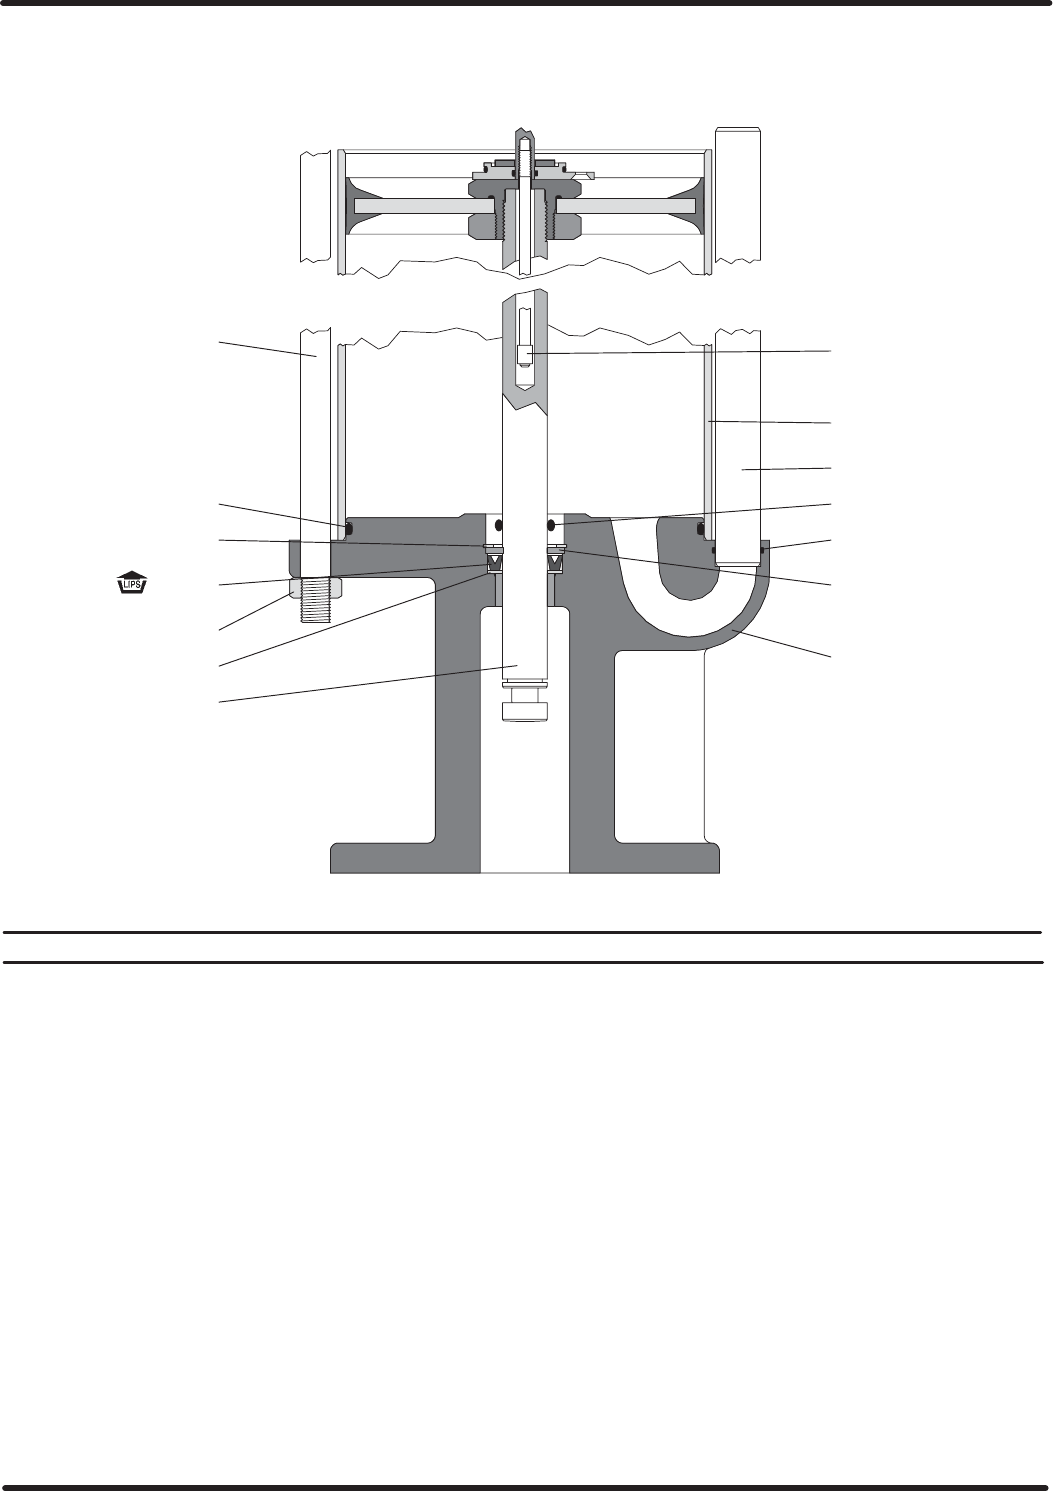
AIR MOTOR PISTON ROD AND BASE
SEE CHART ON OPPOSITE PAGE FOR EACH MODEL.
DISASSEMBLY OF AIR MOTOR (CONTINUED)
16. Remove the (37) upper gland.
17. Remove the (38) seal and (39 and 15) O" rings from the (37) upper
gland (see figure 7).
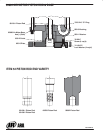
18. Disassemble the (31) valve piston from the (42) piston adapter (see
figure 3).
19. Remove the (31) valve piston.
20. Pull the (42) piston adapter upward and grasp the (40) extension rod
below the (42) piston adapter. Push the (42) piston adapter down on
the (40) extension rod. Remove the (36) washer and (42) piston
adapter.
21. Remove the (16) washer and the (19) U" cup from the (42) piston
adapter.
22. Remove the four (50) nuts from the four (46) bolts.
23. Remove the four (46) bolts.
24. Remove the (18) head assembly and place it on the workbench with
the end that the (28) tube fits in upward".
25. Remove the (20) O" ring from the (18) head assembly.
26. Remove the four (21) machine screws from the (43) lower gland.
27. Remove the (43) lower gland.
28. Remove the (44) washer and (15 and 45) O" rings from the (43) lowĆ
er gland.
29. Remove the (28) tube.
30. Remove the (17) O" ring from the (30) air motor base assembly and
(18) head assembly.
31. Pull upward on the (27) air cylinder until the (52) piston rod is sepaĆ
rated from the (30) air motor base assembly. If the (52) piston rod
does not separate from the (30) air motor base assembly, remove
the (52) piston rod after removal of the (27) air cylinder.
32. Remove the (20) O" ring from the (30) air motor base assembly.
33. Remove the (47) retaining ring, (48) guide washer, (49) U" cup and
(51) washer from the (30) air motor base assembly.
34. Unscrew the (40) extension rod from the (26) valve rod by holding
the (26) valve rod with adjustable type pliers and placing a wrench
on the provided wrench flat at the top of (40) extension rod.
35. Unscrew the (52) piston rod from (22) adapter, using wrench flats on
(52) piston rod. Remove (26) valve rod from (52) piston rod.
NOTE: Caution should be exercised so as not to mar or damage the finĆ
ish on (40) extension rod or (52) piston rod.
36. Remove (25) nut, (23) piston assembly and (24) O" ring from (22)
adapter.