


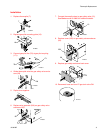
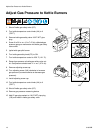
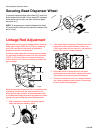
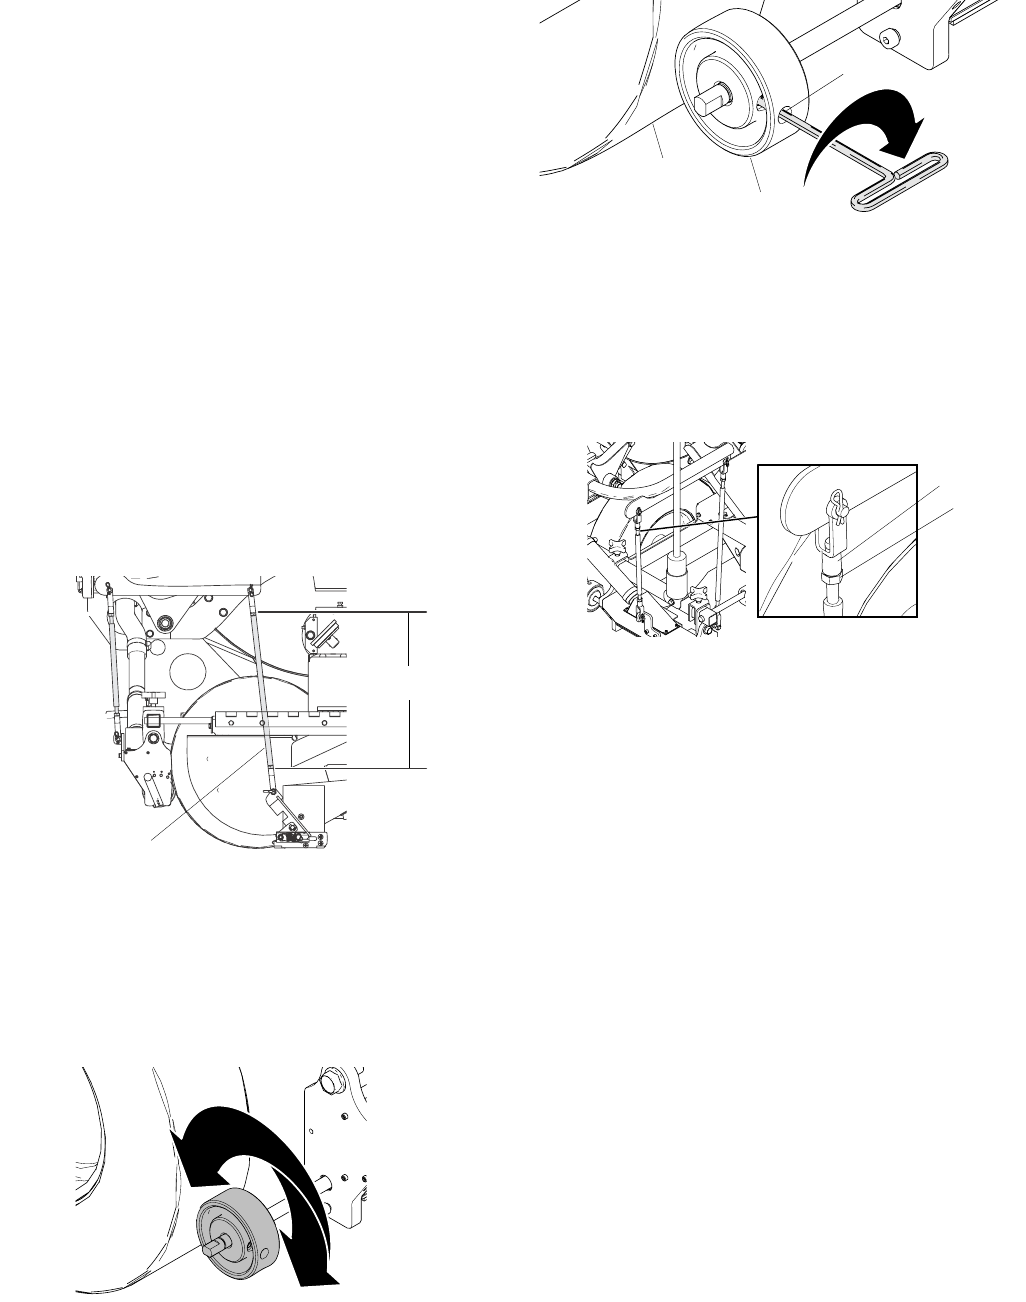
Securing Bead Dispenser Wheel
14 313879B
Securing Bead Dispenser Wheel
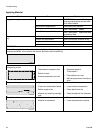
To properly dispense beads, drive wheel (27) must be in
direct contact with tire (89). If drive wheel (27) becomes
loose and/or starts to slip, use allen wrench to tighten
set screw (211).
NOTE: To ensure proper contact between drive wheel
(27) and tire (89), make sure air pressure is always at 60
psi (4.14 bar).
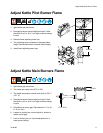
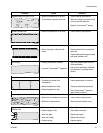
Linkage Rod Adjustment
Adjustments can be made to linkage rods by removing
clevis cotter hairpin (268), clevis (179) pin, loosening
nuts (128), and then turning clevis as required to
lengthen or shorten rod connectors.
To ensure proper application of beads and thermoplas-
tic, make sure screed box linkage rod (182) measures
16.875 in. (42.8 cm). Be sure to measure where nut
(128) meets clevis (179) when checking for proper link-
age rod length.
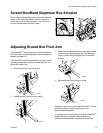
Adjust the bead box linkage rod (181) so bead box drive
is touching ThermoLazer tire when screed box is in
down (but not open) position. A slight downward force
on the bead box linkage should be required when insert-
ing the clevis pin through the clevis deployment bar.
1. With screed box in down (but not open) position,
rotate the bead box wheel by hand.
2. If the wheel does not cause the ThermoLazer tire to
rotate both forward and backwards, loosen nuts
(128), clevis cotter hair pin, clevis pin, and rotate the
clevis (179) one turn counterclockwise.
3. Reconnect clevis to deployment bar and again
rotate bead box wheel to see if adjustments cause
ThermoLazer to move forward and backwards.
4. Continue to rotate clevis 1/2 turn counterclockwise
until rotating bead box wheel causes ThermoLazer
to move forward and backwards.
89
27
211
ti14564a
16.875 in.
ti14565a
182
128
179