


12
J4390pr-0922
E
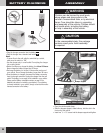
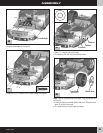
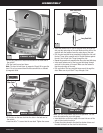
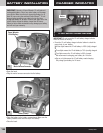
• Locate the simulated
radio on the dash.
• Loosen two screws
on the underside of the dash to remove the simulated radio.
Set the screws aside.
• Remove the simulated radio from the dash.
• Loosen the screw in the battery compartment door.
Remove the battery compartment door.
• Insert three “AA” (LR6) alkaline batteries.
Hint: We recommend using alkaline batteries for longer battery life.
• Replace the battery compartment door and tighten the screw.
• Replace the simulated radio in the opening in the dash.
• Insert the two screws back into the underside of the dash and
tighten to secure the simulated radio.
• If this toy begins to operate erratically, you may need to
reset the electronics. Remove the batteries from the radio,
and replace them.
• When sounds from the simulated radio become faint or stop,
it’s time for an adult to change the batteries!
14
• Protect the environment by not disposing of this product
with household waste (2002/96/EC). Check your local
authority for recycling advice and facilities (Europe only).
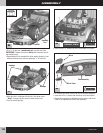
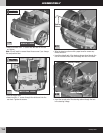
Battery Compartment Door
Battery Compartment DoorBattery Compartment Door
ASSEMBLY
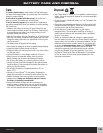
Battery Safety Information
In exceptional circumstances, batteries may leak fluids that can
cause a chemical burn injury or ruin your product. To avoid
battery leakage:
• Do not mix old and new batteries or batteries of different
types: alkaline, standard (carbon-zinc) or rechargeable
(nickel-cadmium).
• Insert batteries as indicated inside the battery compartment.
• Remove batteries during long periods of non-use. Always
remove exhausted batteries from the product. Dispose of
batteries safely. Do not dispose of product in a fire.
The batteries may explode or leak.
• Never short-circuit the battery terminals.
• Use only batteries of the same or equivalent type,
as recommended.
• Do not charge non-rechargeable batteries.
• Remove rechargeable batteries from the product before charging.
• If removable, rechargeable batteries are used, they are only to
be charged under adult supervision.
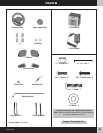
1.5V x 3
"AA" (LR6)
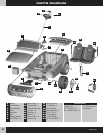
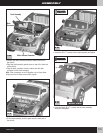
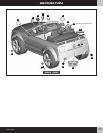
DASH VIEW
14
14 14
14
20
31
30
18
19
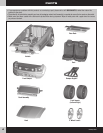
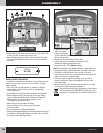
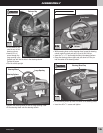
• Before applying the labels, wipe the surface of the vehicle with
a clean, dry cloth to remove any dust or oils.
• Place the labels exactly as shown in the illustrations. For best
results, avoid repositioning a label once it has been applied to
the vehicle.
12