


Assembly
5
6
8
4
5
7
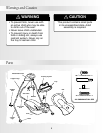
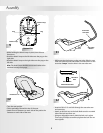
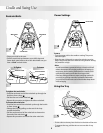
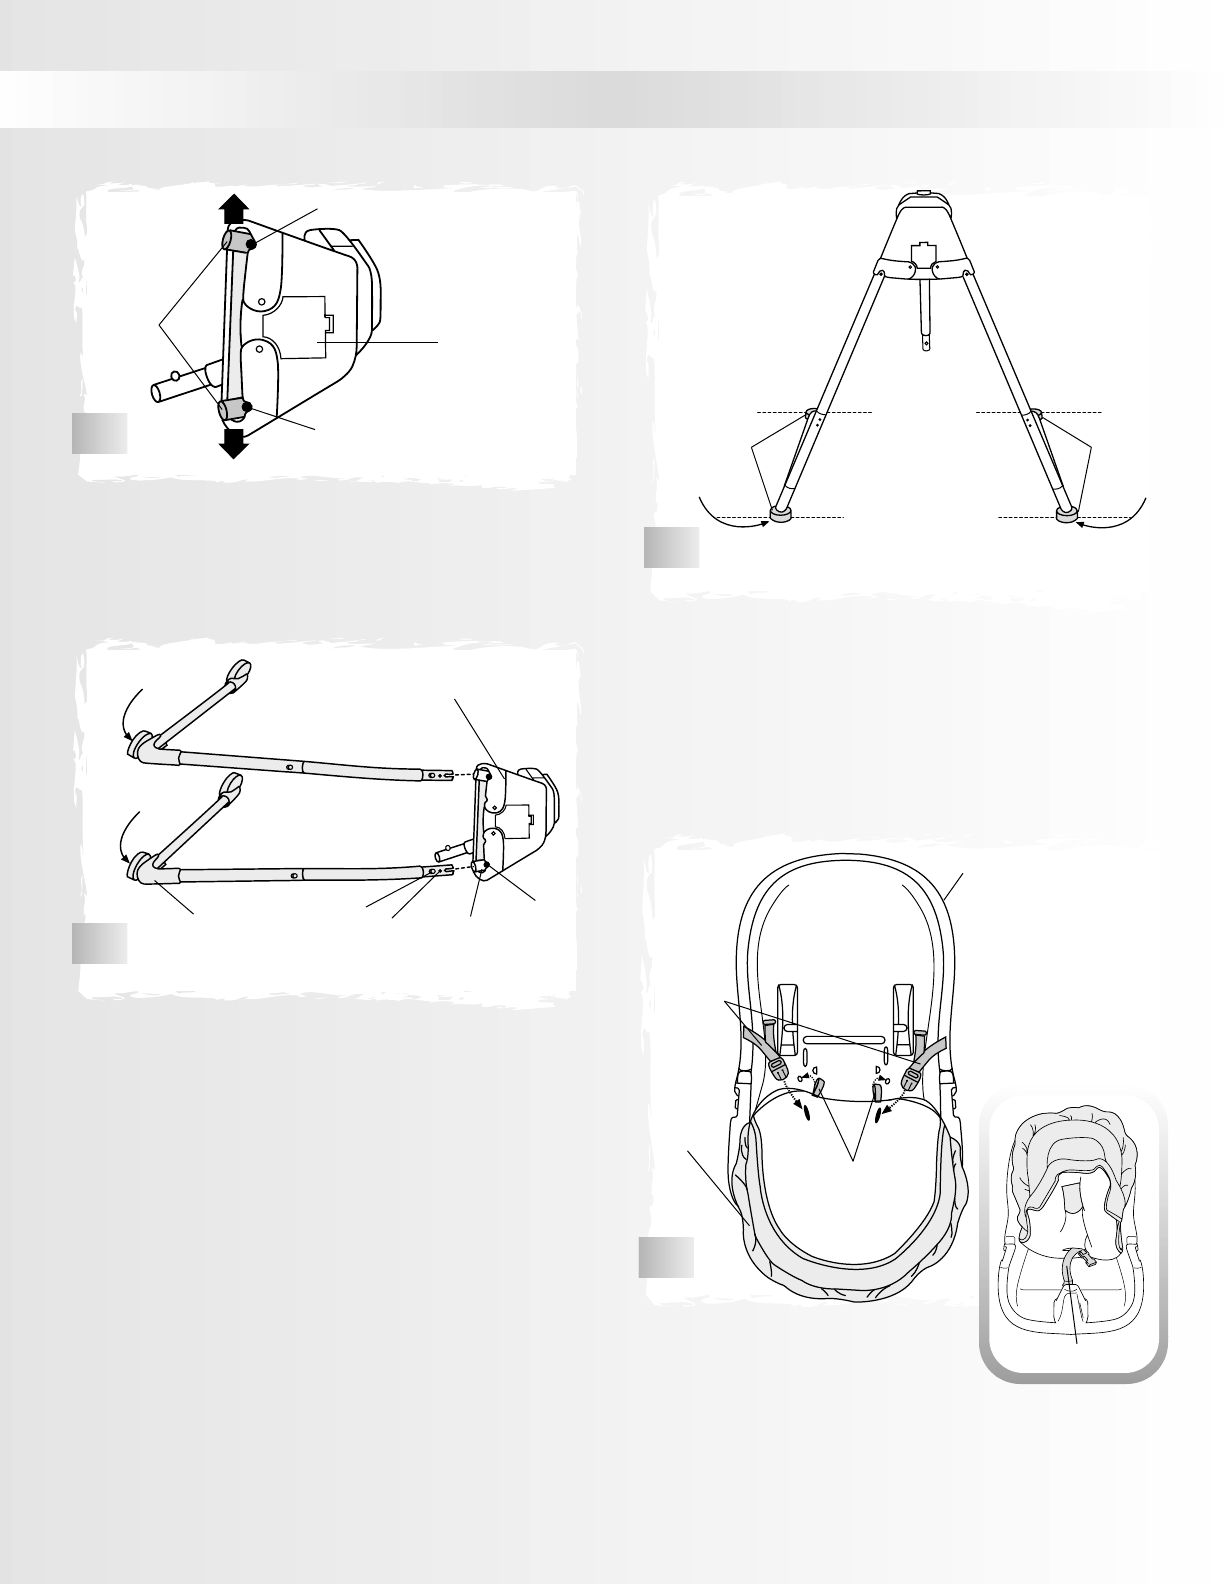
• Position the motorized frame so that the battery
compartment is toward you.
• Position the tubes in the motorized frame so that they are
toward the outer edges.The holes in the tubes should be
visible through the notches in the motorized frame.
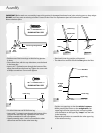
• Locate the R and L on the underside of each elbow foot.
The R indicates the right leg.The L indicates the left leg.
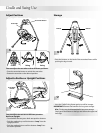
• While pressing the upper button on the right leg, fit it
into the tube in the motorized frame. Make sure the
upper button on the right leg “snaps” into the hole in
the tube.
• While pressing the button on the left leg, fit it into the
tube in the motorized frame. Make sure the button on
the left leg “snaps” into the hole in the tube.
• When the legs are assembled correctly to the tubes in the
motorized frame, you should not see the red dots.
Tube
Hole
Red Dot
Motorized Frame
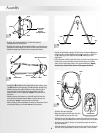
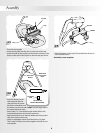
• Stand the assembly upright. All four feet should be flat upon
the floor. Also, when standing behind the product, check for
an L marking on the left foot and an R marking on the
right foot.
• If the feet are not flat upon the floor,or the left and right feet
have been reversed, simply remove both legs and replace
them on the opposite tube in the motorized frame. Again,
check to be sure all four feet are flat upon the floor.
Feet
Button
Feet
Tubes
Hole
Motorized
Frame
Battery
Compartment
Hole
Elbow Foot
L
R
L
R
• Position the seat upright.
• Place the pad onto the seat with the
ruffle toward the top of the seat.
• Fold the top of the pad down. Insert the waist belts through
the slots in the pad. Make sure the waist belts are not twisted.
• Insert the two elastic loops on the pad through the holes in
the seat bottom.
• Fold the bottom of the pad up. Insert the crotch belt through
the slot in the pad. Make sure the crotch belt is not twisted.
Seat
Elastic
Loops
Waist
Belts
Pad
Crotch Belt