


12
13
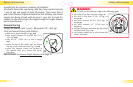
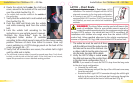
The recline bar must be used at all times 1
with this seat. Insert the recline bar into
the holes on the rear of the child seat. Use
a rubber mallet to tap the recline bar ends
into the holes. See page 28 for details.
Verify the LATCH strap is routed 2 under
the child seat cover in the long route
configuration. (Fig. A)
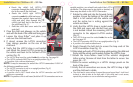
NOTE: If you need to re-route the LATCH strap from the short route
to the long route configuration:
Uninstall the child seat.a
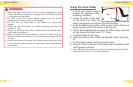
Loosen the harness and pull the top of the child seat cover away from b
the seat shell.
Pull each LATCH connector through the closet belt slot to the front c
of the child seat shell (Fig. B).
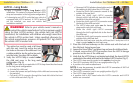
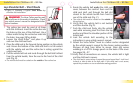
LATCH – Long Route
Figure A illustrates a typical s Long Route LATCH
installation. The restraint is shipped with the LATCH
strap and connectors in the long route configuration.
If choosing to use LATCH verify that your vehicle is s
equipped with LATCH anchors. If LATCH anchors
are not installed, you must use vehicle belt
installation methods.
Press each LATCH adjuster release button and pull d
the webbing to fully extend the LATCH strap.
Route the child’s left connector around to the e
outside of the seat shell.
Route the child’s right LATCH connector f
through child’s left belt slot from the front to
the back of the child seat shell.
Route the child’s right LATCH connector across g
the back of the child seat shell.
The LATCH strap must route h over the harness
straps on the rear of the child seat.
Route the child’s right LATCH connector i
through the child’s right belt slot to the front of
the child seat.
Route the child’s right connector around to the j
outside of the child seat shell.
Refit the child seat cover onto the child seat shell. Verify the LATCH k
strap is routed under the child seat cover.
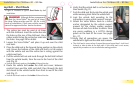
Place the child seat sideways on the vehicle seat with the back of 3
the child seat facing toward you.
Loosen the Versa-Tether4
®
and place it up and over the child seat back.
If stored, remove the LATCH connectors from the LATCH storage 5
pouches on the rear of the child seat.
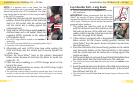
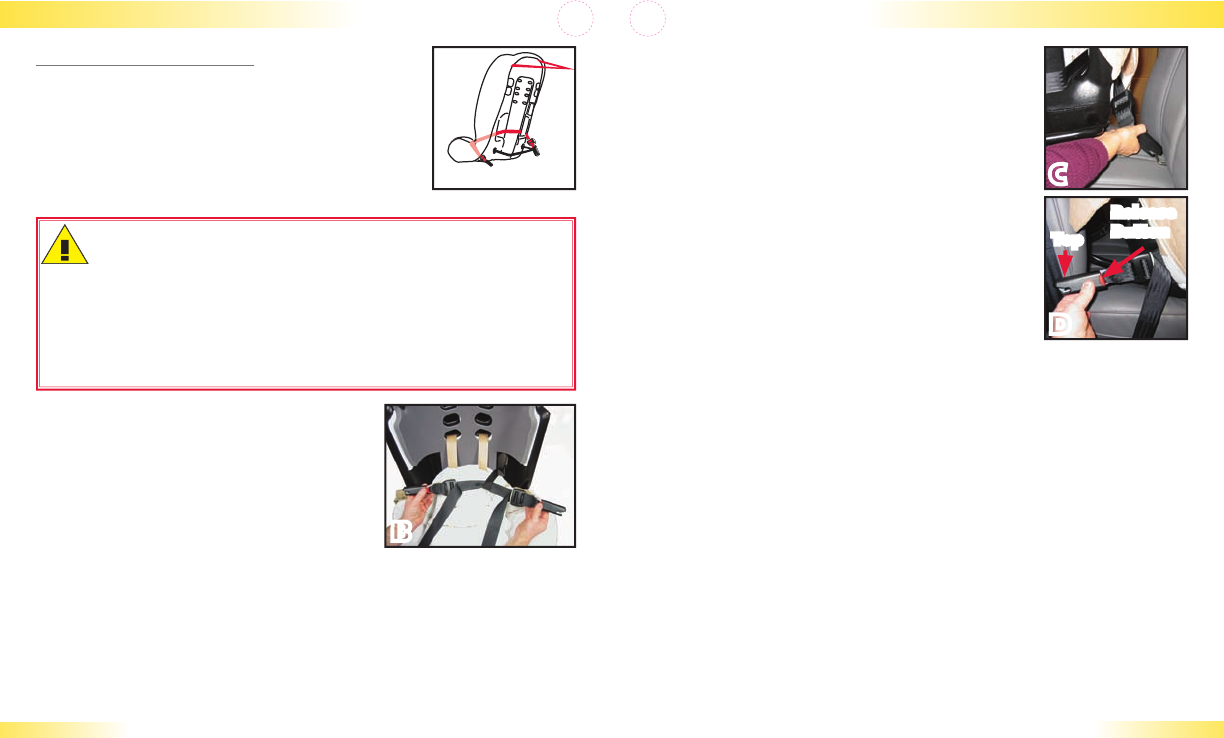
Verify that the LATCH strap is not twisted and attach the closest LATCH 6
connector to the vehicle seat back to the farthest LATCH anchor (Fig. C)
The LATCH strap must be routed on the s outside of recline bar.
The LATCH connector MUST be in an upright position (Fig. D).s
A positive click confirms attachment.s
NOTE: It may be necessary to switch the LATCH connectors if ANY of
the following conditions exist:
The LATCH connector is not in an upright position (Fig. D).s
The LATCH strap is twisted.s
A positive click is NOT heard when the LATCH connector and LATCH s
anchor are connected.
Installation for Children 22 – 40 lbs. Installation for Children 22 – 40 lbs.
A
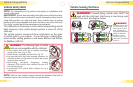
WARNING!
Refer to your vehicle owner’s manual or
contact the vehicle manufacturer for the maximum weight
rating for their LATCH anchors. Use vehicle belt (not LATCH
connectors) for installations with children who weigh more than
the vehicle LATCH anchor limit. Unless specified otherwise by
the vehicle manufacturer, assume a 40 pound (18.1 kg) child is
the vehicle LATCH anchor limit.
C
B
D
Release
Button
Top