


28
29
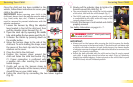
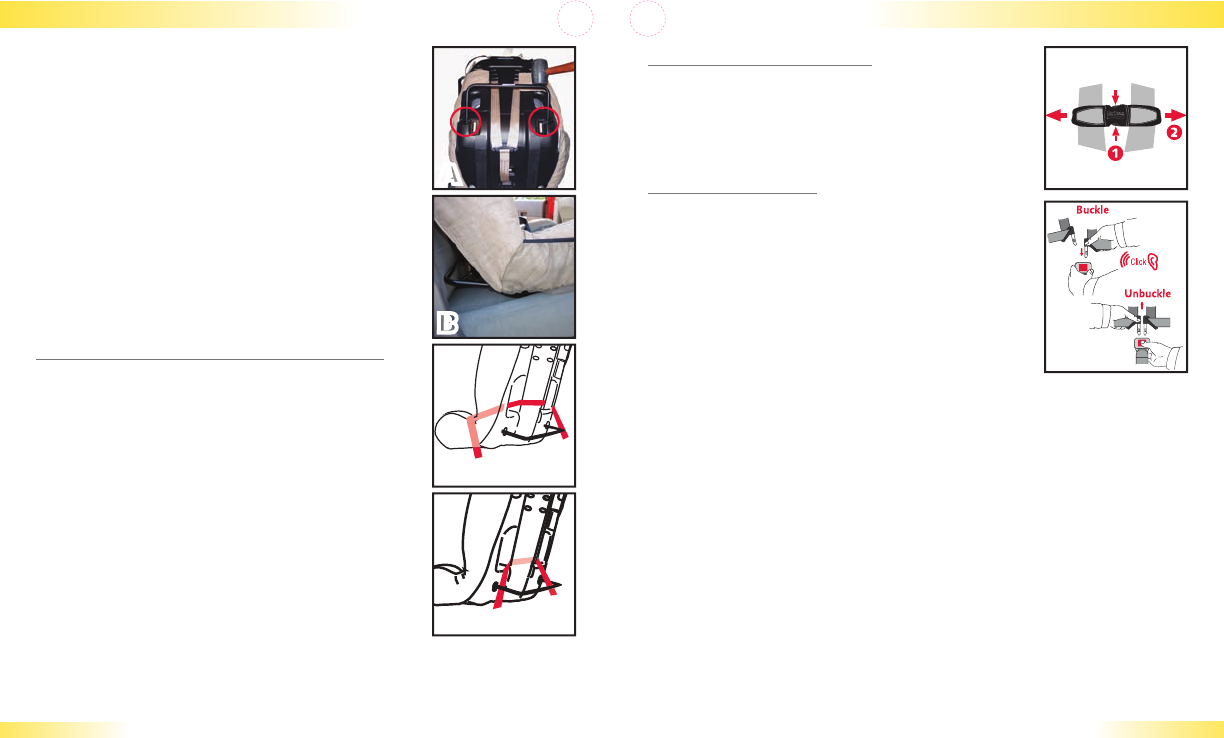
The recline bar must be installed before using this s
restraint.
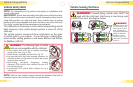
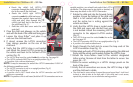
Insert the recline bar into the holes in lower 1
rear of child seat prior to installation in vehicle
(Fig. A).
Use a rubber mallet to tap the recline bar 2
ends into holes (Fig. A).
Do not strike the center of the recline bar near the s
label as this may bend the recline bar.
Ensure that the bottom of the child seat shell 3
is in full contact with the vehicle seat and the
recline bar is resting against the vehicle seat
back (Fig. B).
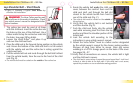
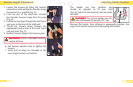
Belt Routing with the Recline Bar
The recline bar is provided to improve stability
of the child seat. Proper installation is key to
ensuring the best performance of the child seat.
Long Route Installation
When using the long route installation, the
LATCH strap or vehicle belt strap must pass
outside of the recline bar. (Fig. C)
Short Route Installation
When using the short route installation, the
LATCH strap or vehicle belt strap must pass
through the inside of the recline bar. (Fig. D)
EXCEPTION: When using the lap-shoulder belt
however, the strap must pass on the outside of the recline bar.
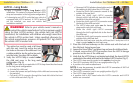
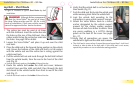
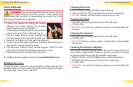
Using the Chest Clip
Open the chest clip by squeezing the middle
tabs, while pulling the two pieces apart (Fig. A).
IMPORTANT: The correct height for the chest clip
is at the middle of the chest, level with the armpit.
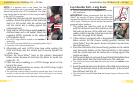
Using the Buckle
Fastening the Buckle
Hold the buckle with one hand.1
Use your other hand to insert one tongue at 2
a time into the buckle. Proper connection is
confirmed with a positive click, after inserting
the second buckle tongue (Fig. B).
Releasing the Buckle
Hold the buckle with one hand.1
Use thumb to press release button to eject the tongues from 2
buckle (Fig. B).
NOTE: Periodically clean the buckle to ensure proper operation. See
page 37.
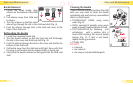
Using the Recline Bar
A A
B
C
D
Using Child Seat Features
B