


Switching the LATCH Connectors
Installation: Forward-Facing
2120
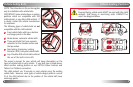
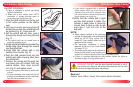
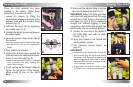
Lap-Belt Installation
• Figure A illustrates the forward-facing lap-
belt-only vehicle belt route.
•
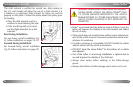
When not in use, always store the LATCH
connectors in storage pouches sewn in cover
above rear-facing lock-offs.
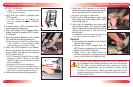
Place the child restraint forward facing
on the vehicle seat.
•
Restraint must be in the full upright position
when installed in forward-facing mode with
children over 33 pounds (15 kg).
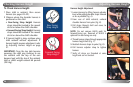
Pull the vehicle belt out, then pass it under
the LATCH bar, through the forward-
facing belt slots, then under the LATCH bar
on the other side (Fig. B).
Verify that the vehicle belt is not twisted,
then buckle
.
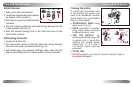
Kneel on the child restraint to push it into
the vehicle seat
while removing slack from
the vehicle belt (Fig. C).
Verify that the vehicle belt is tight and
the child restraint is secure.
The restraint
is stable when it cannot be moved front to
back or side to side more than 1 inch (2.5
cm.) at the belt path.
•
See "Checking Buckle Position" on pg. 26.
•
Installation can be improved by the use of
the Versa-Tether
®
(see pages 23–25).
Removal
Release Versa-Tether, if used, then reverse
the above directions.
1�
2�
3�
4�
5�
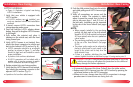
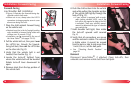
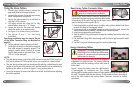
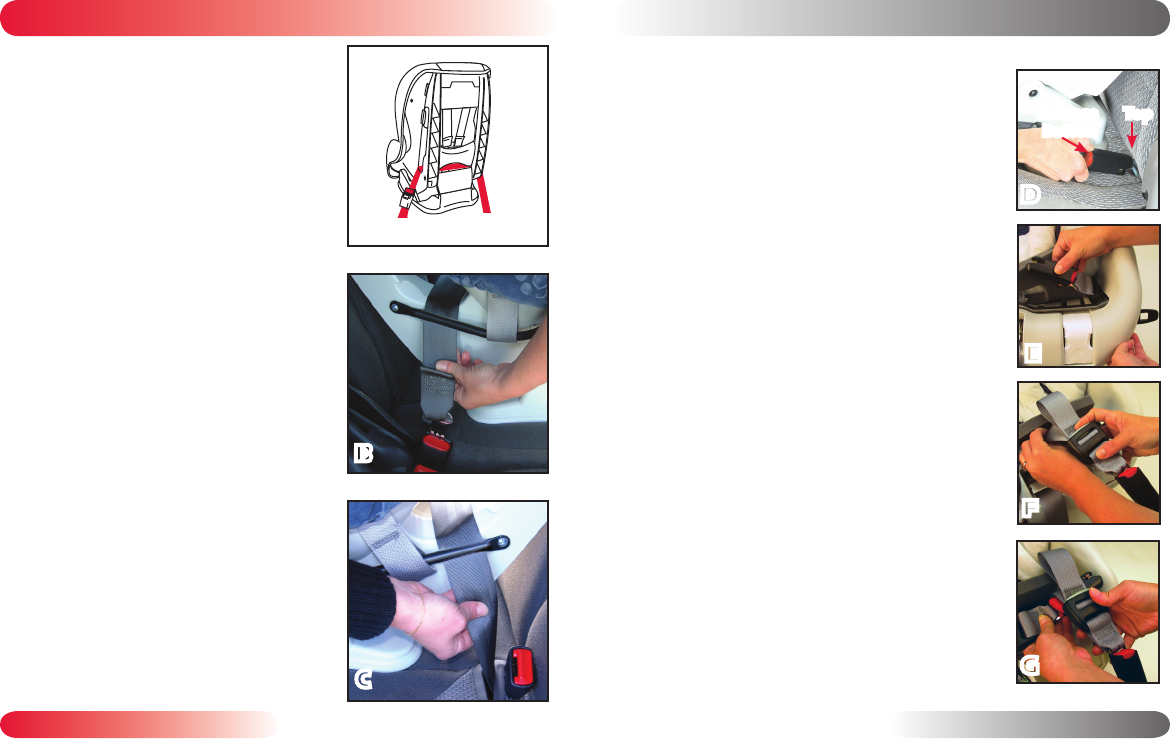
Switching the LATCH Harness
The LATCH connectors will properly connect with the
vehicle’s LATCH anchors only when the connectors
are properly aligned and the harness is not twisted.
To ensure the LATCH connector is properly aligned,
the connector’s red release button should face away
from the vehicle seat, and the larger of the two
connector sections should be on top (see figure D).
Lift the front of the child restraint's cover to
access the LATCH connectors.
Slide both LATCH connectors through rear-
facing belt slots to center of restraint so both
connectors are on the front side of the restraint
(Fig. E).
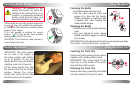
Loosen loop on one connector (Fig. F).
Thread the other connector through the loop
created in step 3 to switch positions (Fig. G).
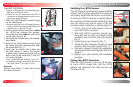
Slide each connector through the appropriate
rear-facing belt slots to the opposite side of the
restraint.
Replace cover and continue with installation
procedure.
Storing the LATCH Connectors
When the LATCH harness is not in use, lift the cover
to access LATCH storage slots. Fold the LATCH
adjuster and connector, then slide each set into
the adjacent slot.
1�
2�
3�
4�
5�
6�
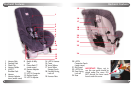
Top
Release
Button
A
B
C
D
E
F
G