DPF710K 9
Installation (Cont)
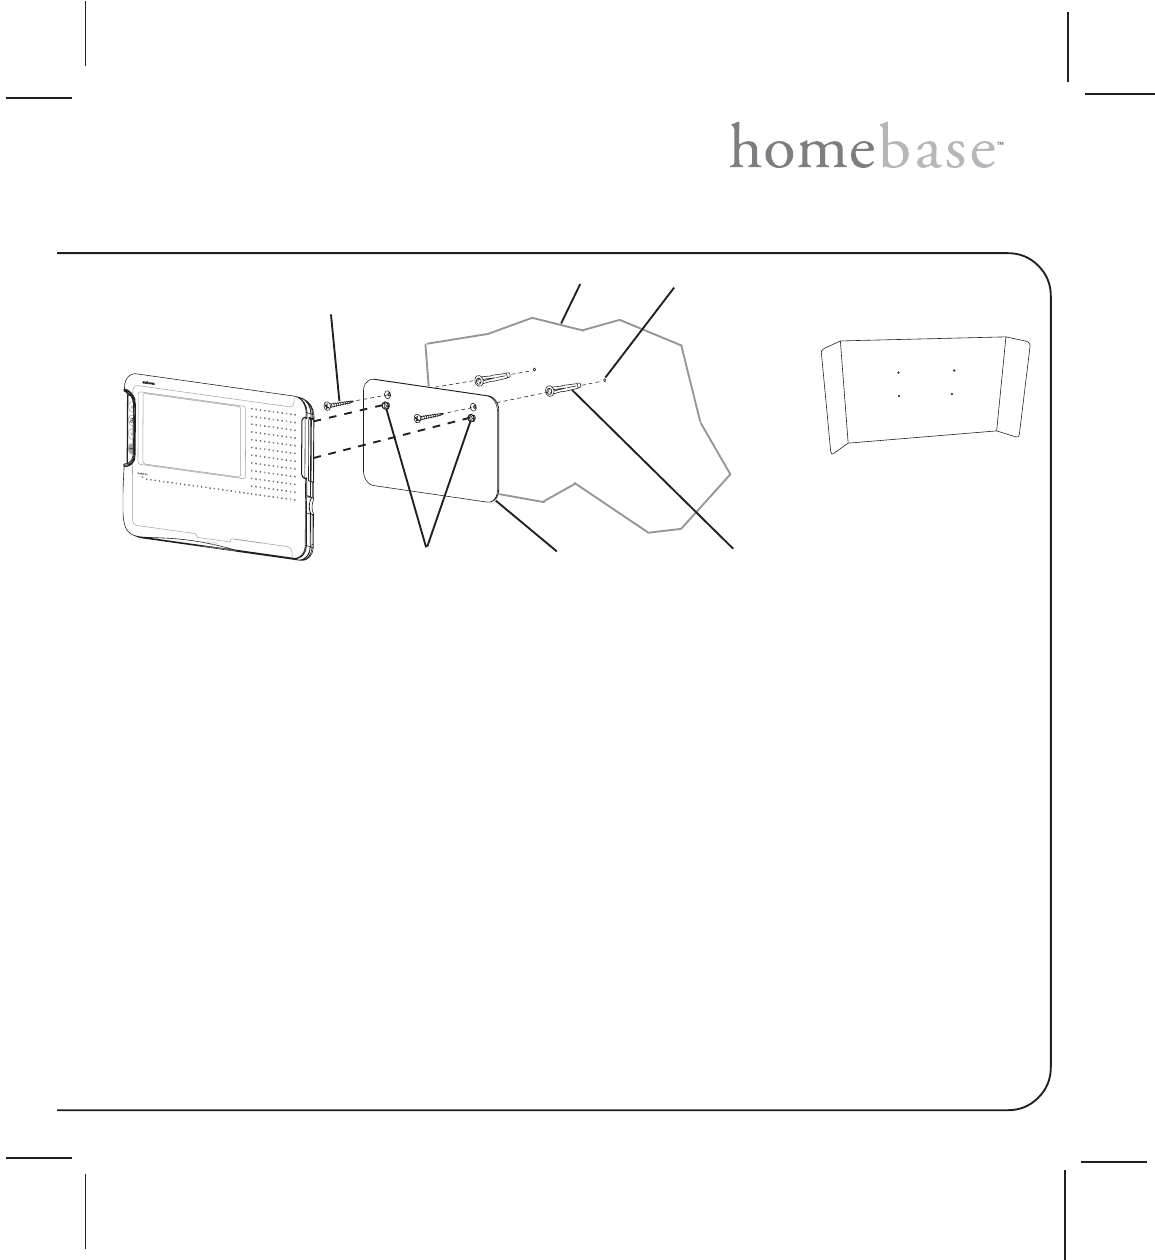
homebase Wall Mount Installation Using the Wall Mount Bracket
Note: If the wall bracket is to be mounted using the foam adhesive pads, the procedure will be the same as that
for the refrigerator mount as described on page 7.
If the wall bracket is to be mounted using screws, proceed as follows:
1. Position the mounting hole template at the desired place on the wall; level the template and mark the
position of the two upper holes.
2. Drill two holes using a 1/4" (6mm) drill bit. If a wall stud is not present, insert the plastic anchors into the holes
until flush with the wall surface .
Caution: Do not over tighten the screws; otherwise, the wall bracket could be damaged
3. Align the wall bracket with the two holes and/or wall anchors; insert two flat-head screws and secure the wall
bracket to the wall.
4. Connect the power adapter plug to the DC input connector at the rear of the homebase.
5. Choose the direction of the adapter wire in reference to the AC wall outlet. Place the DC wire in the correspond-
ing wire notch.
6. Check the amount of wire required to reach the AC outlet. Spool excess wire on the four posts inside the rear
cavity of the homebase.
7. Attach the homebase to the bracket by lining up the homebase bracket mounting holes with the wall bracket
mounting tabs, and slide the homebase down until the mounting tabs engage the mounting hole slots.
8. Cover the power adapter wire with the clear, black or white wire cover; seal the cover using the double-sided
tape and dress the wire, adhering it to the wall surface.
Drill 1/4" Hole
(2 Places)
Wall Surface
Plastic Wall
Anchor (2) if
Needed
Flat-Head Self-Tapping
Screw (2)
Wall Bracket
Mounting Tabs
Wall Mount
Bracket
Mounting Hole
Template


