9
Getting Started
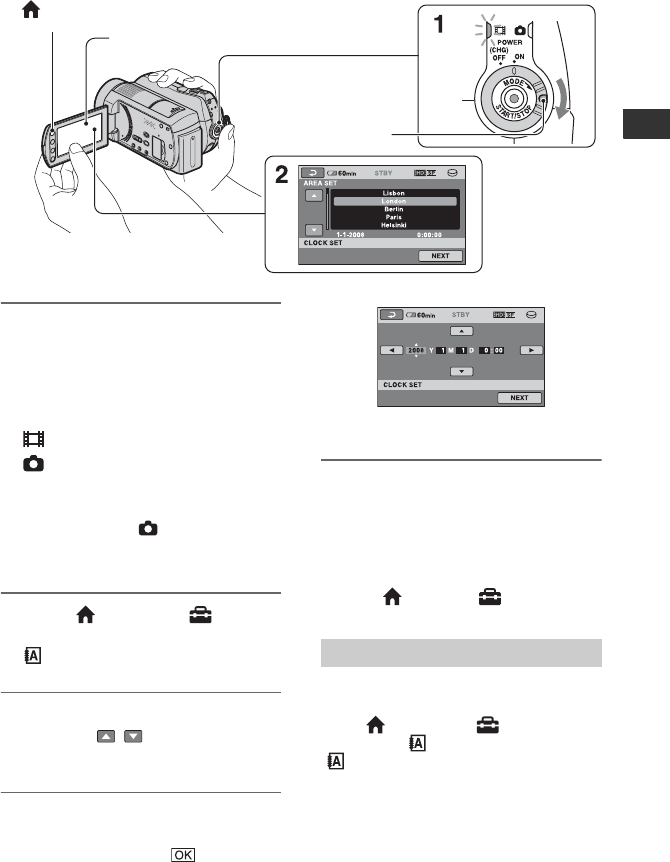
Step 2: Turning the power on, and setting the
date and time
1 While pressing the green button,
turn the POWER switch
repeatedly in the direction of the
arrow until the respective lamp
lights up.
(Movie): To record movies
(Still): To record still images
Go to step 3 when you turn on your
camcorder for the first time.
• When you turn on (Still) lamp, the
screen aspect ratio is changed to 4:3
automatically.
2 Touch (HOME) t
(SETTINGS) t [CLOCK/
LANG] t [CLOCK SET].
3 Select the desired geographical
area with / , then touch
[NEXT].
4 Set [SUMMERTIME], [Y] (year),
[M] (month), [D] (day), hour and
minute, then touch .
The clock starts.
z Tips
• The date and time does not appear during
recording, but they are automatically recorded
on the media, and can be displayed during
playback.
• You can turn off the operation beeps by
touching (HOME) t (SETTINGS) t
[SOUND/DISP SET] t [BEEP] t [OFF].
You can change the on-screen displays to
show messages in a specified language.
Touch (HOME) t (SETTINGS)
t [CLOCK/ LANG] t
[ LANGUAGE SET], then select the
desired language.
1
When using the
camcorder for the
first time, the
[CLOCK SET]
screen appears on
the LCD screen.
Touch the button on the
LCD screen.
POWER switch
(HOME) (p. 19)
Changing the language setting


