


5
Topcom Babytalker 2000
ENGLISH
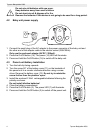
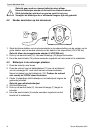
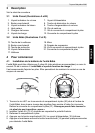
4.4 Parent unit power supply
1. Connect the power adapter cable to the main
power socket (230V/50Hz).
Only use the enclosed adapter
(6V DC / 200mA).
2. Slide the Parent Unit into the charger. The red
charging light illuminates.
3. It takes about 13 hours to charge the unit.
4. Press the On/Off button (2). The power LED (7)
will illuminate.
5. Press and hold the On/Off button (2) to switch off the patent unit.
When the battery level is low, the power LED (7) will blink.
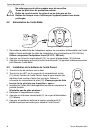
4.5 Link
Do not place the baby unit or cables in the crib or within the arm reach of the baby
(at least 1 meter away).
When using the Babytalker the first time, it is adviced to test the connection.
• Install the parent unit in the same room as the baby unit, but have at least 1 meter
between the 2 units.
• When both units are switched on, the parent unit will search for the baby unit.
• The green link LED on Parent Units will flash until they communicate. Once the link is
established, the LED will light continously.
• The voice captured by the microphone will be audible on the parent unit.
• The level of the detected speech is represented by the LED’s on top of the parent unit.
• When the speech reached the maximum level, a beep will be audible.
• When the connection is established, move the parent unit to the monitor room, but within
the operation range.
• When there is no connection, an alert signal (double beep) will be audible (out of range
warning) and the green connection LED will blink.
• Move the parent unit closer until the link is re-established.
5 Using the Babytalker 2000
5.1 Volume adjustment
There are 5 volume levels on the parent unit.
• Press the volume up button to increase the volume level.
• Press the volume down button to decrease the volume level.
5.2 Night Light
• Press the Night Light button on the baby unit. The night light (17) will illuminate.
• Press the Night Light button again to switch the light off.