


a
b
15
or
13
7
NOTE FOR HARDWARE INSTALLED GATE: Follow steps 1-5 to adjust
the width of your gate to finish installation.
Place the gate in a doorway or hallway that is at least 27.5 inches
wide but no wider than 42.5 inches.
IMPORTANT: Hold the gate upright during installation, flush
against floor.
NOTE: Do not use pressure mount mode at top of stairs. Hardware
is included for top of stair use.
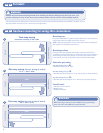
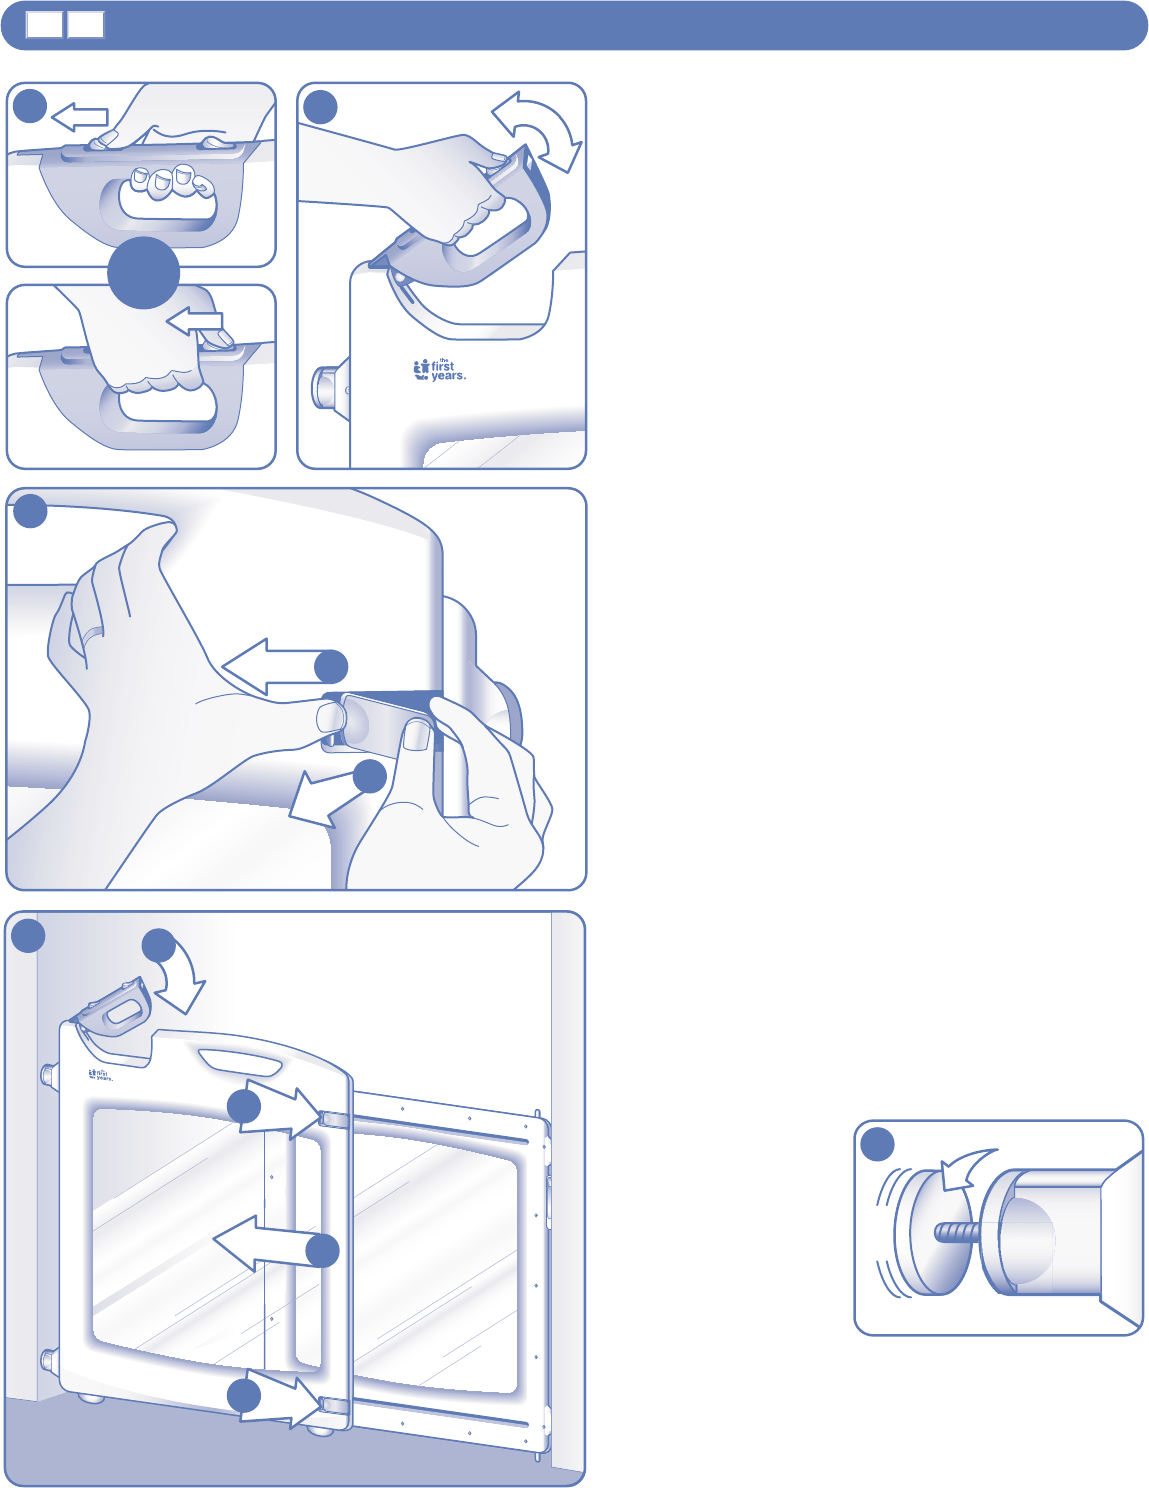
1. Holding the release handle with one hand, first use your thumb
to push and slide the release button that is most comfortable for
you, as shown in diagram
bn
, then lift up on the release handle,
as shown in diagram
bo
.
NOTE: We designed the All-Clear Swing Gate with two release
buttons to make it easy to open regardless of where you are
standing when you want to open the release handle. You only
need to push and slide ONE release button in order to lift the
release handle.
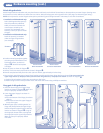
2. Open the top and bottom adjustment buckles as shown in
diagram
bp
.
a. Push the adjustment buckle tab to the left and hold in place.
b. Now lift up the adjustment buckle to release. Be sure to
release both the top and bottom buckles.
TIP: You may find it difficult to open the adjustment buckles.
The tightness you may encounter is an intentional safety
measure that we’ve built-in for optimal child security. To make it
easier to open the adjustment buckles, try placing the gate flat
on the floor with buckle side facing up towards you. Then, follow
steps a. and b. above and continue with the installation.
NOTE: Illustration
bq
shows the gate pressure mounted.
3. With the release handle up in the unlocked position, slide
panels (
A
) until the adjustment knobs hit the door jam, as
shown in diagram
bq
.
TIP: Lean over the top of the gate. Grasp each panel in center
at point
A
and simultaneously push each panel to slide in
opposing directions.
IMPORTANT: Always hold the gate in the center when sliding
the panels out to adjust.
CDNENG
Pressure mounting/Adjusting width
a
b
b
c
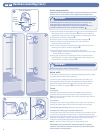
4. While holding gate on point
A
, press the adjustment buckles
(
B
) down to lock panels in place at the desired width as
shown in diagram
bq
.
5. Lower release handle (
C
) down to lock as shown in diagram
bq
. Pads will press up against mounting surface. Your gate is
now locked!
17
NOTE: If the gate is being
pressure mounted in an
opening with baseboards
or other uneven surface,
you may need to adjust
the adjustment knobs for
an optimal fit, as shown in
diagram
br
.
16
14