


CDNENG
Hardware mounting (cont.)
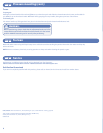
Attach hinge brackets
Attach hinge brackets to wooden stair post, doorframe or wall studs on the side of the stairway or doorway where you want hinges. Opening must
be at least 27.5 inches wide but no wider than 42.5 inches. Gate will swing open on the opposite side. (See page 4 to determine gate swing.)
NOTE: You may need to use the hinge bracket spacers provided if gate is being mounted in a doorway or area with a baseboard.
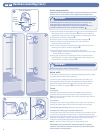
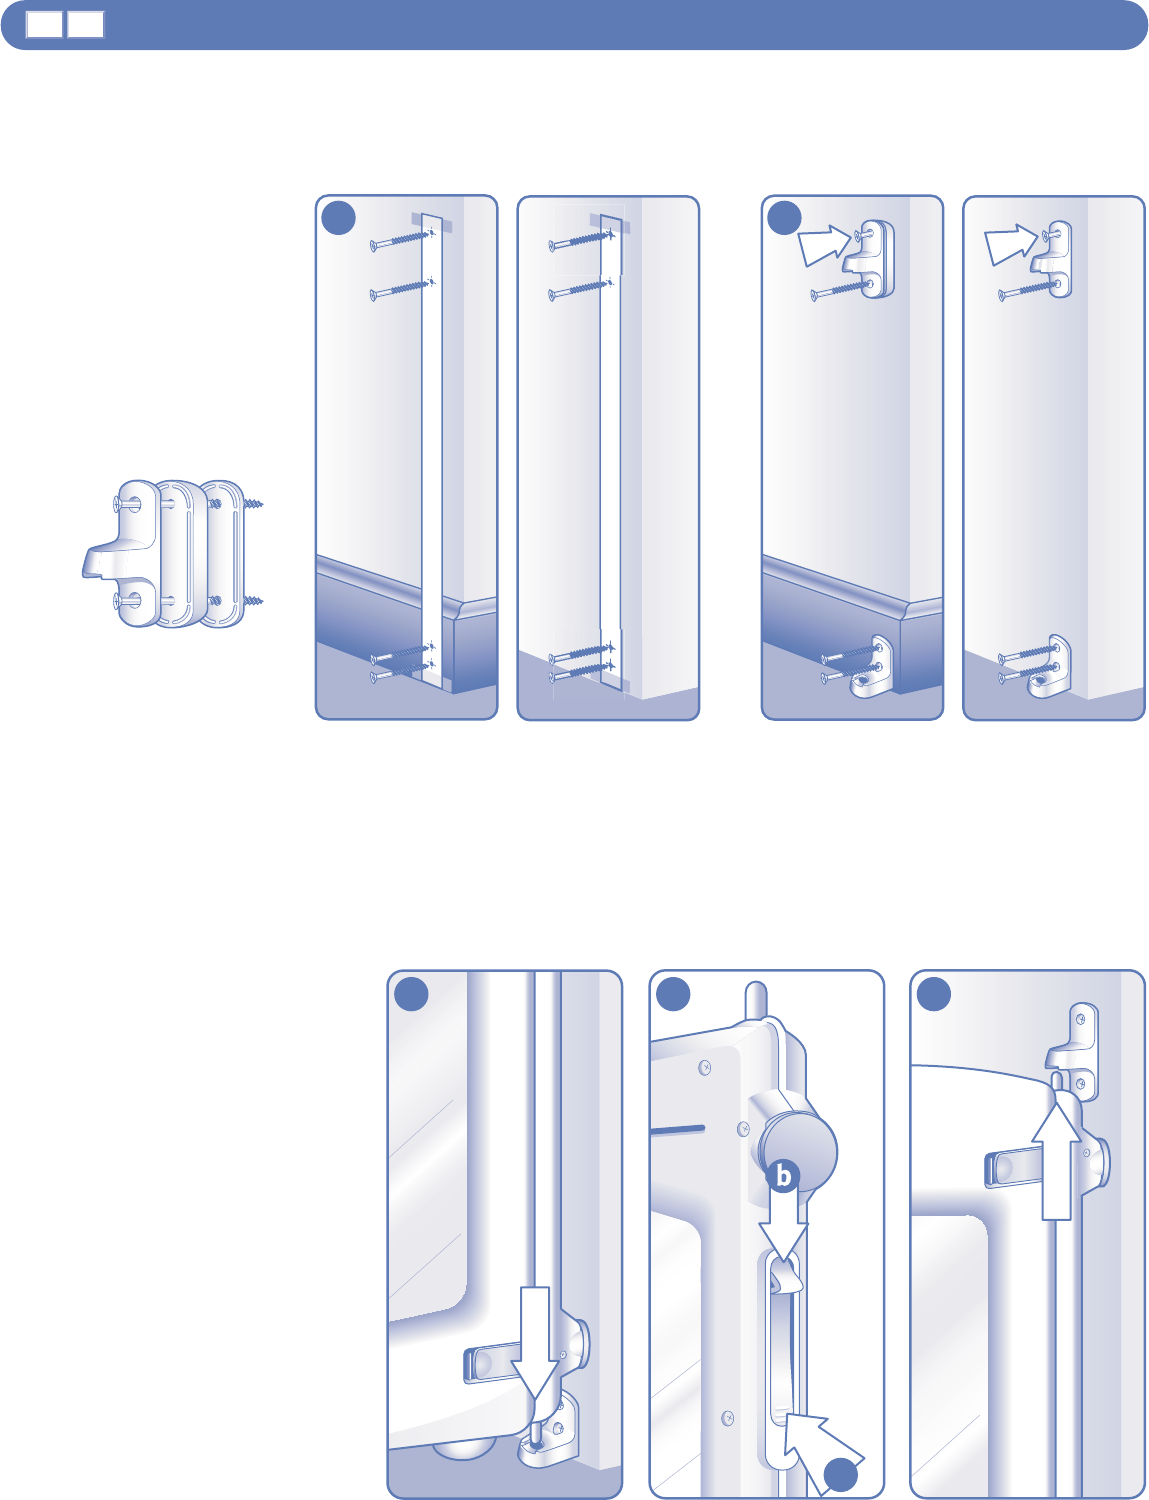
Hang gate in hinge brackets
1. Place the lower hinge pin in lower hinge
bracket as shown in diagram
6
. Make sure
the pin is properly seated in bracket.
2. Lower the upper hinge pin as shown in
diagram
7
.
a. Press the bottom of the hinge pin release
slider in.
b. Slide down to lower the upper hinge pin
on top of the gate.
3. With the gate open, hold the gate 90° to
hinge and directly below the upper hinge
bracket. Align the upper hinge pin with the
bracket as shown in diagram
8
. Let go of
the hinge pin release slider to spring load
the hinge pin into the upper hinge bracket.
Make sure the pin is properly seated
in bracket.
54
7 86
5
Installation
with baseboard
Installation
without baseboard
Installation
with baseboard
Installation
without baseboard
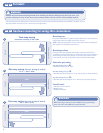
1. Installation with baseboard only:
Select the hinge bracket spacer(s)
that will provide the additional
width you need to eliminate the
uneven space caused by the
presence of a baseboard in the
doorway or area you plan to install
the gate.
2. Installation with baseboard only:
Stack the spacer(s) as needed
under the upper hinge bracket
(see example).
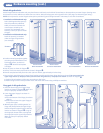
3. Position mounting template against
mounting surface with bottom end
flush against floor, as shown in
diagram
4
. Assure that template
is straight.
4. Tape in place, as shown in diagram
4
.
5. Use tip of screw to mark screw holes as shown in diagram
4
.
6. Remove template and drill pilot holes with 1/8 inch drill bit, approximately 2 inches deep.
7. One at a time, attach the spacer/upper hinge bracket assembly and the lower hinge bracket to the wall. Be sure to attach the
upper hinge bracket (T-shaped) at the top and the lower hinge bracket (L-shaped) at the bottom as shown in diagram
5
.
a. Position hinge brackets so holes are centered over pilot holes.
b. Attach using 4 of the screws provided. Insert and secure the screws using a Phillips screwdriver.
a
Example