


REINFORCEMENT INSTALLATION
1. Remove the ceiling tile from the ceiling.
2. Prepare the ceiling tile for installation. Use the metal panel as a template. Place the metal panel on top of the ceiling tile, and draw an outline
of the center circle. Cut the circle out of the ceiling tile.
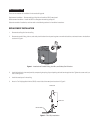
3. Remove the conduit fitting, lock nut, and safety chain bracket from the parts bag that came with the back box, and attach them to the back box
as shown in Figure 1.
4. Place the metal panel on top of the ceiling tile.
NOTE: When installed, the metal panel will be inside the ceiling with the ceiling tile exposed.
5. Install the back box in the ceiling tile and metal panel by compressing the spring clips and pushing the back box through the hole. Tighten the
screws until you hear a clicking noise.
6. Install the tile and panel in the ceiling.
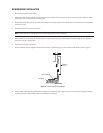
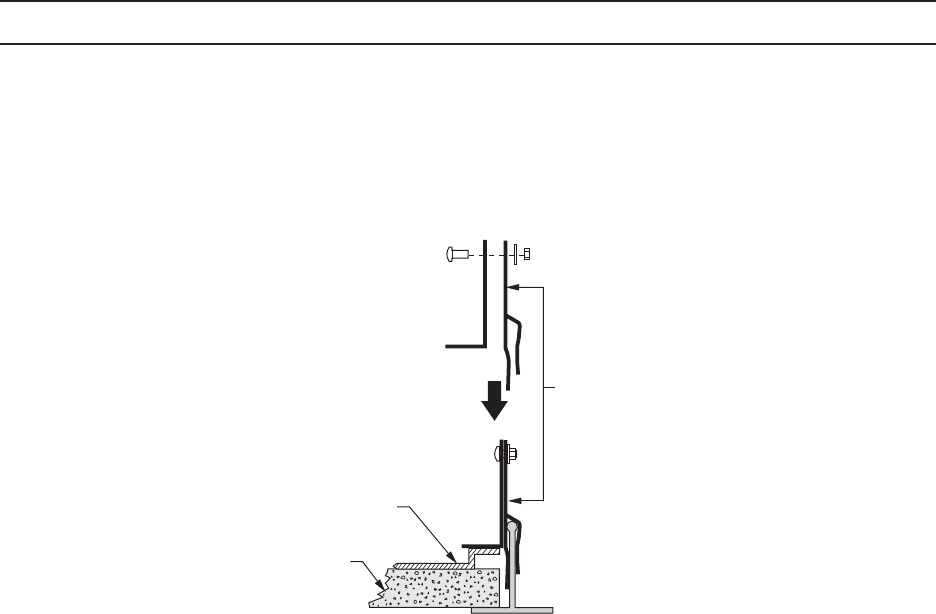
7. Use the T-brackets and clips supplied with the back box to attach a T-bracket and clip on each side of the metal panel as shown in Figure 3.
T-BRACKET
AND CLIP
CEILING TILE
METAL PANEL
Figure 3. T-Bracket and Clip Installation
8. Install a safety chain/cable (not supplied) that will support up to 16 pounds (7.3 kg). Fasten one end of the chain/cable to a support structure in
the ceiling. Fasten the other end to the safety chain bracket (refer to Figure 1).