


Installation
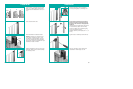
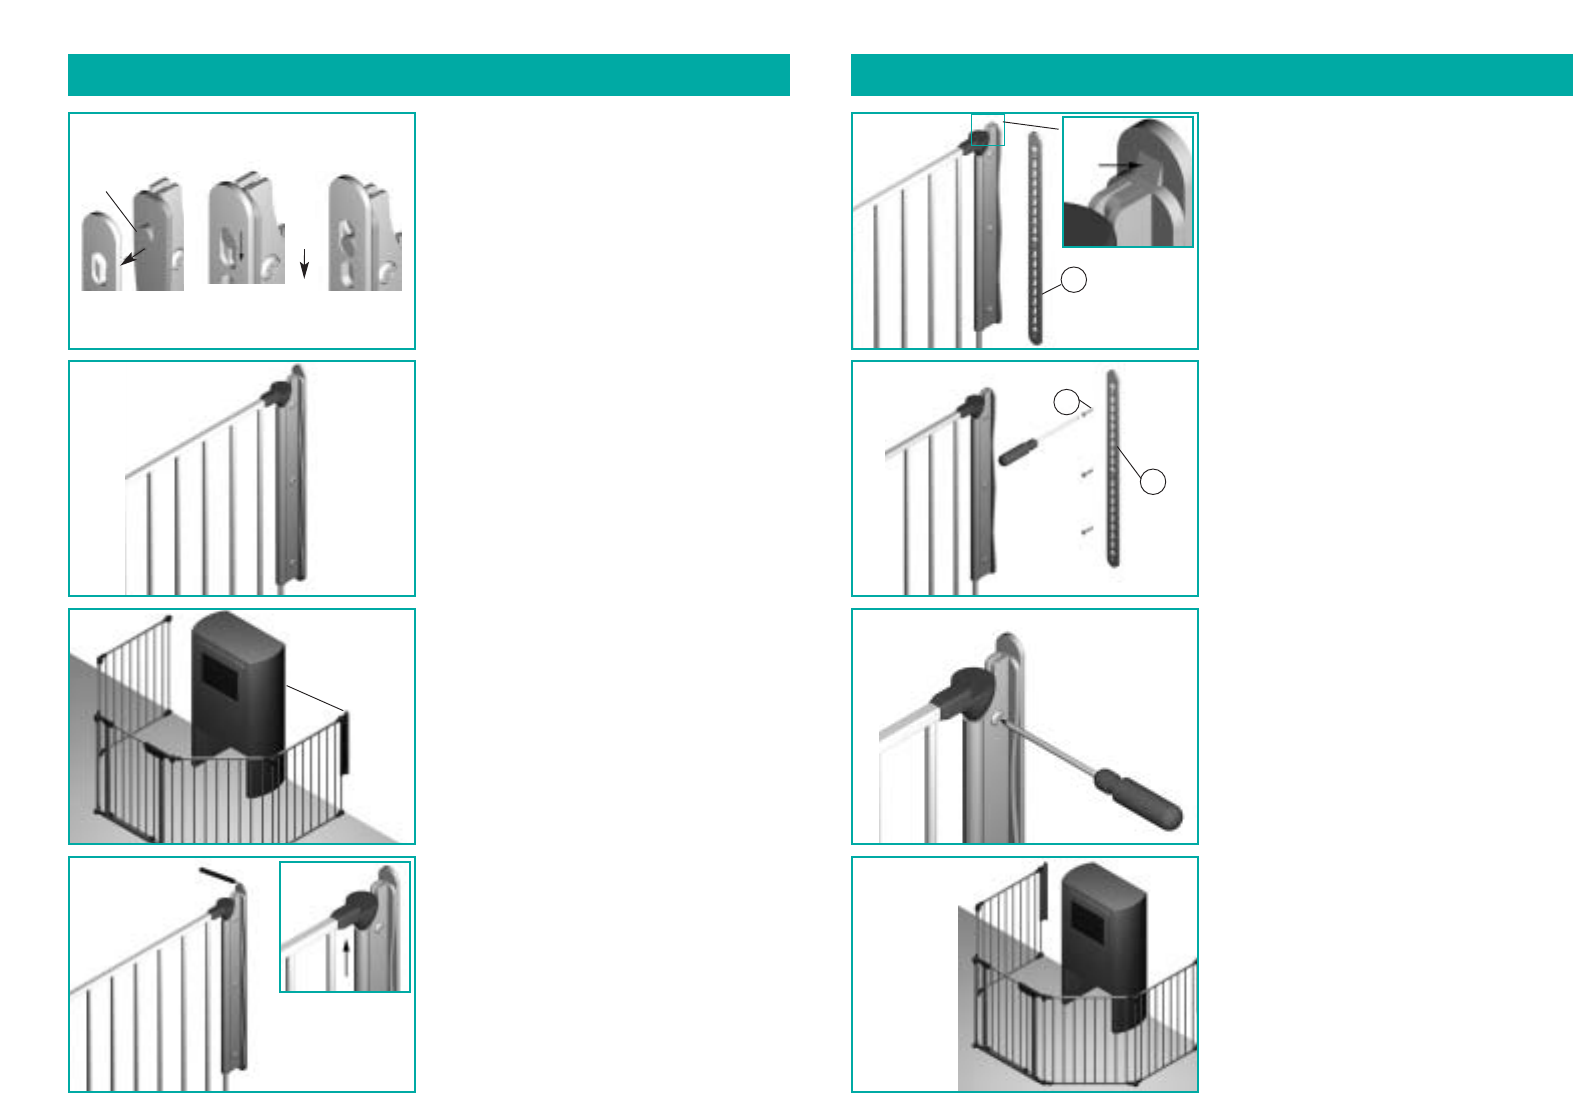
Remove wall plate (C) from assembly by
pressing locking tab (21a.) and lifting it off.
Note: Screws provided are for mounting
directly into wood. If mounting into brick,
drywall or other surfaces, use appropriate
hardware.
Hold wall plate (C) inside outline and screw in
3 wood screws (D). Space screws evenly.
There are multiple holes in wall plate giving
many screw location options.
Reattach assembly to wall plate (see 17. a, b
and c).
Tighten 3 sets of assembly screws and nuts.
Now you are ready to mount other end of
HearthGate™. Follow steps 13 to 23.
8
22.
23.
24.
C
D
21.
C
21a.
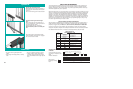
Installation
Center buttons of assembly with wall plate
holes (17. a). When aligned, push buttons
through holes and slide down to lock (17. b
& c).
Now it should look like this.
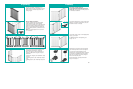
Move HearthGate™ to desired location.
Warning: A distance of a minimum of 20”
from source of heat/fire to gate is recom-
mended (see ”Important Notes” page 2). If
this is not possible with sections included,
optional 24” sections are available from your
HearthGate™ dealer or KidCo.
Slide the assembly as close to cone as pos-
sible (20a.). With a pencil, outline assembly
on mounting surface.
9
17.
bc
Buttons
20.
20a.
18.
19.
min. 20”
a