


Installation
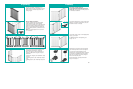
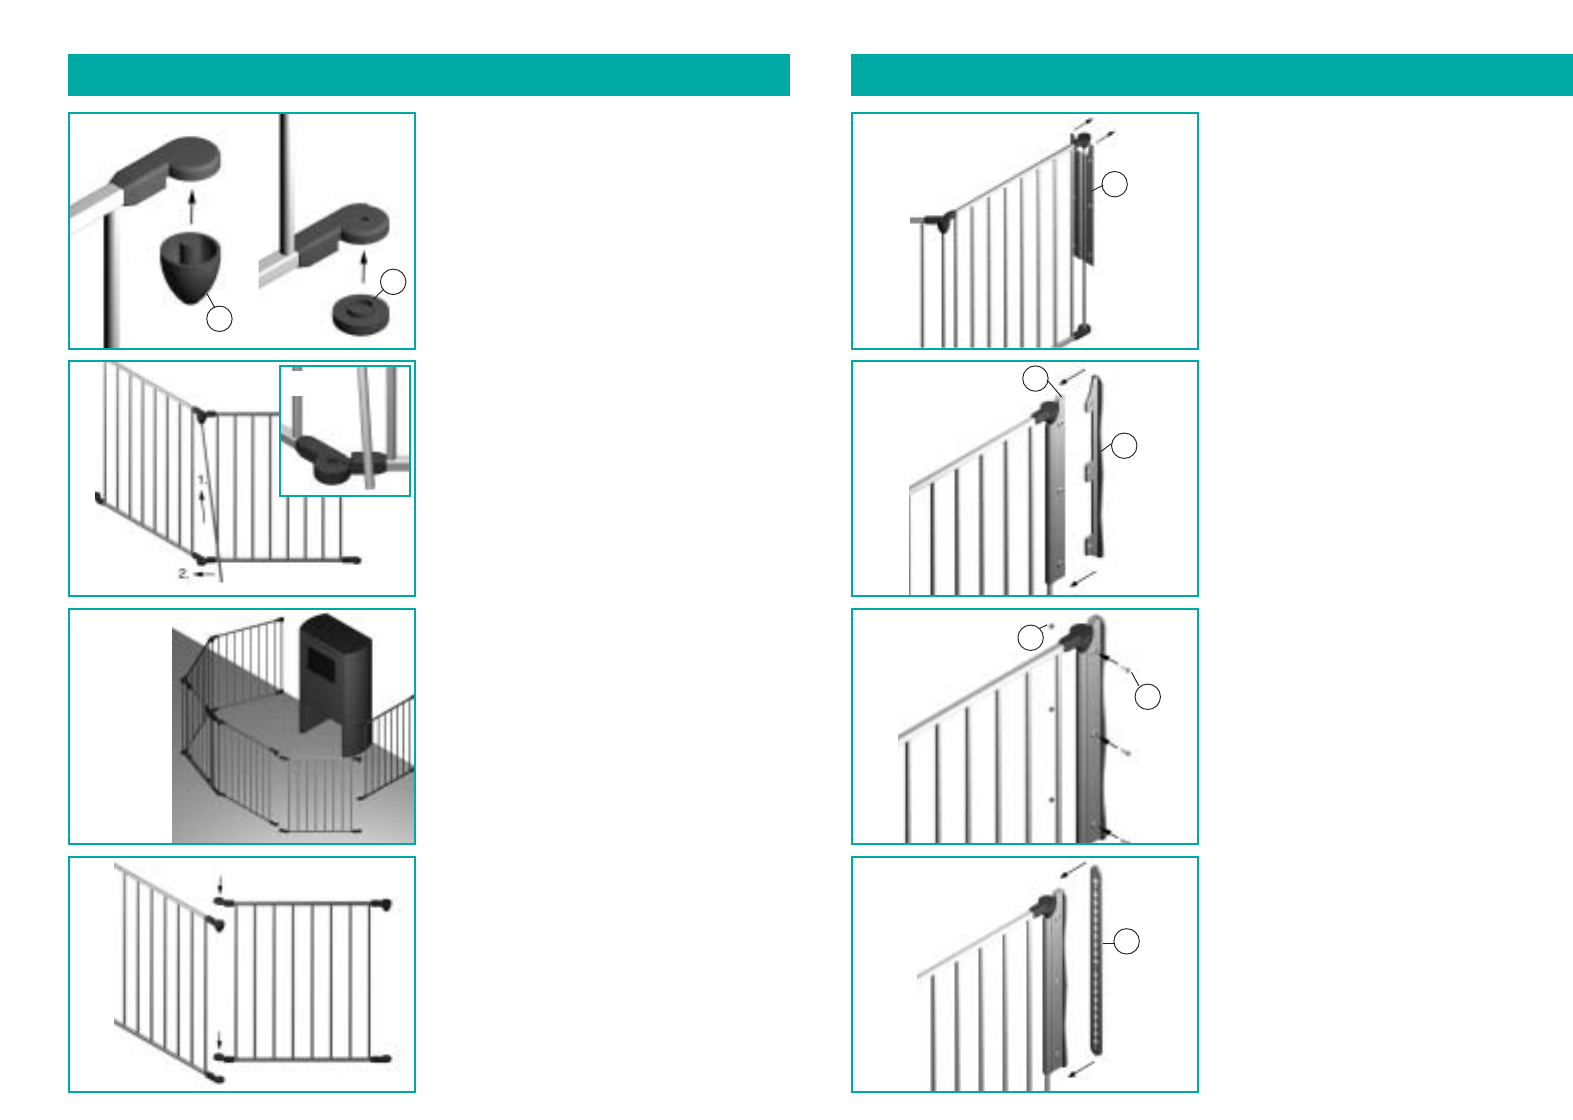
Installing the wall mountings:
Fold wall cover (A) around vertical bar at end
of gate.
Insert lock fitting (B).
Insert 3 wall cover screws (E) through oblong
holes in top, middle and bottom of assembly.
Note: Loosely screw on nuts (F), but do not
tighten at this time.
Fasten wall plate (C) onto assembly. See
steps 17. a, b and c.
6
16.
C
13.
A
14.
A
B
15.
E
F
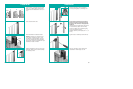
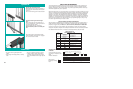
Assembly
Remove hinge cap (H) from bottom of original
end section. A screwdriver may be needed to
pry it off. Place under bottom hinge. Remove
plastic cone from under top hinge of original
end section. Install cone (I) under top hinge
of new end section.
Reinstall a removable, vertical bar. Insert bar
by pressing it into upper hinge cone, while
sliding bar into groove of lower hinge. Spring
in cone will make bar lock in place.
Proceed to ”Installation” steps 13 to 23.
Adding optional section/s:
Remove vertical bar from optional section
(steps 5 & 6).
Position optional section with cone hinge at
top. Align cone hinge underneath top hinge
on end section. When the center of both hin-
ges are aligned, top and bottom, they will fall
together.
Insert removable bar (see step 10).
If adding more than one section, repeat the
process.
Reattaching end sections:
Align top cone corner of one section with the
top hinge of the end section. When the cen-
ter of both hinges are aligned, top and bott-
om, they will fall together.
Insert removable bar.
Proceed to ”Installation” steps 13 to 23.
Note: The HearthGate™ cannot be com-
pletely folded when optional section/s have
been added.
Relocating the walk through door section:
The walk through door section can be repo-
sitioned in the configuration as long as it is
interchanged with a section that has
matching top and bottom hinges (refer to
diagram 3).
7
9.
I
H
10.
10a.
11.
12.