Step 3.
To return seat back to a more upright position, push forward
on back until it snaps into desired position. (Front seat
middle position locks for safetyunlock by squeezing lever
before pushing into full upright position.)
10 11
12
9
751-6-99
Rear seat
Back of front seat
To Remove Rear Canopy
Step 1.
Fully recline the rear seat.
Step 2.
Unsnap canopy fabric from stroller.
Step 3.
Slide both brackets up, then push
brackets in slightly to remove canopy.
Slide up
and
push in
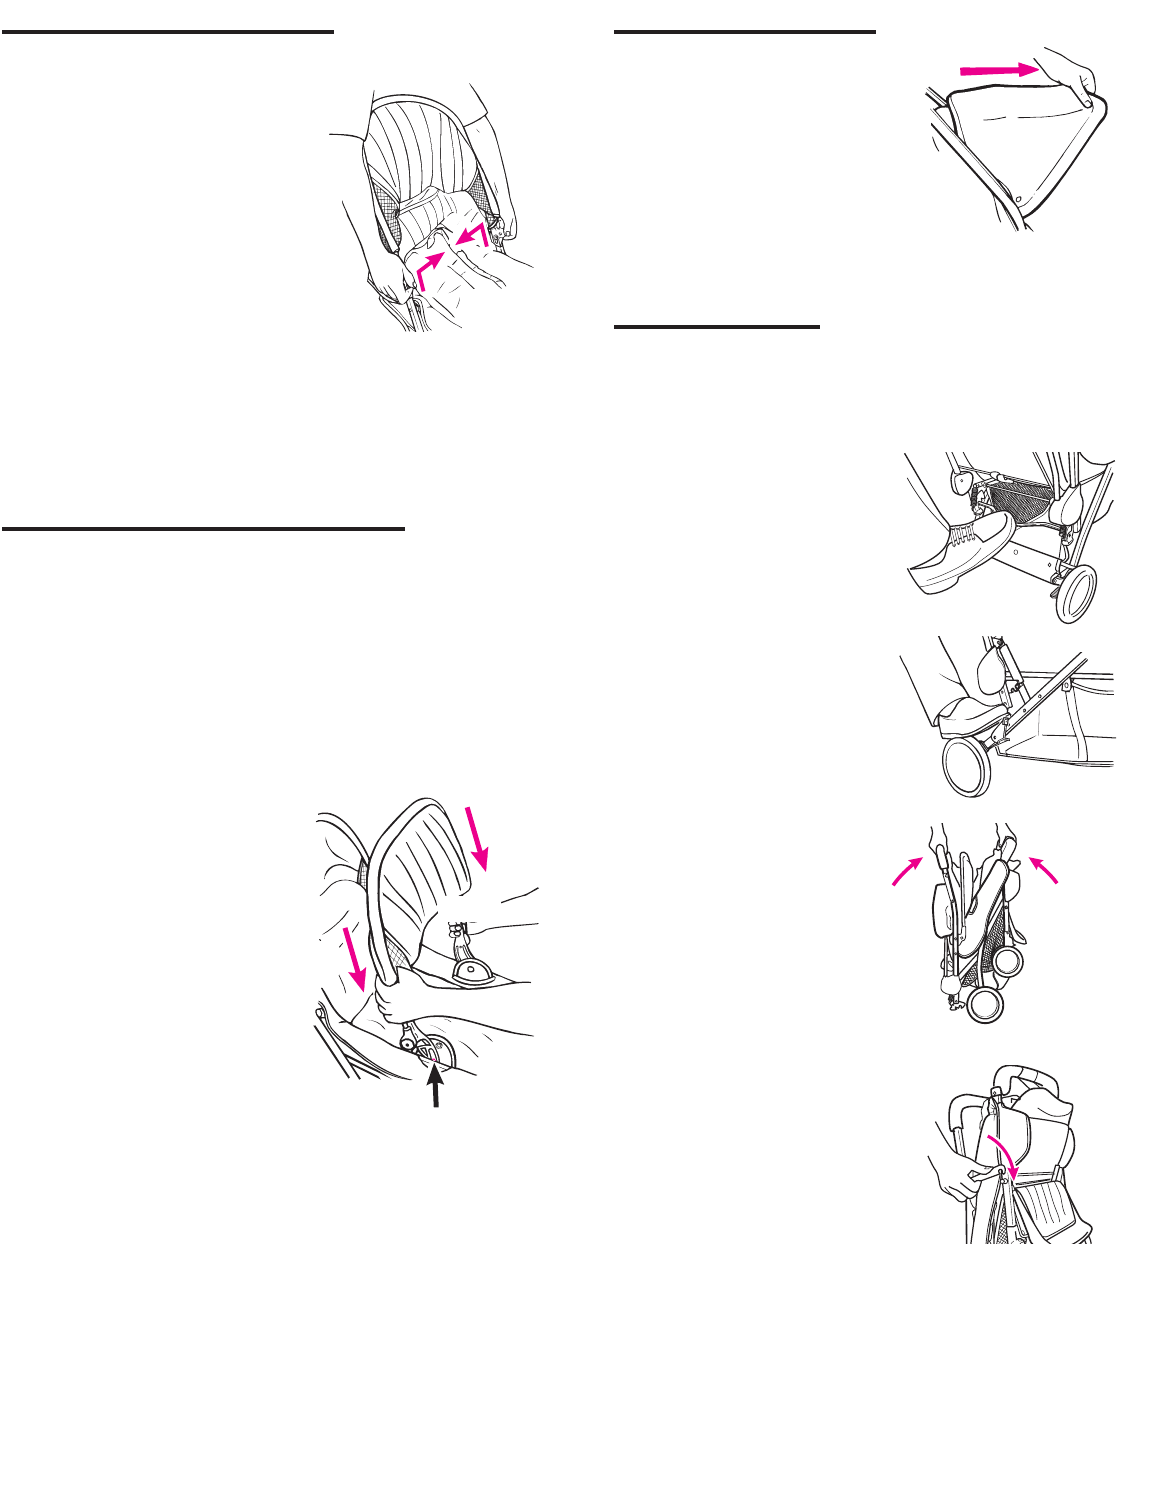
To Fold Stroller
NOTE: Before folding,
(1) adjust backs to upright position;
(2) fold canopy; (3) align front
wheels with frame.
Step 1.
Push on rod to fold as shown.
Step 2.
Release secondary latch as
shown.
Step 3.
Push handle forward.
Step 4.
Lock latch.
To Change to Swivel
or Non-swivel Wheels
Front swivel wheels lock for use on uneven surfaces such
as grass, stones or gravel.
Before locking swivels, first push stroller forward a few feet
to ensure that the wheels are correctly positioned.
Push buttons up or down, depending on model, to lock or
release swivels. Turn swivel to check that it is locked or
released.
Step 1.
Place crotch strap between
childs legs and snap both side
buckles to the center buckle.
Adjust belt as needed to get a
snug fit around your child.
Step 2.
Push in on front of buckle to
release.
To Secure Your Child
Avoid serious injury from falling or
sliding out. Always use seat belt.
To Adjust Backs
Step 1.
Push back of seat slightly
forward while squeezing
lever as shown to unlock.
Step 2.
Adjust to desired position.
Rear seat has four positions, front
seat has three. You may use any
combination of seat positions.
Child may slip
into leg openings and strangle.
NEVER use front seat in a
reclined carriage position unless
footrest is raised to cover the
front opening and wire is
snapped into lower notch.
NEVER use rear seat in a
reclined carriage position unless
footrest opening behind front
seat has first been closed by
snapping the flap in six places
to the back of the front seat.
Do not pull
on this bar!
Step 1.
Fully recline the front seat.
Step 2.
Unsnap small flaps on top of
both armrests.
Step 3.
Make sure arrows on inside of
canopy bracket face toward the
front of stroller.
Step 4.
Insert brackets through elastic,
then through holes on armrests
as shown.
Step 5.
Push both brackets down at the
same time onto stroller frame until
they snap into place. Brackets
must fit over metal bars on inside
of frame. Be sure fabric is not
caught under brackets.
Step 6.
Resnap small flaps on armrests
when front canopy is not in use.
Push
Push
Metal bar
To Install Front Canopy
(found only on some models):
Align front
wheels
To Install Rear Canopy
Step 1.
Fully recline the rear seat. Locate
small knobs on the inside of the
handle.
Step 2.
Hold canopy by mounting
brackets as shown. Push
brackets in slightly and align
holes in brackets with knobs
on handle. Mount brackets
onto knobs.
Step 3.
Slide brackets down to latch.
Be sure fabric is not caught
under brackets.
Step 4.
Snap canopy fabric to seat back.
Bracket
hole
Knob
Knob
To Adjust Canopies
Push or pull canopy to desired
position.
Canopy bag (on certain models)
carries a maximum of 2 pounds
(0.9 kg).


