


9
134-10-99 IS2479
10 11 12
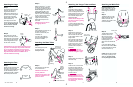
Step 1.
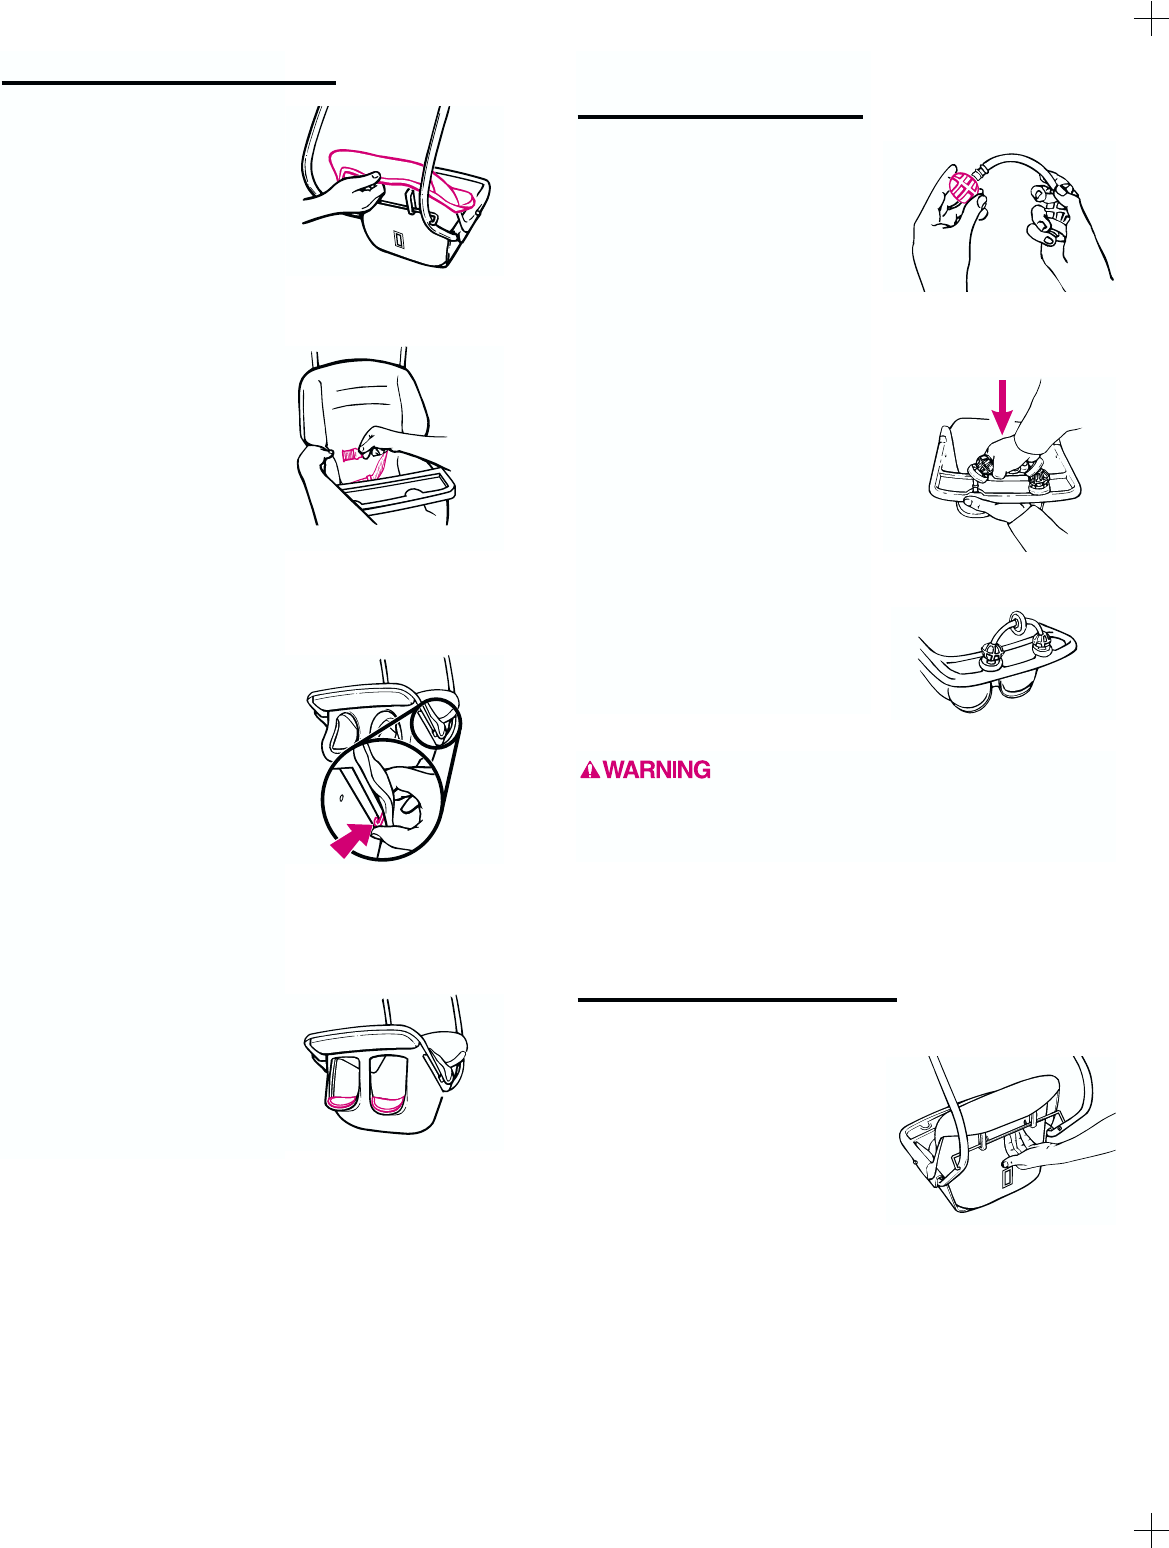
Slide the pocket of the cloth
cover over the top of the seat
as shown.
Step 2.
Push both ends of the waist
belt through the slots in the
cloth cover, and pull the belt
through.
Step 3.
Tuck the rear edges of both
side flaps under back of seat
cover. This will hold the side
flaps in place.
Some cover styles have plas-
tic clips on side flaps. For
these covers only, first wrap
side flaps around the arm-
rests, then push the plastic
clips onto edge of the seat on
both sides as shown.
Step 4.
Pull out edges of seat cover
at leg openings.
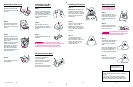
Step 1.
Place the two beads and three
rings on the bar. The suggested
order is ring-bead-ring-bead-
ring. (Once the toy bar is on the
tray, the order cannot be
changed.)
Step 2.
Snap the bar (one end at a
time) into the two U-shaped
holes located on the top front of
the tray.
Step 3.
Finished assembly will look like
illustration.
Starting the Swing
CHECK that all parts are
securely fastened together
before using the swing.
Step 1.
Open the waist belt. Place
baby in the seat. (If your child
is very small, you may want
to use rolled-up blankets as
a prop.)
Step 2.
Fasten the waist belt. Adjust
belt as needed to get a snug
fit around your child.
Step 3.
To start swing, slide the speed
button to the desired speed
and give the swing a gentle
push.
Observe the swinging motion
for a minute. It takes time for
the swing to adjust to a set-
ting. Change setting if needed.
Step 4.
To turn swing off, slide switch
to the center OFF position.
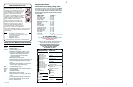
Step 1.
With baby out of swing, open
the battery compartment lid by
inserting a coin (penny, nickel or
dime) into the coin slot. After the
lid pops open, swing it down
and remove it.
Step 2.
Insert four D cells. Alkaline or
Ni-Cad D cells are best.
CHECK that the batteries are
put in correctly. Your swing will
not run if the batteries are put in
backwards.
Step 3.
To replace lid, put the two
tabs of the lid into the two
slots in the bottom of the motor
housing. Swing lid up, and
press it into place until you
hear the latch click.
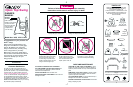
Attaching the Seat Cover Installing the Toy Bar
(on certain models)
Coin
slot
Make sure the toys are properly
assembled before and during use. Do not tie other toys
or objects onto the swing toys. If child is able to
remove the toy bar from the tray, discontinue use.
Installing the Batteries
Do not depend on the tray alone to
hold your baby. Always secure your baby with the
waist belt when your child is in the swing.
Indicator Light-
Red light comes on
when swing is turned on.
Your seat may be stopped at any time the motor is
running without damaging the motor. Push swing
to restart.
If your swing motor stops operating by itself, a
protective device may have been activated. Turn
off motor, wait three minutes, then restart swing.
The seat has two positions,
upright and reclined.
To recline the seat, first lift the
seat wire, then pull the seat
back downward.
For the upright position, just pull
forward on the top of the seat.
Reclining the Seat Back