


2
1. Locate area that can support the wall seat when mounted to the partition.
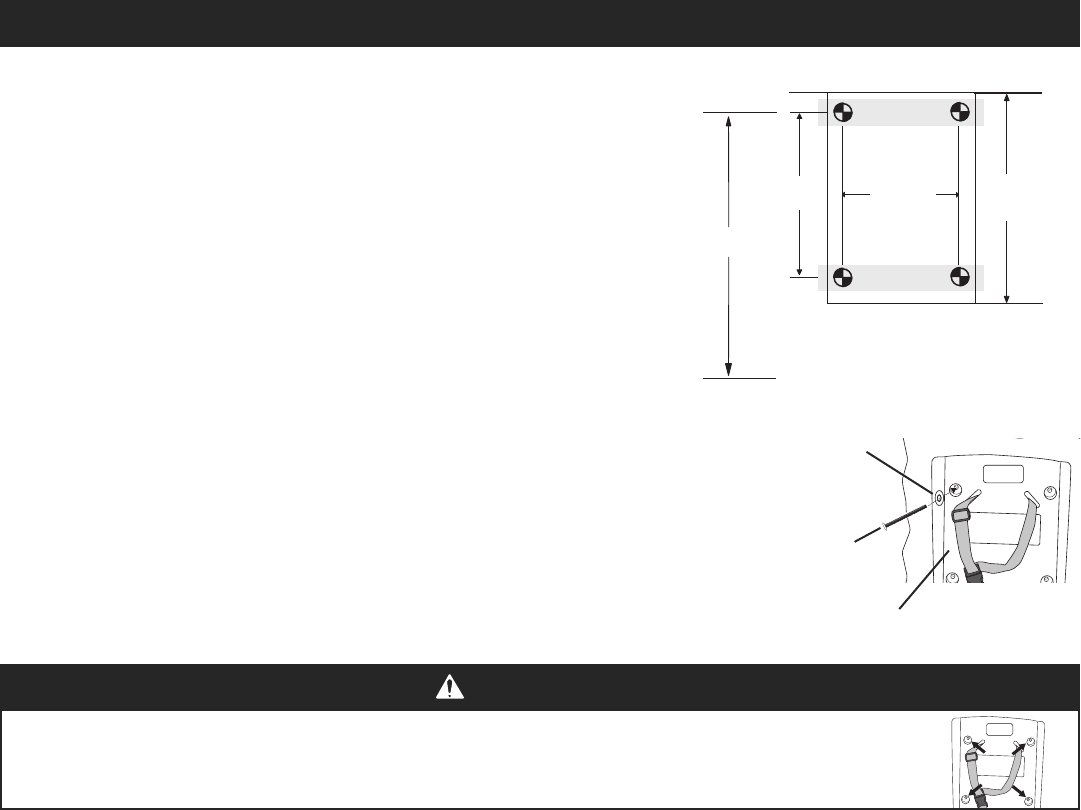
2. Measure up 33” (84 cm) from the floor and mark the partition (Fig. a).
This locates the position for the top left attachment hole.
3. Align hole in top left corner of wall seat with mark on partition and hold in place.
4. Using a level and measuring tape, mark the remaining three (3) holes. After
marking holes, set wall seat down on ground.
5. Use a power drill and 3/8” bit to drill four (4) holes through partition a mounting
points.
6. From opposite side of partition, insert four (4) T-nuts into mounting holes.
7. Align holes in wall seat with drilled holes and secure top left corner of wall seat
to partition using a machine screw and flat washer into the T-nuts. Continue to
secure the three (3) remaining corners using the machine screws and flat
washers into the T-nuts (Fig. b).
8. Ensure all four (4) screws are tight and snap caps over screw heads.
NOTE: Operate seat three (3) or four (4) times to ensure proper function.
OPERATION:
Rotate base downward. Place infant on top of the changing surface. Use restraint system as described below. After child has been
changed, remove restraint system and rotate base back up against the wall.
USE OF RESTRAINT SYSTEM:
Place child on wall seat. Place restraint system over child shoulders and buckle between child’s legs. Insert buckle tongue into buckle
and snap together. To tighten or loosen straps, slide adjuster up or down strap. To remove restraint system, press sides of buckle to
release tongue and pull tongue out of buckle.
MAINTENANCE AND CLEANING:
Check all hardware and components monthly or as required to ensure hardware is tight and there are no missing or damaged
components. Take unit out of service if any component is missing or damaged and contact customer service to order replacement
parts. Do not substitute parts. For replacement parts, contact customer service at 1-877-716-2757.
Clean by using a damp cloth with mild soap or mild multi-purpose cleaner. Do not use any strong chemical cleaners or
cleaning agents that may be hazardous to children.
INSTALLATION
Fig. b
Wall Seat
Machine
Screw
Flat
Washer
•
All 4 of these locations MUST be used for safe installation.
WARNING
8"
(203 mm)
8 1/2”
(216 mm)
T
op
16-5/16"
(414 mm)
33”
(84 cm)
A
. F. F
Fig. a