


6
9
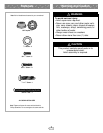
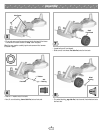
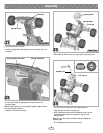
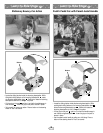
• Fit a .354" cap nut onto the end of the front axle.
• Cover the cap nut with the assembly tool. Tap the cap nut assembly
tool with a hammer to secure the cap nut to the front axle.
• Pull on the small, front wheel to be sure it is secure on the front axle.
10
11
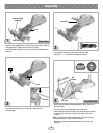
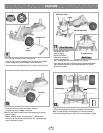
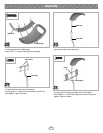
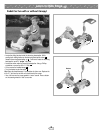
• Lift the back end of the
frame up slightly.
• Position the bouncer
base/spoiler so that the
columns are upright and
the “U” shaped cut-out is toward the back of the vehicle.
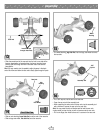
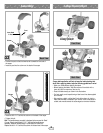
• Now, lower the back end of the frame onto the bouncer base/spoiler
tabs. Make sure the tabs on the bouncer base/spoiler fit into the
grooves in the frame.
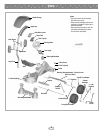
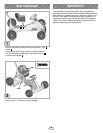
Assembly
.354"
.354"
Cap Nut
Assembly Tool
Axle Cover
• Fit an axle cover to the small, front wheel, as shown.
• Push the axle cover to “snap” it into place.
Hint: You may need to carefully tap the axle covers with a hammer
to secure in place.
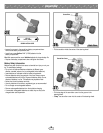
• Repeat assembly steps 6-10 to assemble a
5
/
16
" washer, axle
bushing, small, front wheel, wheel bushing, .354" cap nut and axle
cover to the other front axle.
Back End of Frame
Groove
Tabs
Bouncer Base/Spoiler
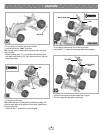
12
• Fit the frame bushings into the slots in the back end of the frame.
Hint: The frame bushings are designed to fit in the slots one way!
If the frame bushing does not fit in the slot, turn it around and try again.
Frame Bushing
“U” Shaped Cut-Out
Back View
Frame Bushing
Rear Side View