2
2
2
4
Assembly
IMPORTANT! Before each use or assembly, inspect this product for damaged hardware,loose joints, missing parts or sharp
edges.DO NOT use if any parts are missing or broken. Contact Fisher-Price® for replacement parts and instructions if needed.
Never substitute parts.
2
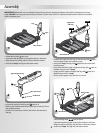
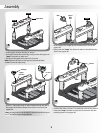
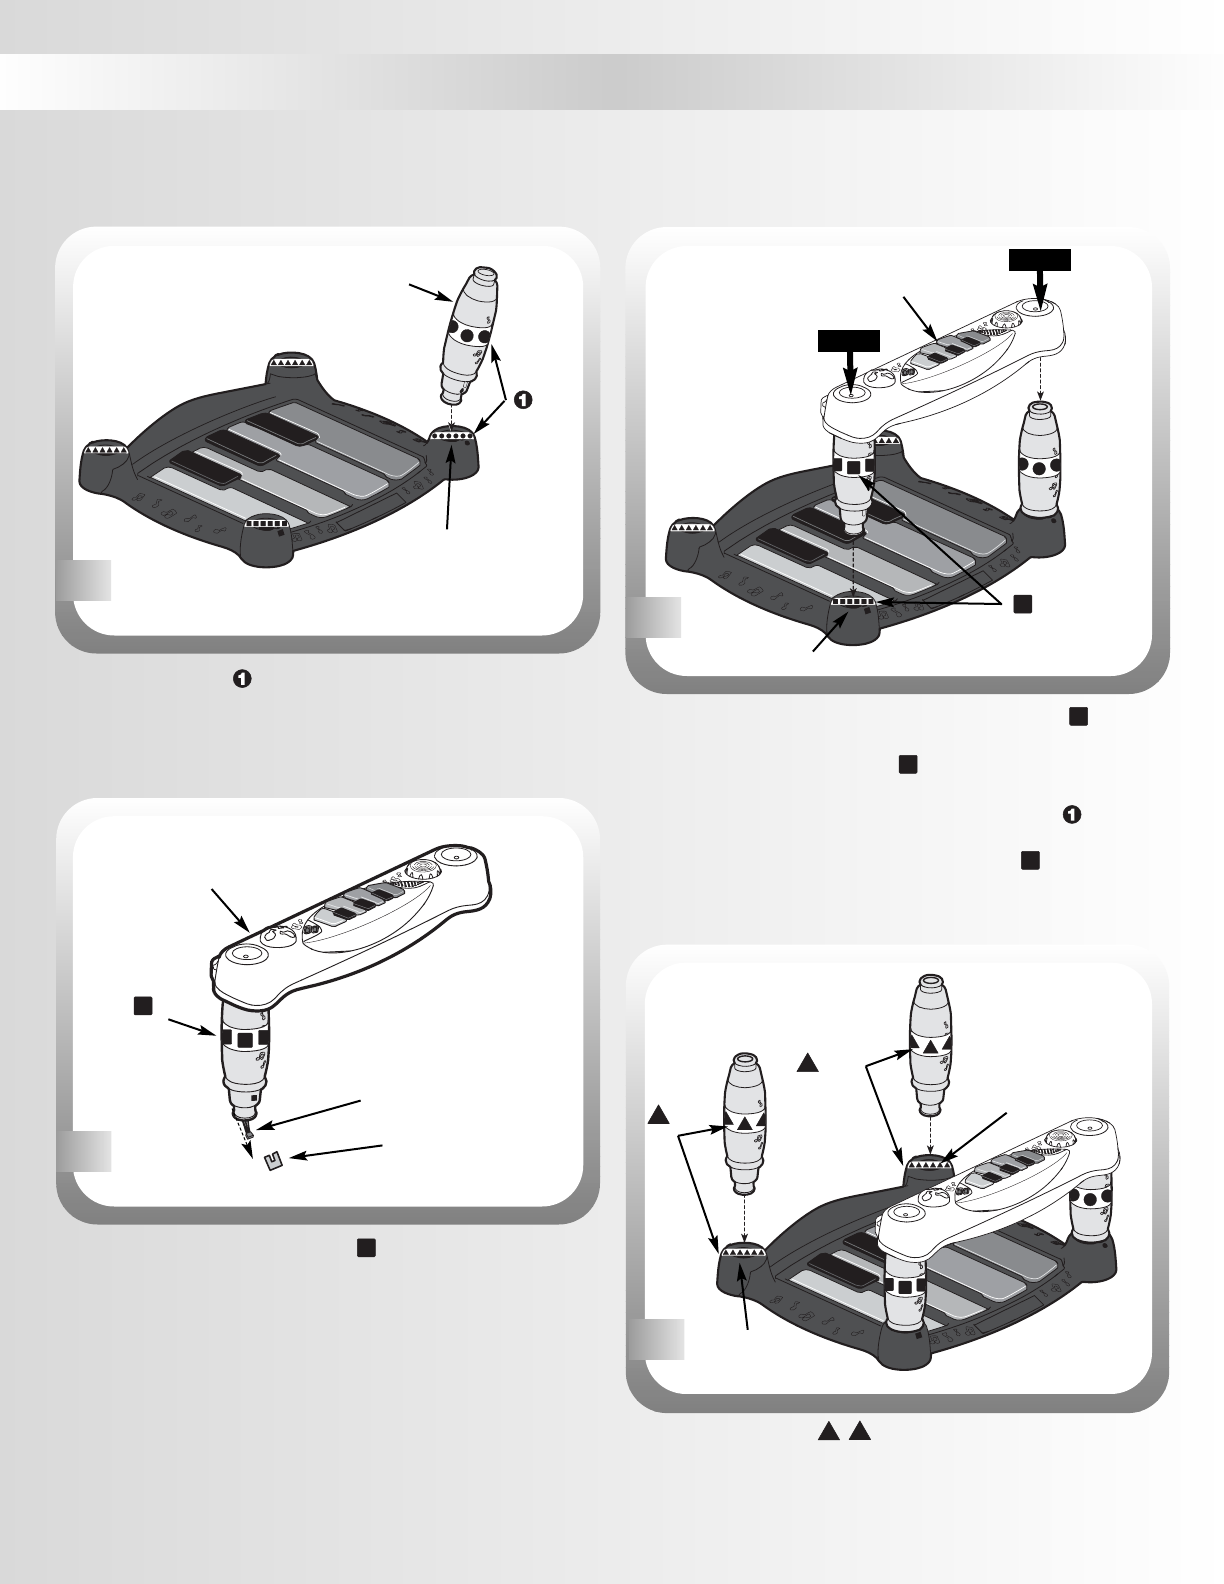
•Locate the leg with tape on it.
•Locate the matching tape covering the socket in the base.
•Align the tab on the leg with the slot in the base socket.
• Insert and “snap” the leg into the base socket.
4 4 4 4 4 4
3 3 3 3 3 3
2 2 2 2 2 2
111111
1
1
1
1
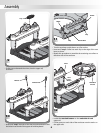
•Locate the upper rail with leg and tape on it.
•Remove the cardboard attached to the wire connector.Throw
the cardboard away.
•Pull the wire connector out from the hole in the bottom of
the leg.
2
Tape
Base Socket
Wire Connector
Tape
2
Upper Rail with Leg
Cardboard
Leg
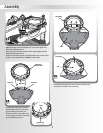
•Position the upper rail with leg so that the leg with tape is
over the base socket with matching tape.
• Insert and “snap” the leg with tape into the socket with
matching tape.
•Now, firmly push the upper rail above the leg with tape on
it.Make sure you hear a“snap”.
•Firmly push the upper rail above the leg with tape on it.
Make sure you hear a “snap”.
•Pull up on the upper rail to be sure it is secure.
2
2
2
4 4 4 4 4 4
2
2
2
1
1
1
3 3 3 3 3 3
2 2 2 2 2 2
3
Upper Rail
with Leg
Base Socket
PUSH
PUSH
Tape
2
1
1
1
2
2
2
3
3
3
4
4
4
4 4 4 4 4 4
3 3 3 3 3 3
4
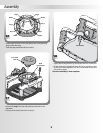
Base Socket
Base Socket
•Locate the legs with tape on them.
•Locate the matching tape covering the sockets in the base.
•Align the tabs on the legs with the slots in the base sockets.
• Insert and “snap” the legs into the base sockets.
4
3
Tape
4
Tape
3


