• Fit a ring into the hole in the mirror.
• Clip a ring to each of the hangers.
• Attach a ring or key to the ring or mirror.
Hint: Adjust the height of these toys, as
baby grows.
10
10
Hangers
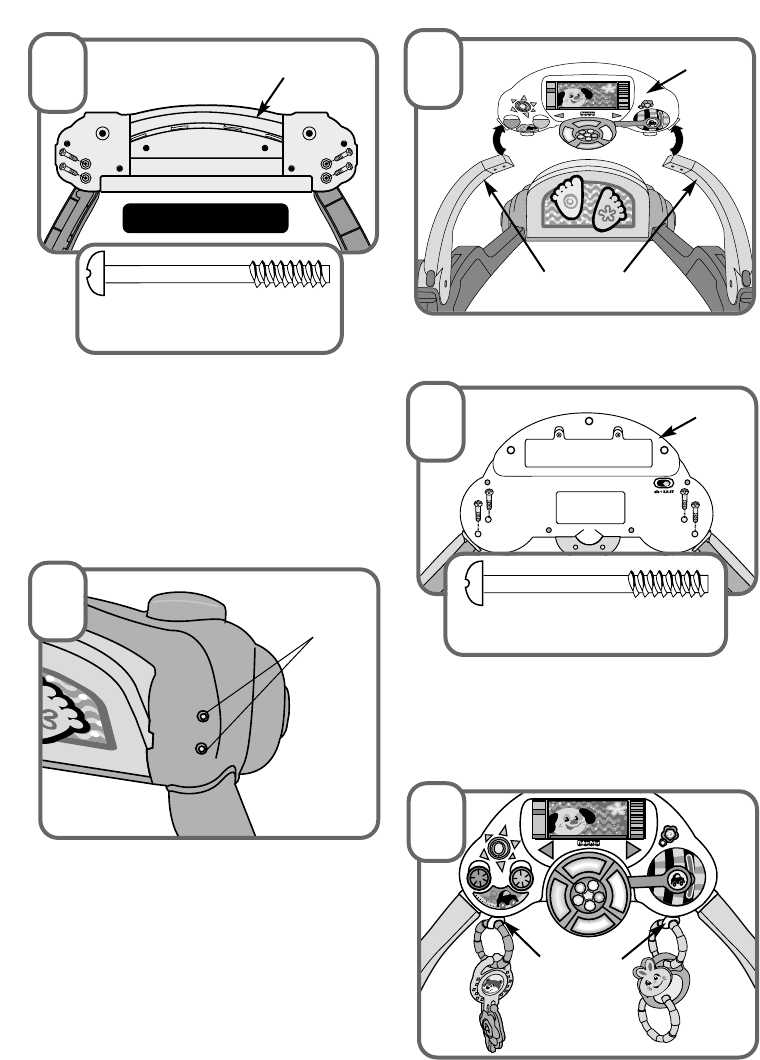
• Turn the bumper over, so that the bottom
is facing you.
• Be sure the screw holes in the base and
bumper assembly are aligned.
• Insert four #8 x 1
9
/
16
" screws through the
holes in the bumper assembly and into
the base.Tighten the screws with a
Phillips screwdriver. Do not over-tighten.
6
6
#8 x 1
9
/
16
" Screw
Shown Actual Size
Bottom View
Bumper
7
7
Screws
Visible
• Look into the two holes on each end of
the bumper. If the screws were inserted
properly in this step, they should be
visible in the holes.
• If the screws are not visible, remove the
four screws. Repeat step 6 making sure
the end of the base is fully inserted into
the bumper assembly with no gaps
between the two parts.
Hint: You may feel some resistance.
Press firmly.
• From the back of the dashboard, insert
four #8 x 1
9
/
16
" screws through the
holes in the dashboard and into the
arms.Tighten the screws with a Phillips
screwdriver. Do not over-tighten.
9
9
#8 x 1
9
/
16
"Screw
Shown Actual Size
Dashboard
5
• Fit the ends of the arms into the holes
in the bottom of the dashboard.
8
8
Support
Arms
Dashboard


