


TRAXXAS
•
5
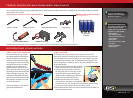
TOOLS, SUPPLIES AND REQUIRED EQUIPMENT
Your model comes with a set of specialty metric tools. You’ll need to purchase other items, available from your hobby dealer, to operate
and maintain your model.
REQUIRED EQUIPMENT
(sold separately)
Recommended Equipment
These items are not required
for the operation of your
model, but are a good idea to
include in any R/C toolbox:
• Safety glasses
• Thin, hobby-quality
cyanoacrylate instant tire
glue (CA glue)
• Hobby knife
• Side cutters and/or needle
nose pliers
• Philips screwdriver
• Soldering iron
For more information on
batteries, see Use the Right
Batteries on page 11.
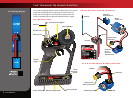
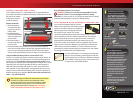
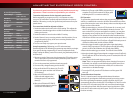
SUPPLIED TOOLS AND EQUIPMENT
2.0mm “T” wrench 4-way wrench2.5mm ball driver wrench1.5mm “L” wrench
Body clips
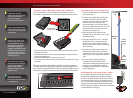
6-cell 2/3A NiMH battery
TRAXXAS
NiMH battery charger
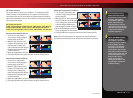
APPLYING THE DECALS
The main decals for your model
have been applied at the factory.
The decals are printed on self-
adhesive clear mylar and are die-
cut for easy removal. Use a hobby
knife to lift the corner of a decal
and lift it from the backing. To
apply the decals, place one end
down, hold the other end up, and
gradually smooth the decal down
with your finger as you go. This
will prevent air bubbles. Placing
both ends of the decal down and
then trying to smooth it out will
result in air pockets.
Look at the photos on the box for
typical decal placement.
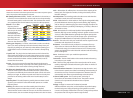
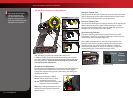
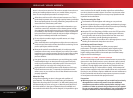
TIRE GLUING
The factory tires on your model are not glued to the rims. The
instructions here are provided to show you how to glue tires to the
rims if desired, but it is not necessary to run your model. If you plan
to upgrade to the Velineon VXL-3m Brushless Power System in the
future, tire gluing is mandatory. Use CA tire glue available from your
local hobby dealer.
1. Remove a wheel from the model using the
larger (7mm) end of the universal wrench.
2. Use your thumb to push the side of the
tire away from the rim. Place one or two
drops of CA glue into the opening and
release the tire. Capillary action will draw
the glue around the bead of the tire.
3. Repeat step two at four or five points
around the rim, until the tire is completely
secured to the rim. Turn the rim over and repeat the process for the
inside of the rim/tire. Repeat for the other three wheels.
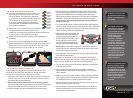
4. Reinstall the wheels, make sure none of the axle pins have fallen out
from behind the hex hubs.
DECORATING YOUR MODEL
WARNING: Lithium Polymer (LiPo) packs should not be used with the XL-2.5 speed control. The XL-2.5 speed control is not equipped with low-voltage detection.
9
8 AA alkaline
batteries