


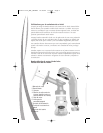
Disassemble the Electric Breast Pump
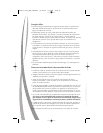
Step 1. Unscrew the Bottle.
Step 2. Remove the honeycomb Liner
(see photo).
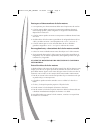
Step 3. Hold Connector and turn the Motor Case
to the unlocked position (see photo).
Cleaning Instructions
Gently wash the Liner, Connector and Bottle
in warm soapy water and rinse. Ensure all parts
are rinsed thoroughly, then air or towel dry.
To clean the Motor Case, wipe down with a damp cloth. Be careful not
to dislodge the purple rubber plugs. Do not remove purple rubber plugs.
Do not immerse the M
otor Case in wat
er or liquids.
Note: You may boil the Liner, Connector and Bottle…but normal hand washing
is just fine. If you choose to boil these parts, no more than 3 minutes
is
needed. These parts are dishwasher safe, however dishwashers are harsh on
plastic and will eventually reduce performance. Microwave sterilization is not
recommend as it may reduce the performance of this product.
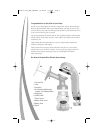
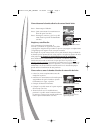
Reassemble the Electric Breast Pump
1. Wash your hands thoroughly before handling
parts.
2. Insert the honeycomb Liner, insuring that the
edges snap firmly into place.
3. Screw the Bottle in firmly.
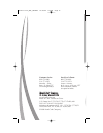
4. Place the Motor Case onto the Connector top
(see photo).
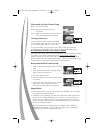
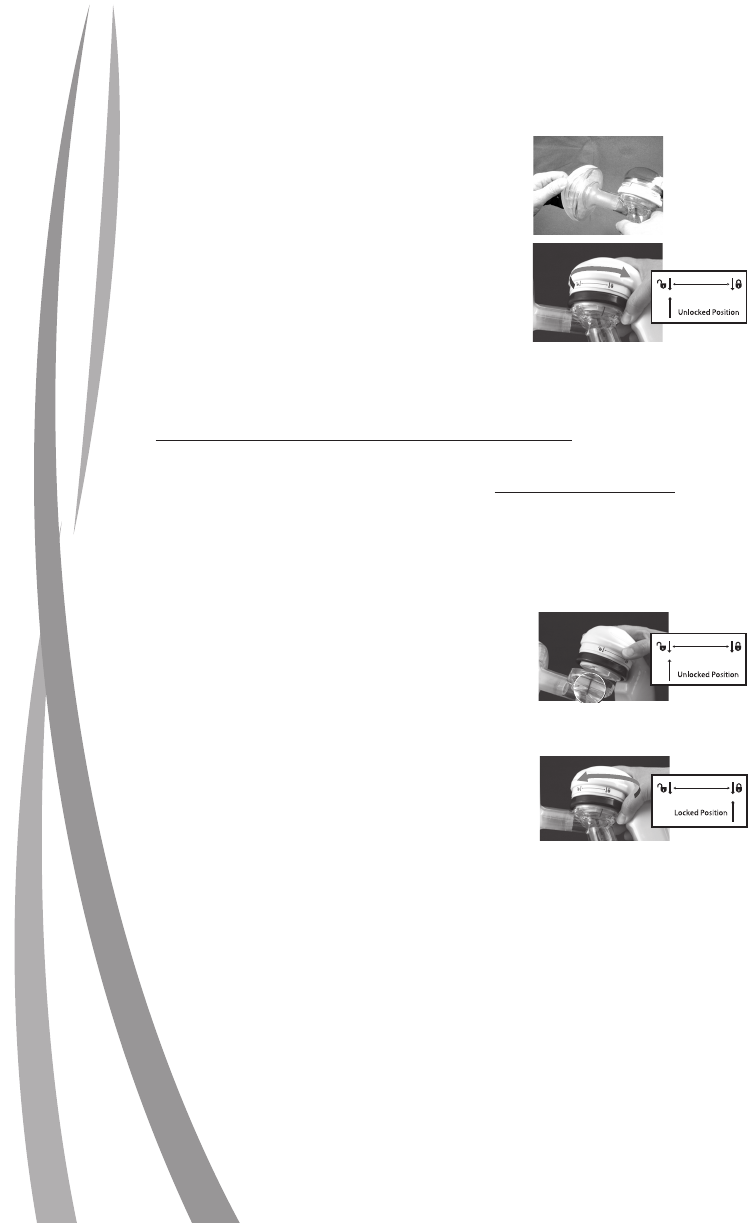
5. Align arrow with open padlock, press Motor
Case firmly onto Connector, then turn
clockwise to locked position (see photo).
Helpful Hints:
• Always examine the pump for firm and proper fit BEFORE USE. An airtight
fit is essential for proper operation.
• At different vacuum settings, you may notice different sounds coming from
the pump. For example, when the Vacuum Dial is at a lower setting, you
may hear an airy, wheezing noise as the pump operates. This is perfectly
normal. At higher settings on the Vacuum Adjustment Dial, you may notice
that the air noises discontinue.
• The honeycomb Liner should be kept in its original shape. If folded or
crimped for long periods, it will stay that way. If this occurs, submerge it
in boiling water until the original shape returns.
Twist motor case counter-clockwise to unlock.
Line up arrows in starting position
Twist the Motor Case clockwise to lock
handi-113-06_EBP_INSTRUC 10/20/06 2:40 PM Page 4