


CCH00701:09/00
3
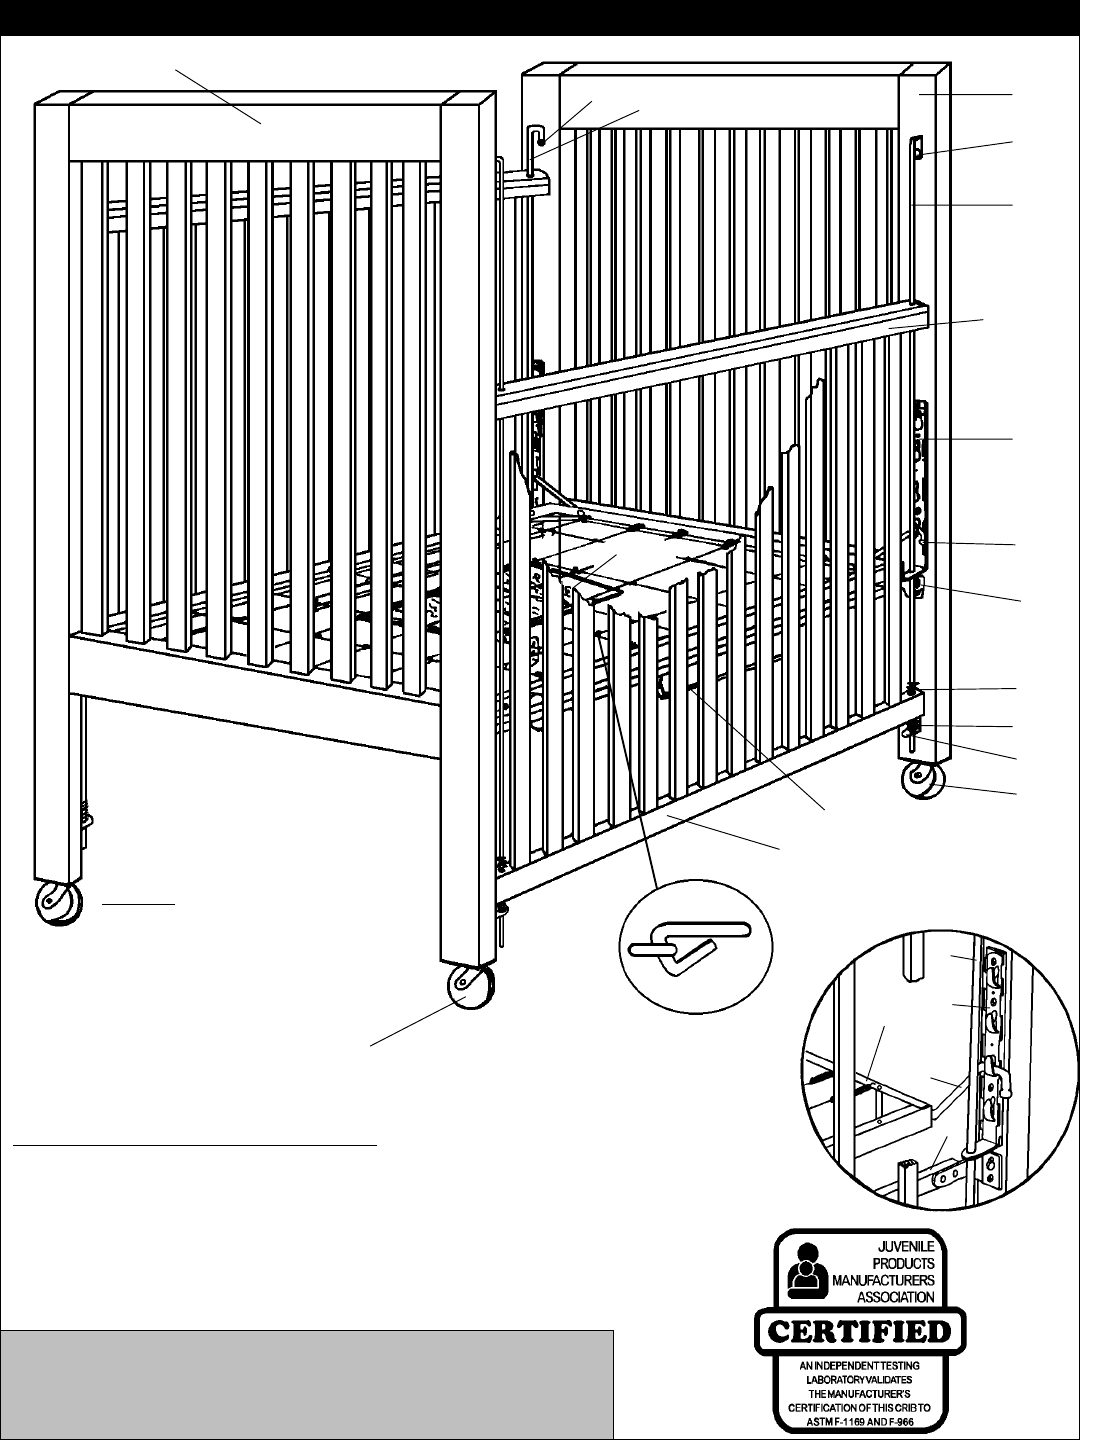
MAIN DIAGRAM 6
Locate the 4 Casters
HH
HH
H, insert each into a
lower corner post of Headboard
NN
NN
N/Footboard
OO
OO
O. Refer to Main Diagram 6.
(Caster
HH
HH
H
design may possibly vary according to your
particular crib model.)
CAUTION:
If crib is placed on exception-
ally thick carpet, take care when crib is
rolled as Casters
HH
HH
H
could catch on thick
carpet pile and possibly cause breakage
or damage to lower corner posts of crib.
Permanent Storage of Assembly Instructions: After completing the assembly
process you are advised to read and be aware of all WARNINGS, CAUTIONS,
CLEANING, STORAGE, USE, and MAINTENANCE notices contained in this set of
assembly directions and printed on the plastic pouch located on the underneath side of
crib spring. You will then place this complete set of assembly directions into the plastic
pouch for future referral. We caution you not to place excess hardware in the plastic
pouch as it could present danger to a small child if retrieved.
Place a purchased mattress on Crib Spring
RR
RR
R and crib is ready for use.
TO RAISE & LOWER CRIB DROPSIDE: To lower lift the dropside
slightly, push the foot latch toward the inside of crib which will release
the dropside to the lowest or "DOWN" position. To raise the dropside,
lift up on the dropside, rail will then lock into the "UP" position.
A
K
D
J
F
G
I
H
P / Q
R
B
O
N
A
K
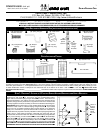
Top rail
P / Q
Bottom rail
Plastic
pouch
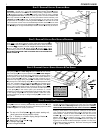
CRIB SPRING
RR
RR
R:
Be sure the smooth side of wire is
placed up as illustrated. Also,style
of Crib Spring
RR
RR
R may differ with
your model of crib.
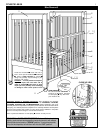
H
Hook end
down
Foot latch
CLOSE UP VIEW
B
D
K
N/O Corner Post
J
TIGHTEN SCREW
AA
AA
A MANUALLY, DO NOT USE ANY TYPE OF POWER SCREWDRIVER.