


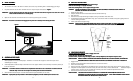
- 7 - - 8 -
C.C. WEATHER COVER INSTRUCTIONSWEATHER COVER INSTRUCTIONS
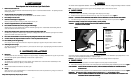
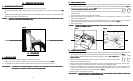
1. Attach the loops from the back corner of the weather cover over the aluminum sleeves located at the upper rear section of the
carrier. Figure 6.Figure 6.
2. Fasten the front corners of the weather cover to the snaps located on the front lower corners of the frame.
WARNING!WARNING! FAILURE TO USE THE WEATHER COVER WILL EXPOSE YOUR CHILD TO ROCKS, INSECTS, AND OTHER DEBRIS.FAILURE TO USE THE WEATHER COVER WILL EXPOSE YOUR CHILD TO ROCKS, INSECTS, AND OTHER DEBRIS.
PERIODICALLY MONITOR YOUR CHILD TO ENSURE THAT HE/SHE IS COMFORTABLE IN TERMS OF TEMPERATURE.PERIODICALLY MONITOR YOUR CHILD TO ENSURE THAT HE/SHE IS COMFORTABLE IN TERMS OF TEMPERATURE.
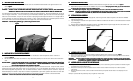
Your Chariot Carrier has climate control features designed to regulate your child's temperature. During cooler temperatures, use the rain
cover to keep your child warmer. If this is too warm or you are worried about ventilation, open one or both of the small red triangular
side vents. For more ventilation, roll up the rain cover and secure it by looping the elastic loops around its ends. If it is bright outside or
the sun is bothering your child, use the back panel as a sunscreen. To do so, remove the weather cover, flip the back panel over the front
of the trailer, secure it to the hook and loop tabs located on the upper frame, and re-install the weather cover.
IMPORTANT:IMPORTANT: Read the safety guidelines (pg.11) before using your Chariot Carrier.Read the safety guidelines (pg.11) before using your Chariot Carrier.
Figure 6Figure 6
C.C. MONTAGE DE LA TOILE DE RECOUVREMENTMONTAGE DE LA TOILE DE RECOUVREMENT
1. Fixer les boucles du coin arrière de la toile de recouvrement sur les embouts en aluminium supérieurs situés à l'arrière de la
poussette. Figure 6.Figure 6.
2. Fixer les coins avant de la toile de recouvrement au moyen des boutons-pression qui se trouvent sur le cadre au coins inférieures en
avant.
MISE EN GARDE!MISE EN GARDE! SI VOUS NE VOUS SERVEZ PAS DE LA TOILE DE RECOUVREMENT FOURNIE, VOTRE ENFANT SERA EXPOSÉ AUXSI VOUS NE VOUS SERVEZ PAS DE LA TOILE DE RECOUVREMENT FOURNIE, VOTRE ENFANT SERA EXPOSÉ AUX
ROCHES, AUX INSECTES ET À D'AUTRES DÉBRIS. VÉRIFIER RÉGULIÈREMTENT L'ENFANT POUR ASSURERROCHES, AUX INSECTES ET À D'AUTRES DÉBRIS. VÉRIFIER RÉGULIÈREMTENT L'ENFANT POUR ASSURER
QU'IL/ELLE NE SOUFFRE PAS DE LA CHALEUR OU DU FROID.QU'IL/ELLE NE SOUFFRE PAS DE LA CHALEUR OU DU FROID.
Votre Chariot Carrier offre mesures de régulation de la température pour garantir le confort de votre enfant. Lorsqu'il fait froid, utiliser la
housse anti-pluie pour garder l'enfant bien au chaud. S'il fait trop chaud, ou s'il n'y pas suffisamment de ventilation, ouvrir l'une ou les
deux fenêtres triangulaires rouges latérales. Pour une meilleure ventilation, enrouler la housse anti-pluie et l'attacher au moyen des
boucles élastiques qui se trouvent à chaque bout. Si le soleil est trop éblouissant et gène l'enfant, passer le rabat arrière vers l'avant de la
remorque et le fixer au moyen des crochets et boucles situés sur le cadre supérieur, puis poser à nouveau la toile de recouvrement.
IMPORTANT:IMPORTANT: Prière de lire Prière de lire attentivement attentivement les instructions les instructions avant avant d'utilser d'utilser votre votre poussette.poussette.
D.D. HANDLEBAR INSTRUCTIONSHANDLEBAR INSTRUCTIONS
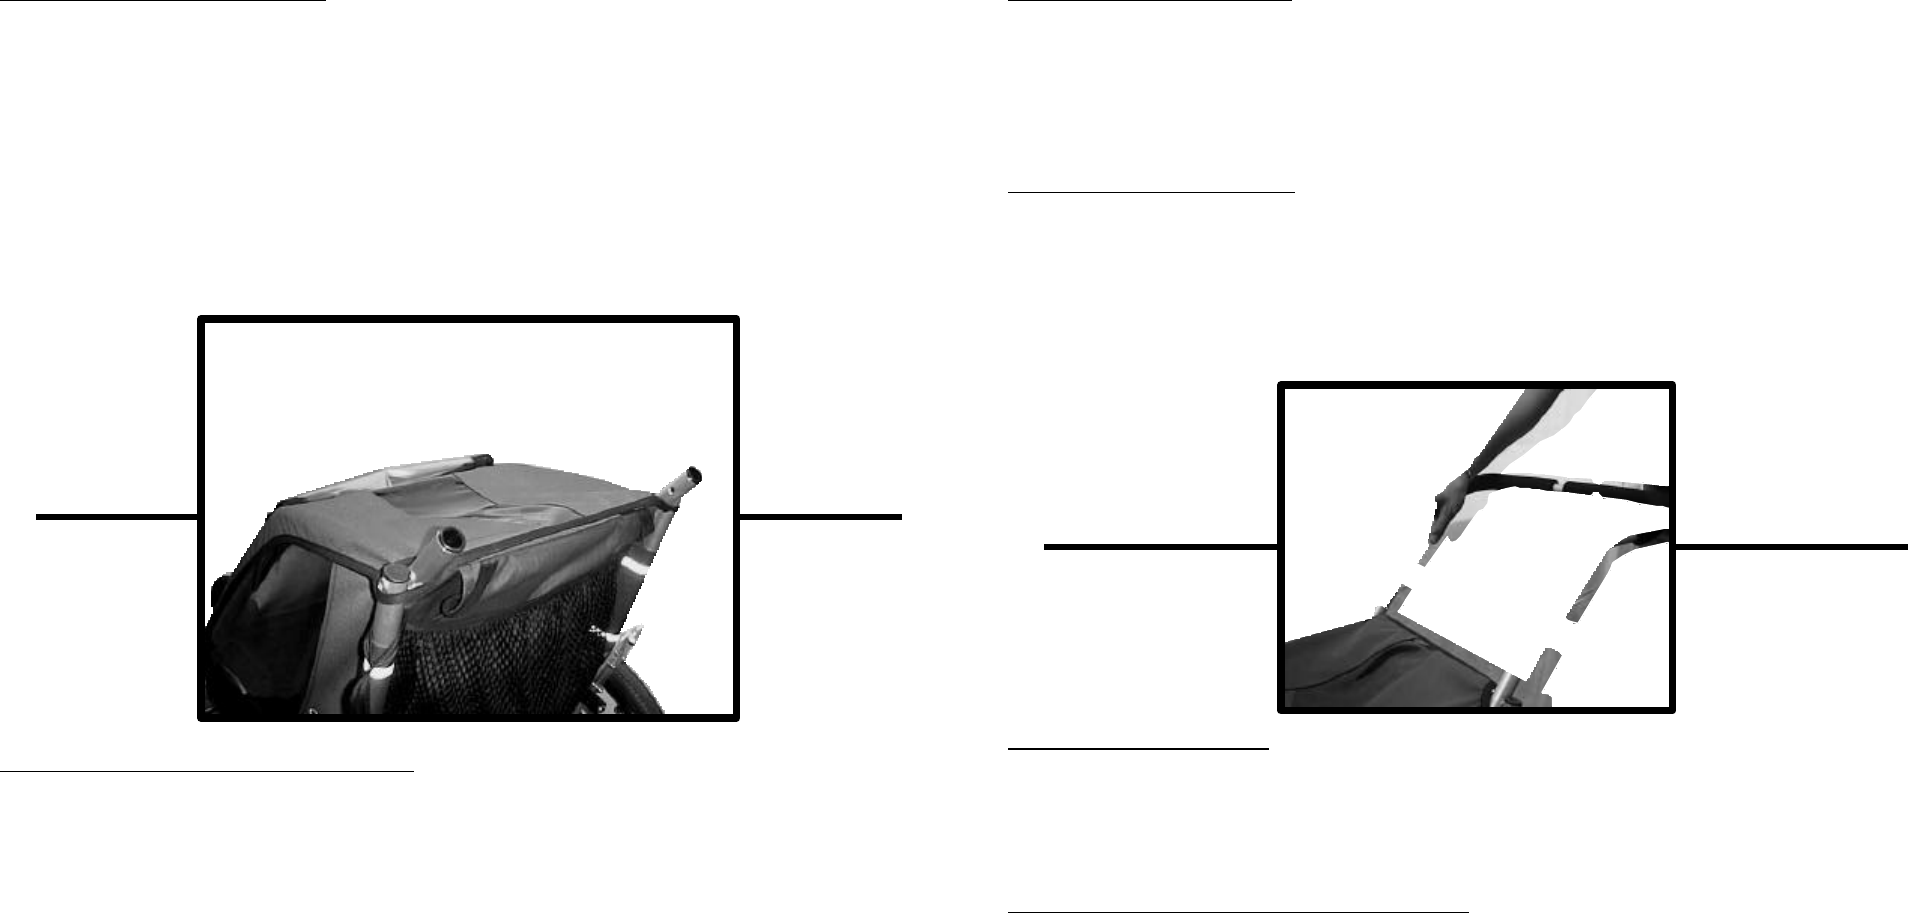
1. Insert both ends of the handlebar into the aluminum sleeves located at the upper rear section of the carrier. Figure 7 Figure 7.
2. Depress both spring buttons and insert the handlebars fully into the sleeves. Both spring buttons must 'pop' out the holes locatedBoth spring buttons must 'pop' out the holes located
on the inner side of the sleeves to secure the handlebar in place.on the inner side of the sleeves to secure the handlebar in place.
Note:Note: The handlebar height is adjustable. Simply remove the handThe handlebar height is adjustable. Simply remove the handlebar, rotate it 180°, and re-insert the handlebar into the sleeves.lebar, rotate it 180°, and re-insert the handlebar into the sleeves.
WARNING!WARNING! FAILURE TO PROPERLY INSTALL THE HANDLEBARS OR USE THE WRIST SAFETY STRAP COULD CAUSE THE CARRIERFAILURE TO PROPERLY INSTALL THE HANDLEBARS OR USE THE WRIST SAFETY STRAP COULD CAUSE THE CARRIER
TO BECOME SEPARATED FROM YOU, RESULTING IN AN ACCIDENT AND SERIOUS INJURY.TO BECOME SEPARATED FROM YOU, RESULTING IN AN ACCIDENT AND SERIOUS INJURY.
E.E. STOSTORAGE POUCH ASSEMBLYRAGE POUCH ASSEMBLY
1. With the opening of the storage pouch facing upwards, fasten the right and left sides of the pouch to the sides of the handlebar
ends using the Velcro tabs.
2. Loop the webbing on the bottom of the pouch around the middle of the hollow axle and fasten it to the buckle located at the bottom
of the storage pouch.
3. Securely fasten the middle Velcro tab around the centre of the handlebar so that the pouch is tight and will not move while in use.
Note: Readjust the pouch whenever the handlebar height is changed.
Figure 7Figure 7
D.D. ASSEMBLAGE DU GUIDONASSEMBLAGE DU GUIDON
1. Insérer le les deux extrérnités du guidon dans les embouts en aluminium supérieurs situés à l'arrière de la poussette. Figure 7.Figure 7.
2. Appuyer sur les deux boutons à ressort et enfoncer le guidon dans les embouts jusqu'à ce que les deux boutons apparaissent à nouveau dans les
trous situés à l'intérieur des embouts.
REMARQUE:REMARQUE: La hauteur du La hauteur du guidon guidon est est réglable. réglable. Il Il suffit suffit d'enlever le d'enlever le guidon, de le guidon, de le tourner de 180 tourner de 180 degrés et de degrés et de l'insérer à nouveau l'insérer à nouveau dans dans les les embouts.embouts.
MISE EN GARDE!MISE EN GARDE!
SI LE GUIDON ET LA COURROIE DE SÉCURITÉ NE SONT PAS FIXÉS COMME IL FAUT, VOUS POURRIEZ PERDRE CONTRÔLE DESI LE GUIDON ET LA COURROIE DE SÉCURITÉ NE SONT PAS FIXÉS COMME IL FAUT, VOUS POURRIEZ PERDRE CONTRÔLE DE
LA POUSSETTE ET CAUSER UN ACCIDENT OU DES BLESSURES GRAVES.LA POUSSETTE ET CAUSER UN ACCIDENT OU DES BLESSURES GRAVES.
E.E. ASSEMBLAGE DE LA POCHETTE D'ENTREPOSAGEASSEMBLAGE DE LA POCHETTE D'ENTREPOSAGE
1. Lorsque l'ouverture de la pochette d'entreposage est tournée vers le haut, fixer les côtés droit et gauche de la pochette aux extrémités de guidon
correspondantes au moyen des attaches velcro.
2. Faire passer la courroie qui est au bas de la pochette autour du milieu de l’essieu et l’attacher à la boucle qui est au bas de la pochette
d’entreposage.
3. Bien fixer l'attache velcro du milieu au centre de la barre horizontale de sorte que la pochette soit bien tendue et ne se déplace pas en cours
d'utilisation.
Remarque: La pochette doit être ajustée chaque fois que le guidon est monté ou baissé.