


- 9 - - 6 -
IV. OPERATING INSTRUCTIONSIV. OPERATING INSTRUCTIONS
A.A. PARKING BRAKE INSTRUCTIONSPARKING BRAKE INSTRUCTIONS
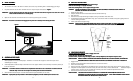
The parking brake is located at the rear of the carrier just above and to the left of the right wheel.
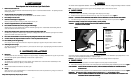
1. Engage the parking brake by pivoting the plastic handle of the brake assembly upwards until it 'snaps' over centre into place. FigureFigure
8.8.
2. Disengage the parking brake by pivoting the plastic handle of the brake assembly downwards all the way to the bottom of the down
stroke to prevent the brake from contacting the tire.
WARNING!WARNING! FAILURE TOFAILURE TO ENGAGE PARKING BRAKE WHEN THE CARRIER IS PARKED COULD CAUSE THE CARRIER TO ROLL AWAY, ENGAGE PARKING BRAKE WHEN THE CARRIER IS PARKED COULD CAUSE THE CARRIER TO ROLL AWAY,
RESULTING IN AN ACCIDENT AND SERIOUS INJURY.RESULTING IN AN ACCIDENT AND SERIOUS INJURY.
Figure 8Figure 8
IV. UTILISATIONIV. UTILISATION
A.A. MONTAGE DU FREINMONTAGE DU FREIN
Le frein est situé à l'arrière de la poussette, au-dessus et à gauche de la roue de droite.
1. Engager le frein en tirant le manche en plastique vers le haut jusqu'au point d'enclenchement complet. Figure 8.Figure 8.
2. Pour désengager le frein, pousser le manche en plastique vers le bas de sorte que le frein ne touche plus au pneu.
MISE EN GARDE!MISE EN GARDE! SI LE FREIN N'EST PAS ENGAGÉ LORSQUE LA POUSSETTE EST STATIONNÉE, CELLE-CI EST SUSCEPTIBLE DESI LE FREIN N'EST PAS ENGAGÉ LORSQUE LA POUSSETTE EST STATIONNÉE, CELLE-CI EST SUSCEPTIBLE DE
S'ÉLOIGNER ET DE CAUSER UN ACCIDENT OU DES BLESSURES GRAVES.S'ÉLOIGNER ET DE CAUSER UN ACCIDENT OU DES BLESSURES GRAVES.
B.B. WHEEL ASSEMBLY CONT.WHEEL ASSEMBLY CONT.
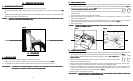
4. Insert wheel arms into the wheel arm attachment brackets. When inserted properly the brackets attached to the wheel arms should be
located below the arms and the end cap on the wheel arms should be seen from the back of the wheel arm attachment brackets. Figure 4.Figure 4.
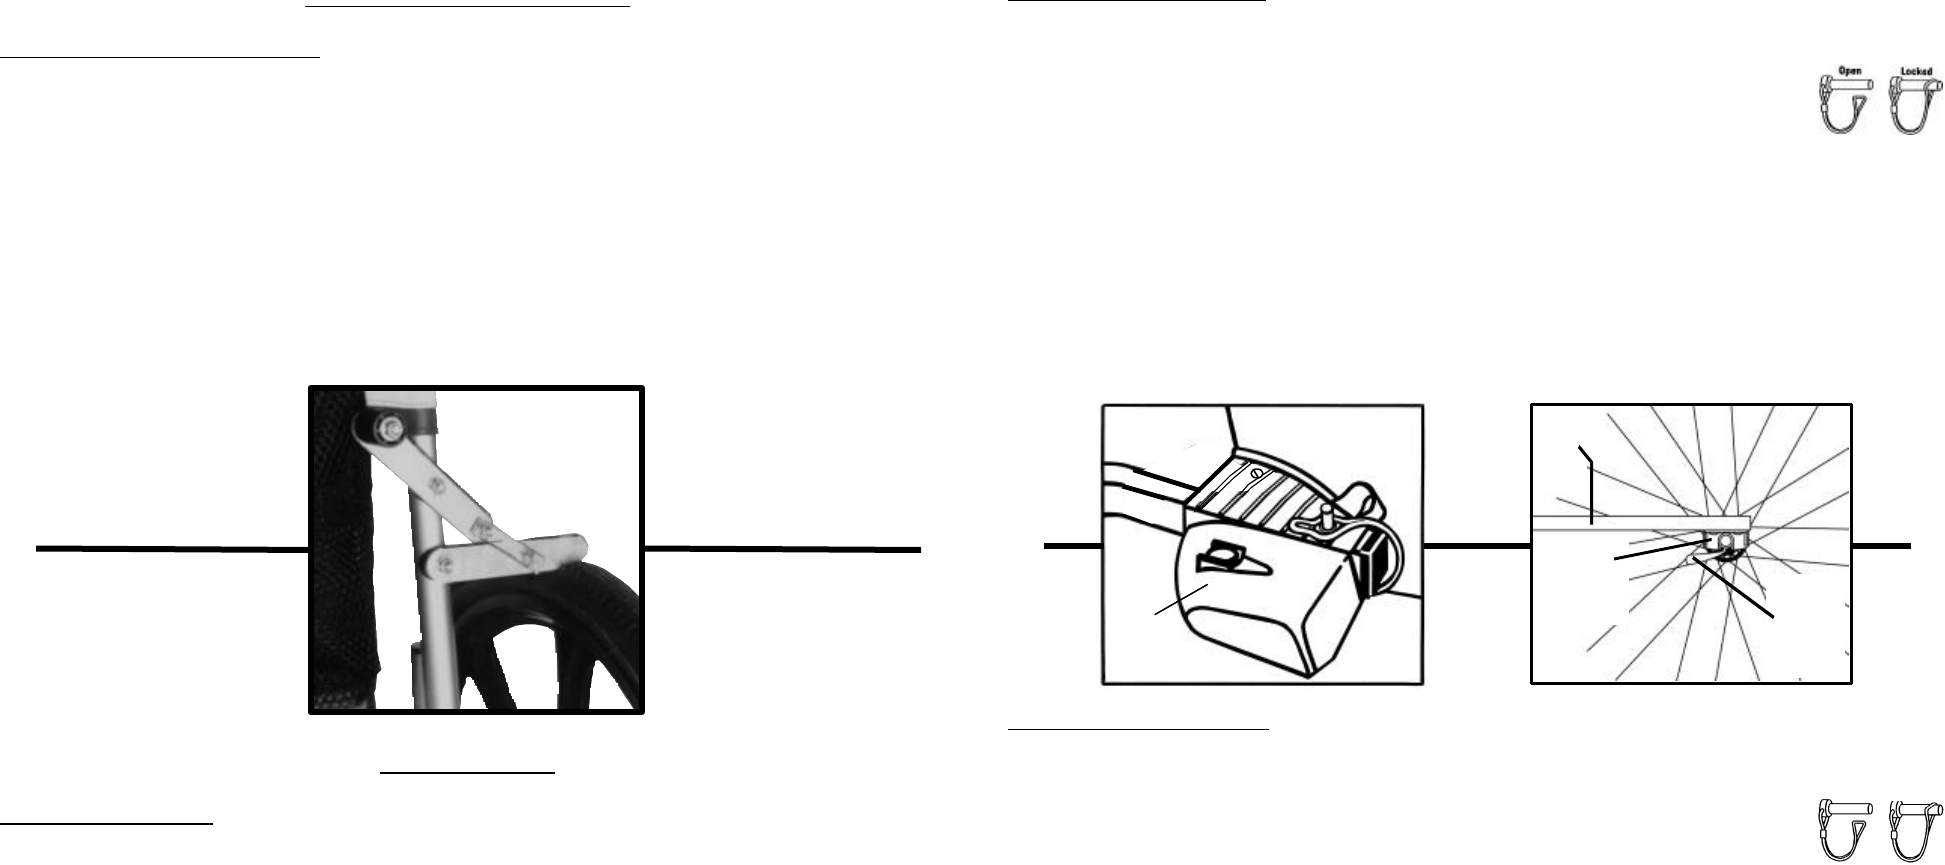
5. Insert both safety snap pins up through the holes in BOTHBOTH the wheel arm attachment bracket and the wheel arm.
Lock safety snap pins by securing the clip over the pin.Lock safety snap pins by securing the clip over the pin.
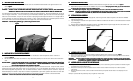
6. Install the quick release axle through the wheel's axle with a spring on each side of the wheel and screw the nut
onto the other side.
7. Slide the wheel axle all the way into the wheel bracket dropouts.
8.
With the quick release lever opened 90 degrees to the wheel brackets (i.e. pointing straight out), hand tighten the nut on the back
side of the quick release skewer.
9. Close the quick release lever by pushing it flat against the wheel bracket. When the nut is properly adjusted, you will feel resistance
halfway through tightening the lever. Make sure the lever is closed towards the back of the carrier. Figure 5.Figure 5.
10. Inflate tires to 30-35 p.s.i.
WARNING!WARNING! FAILURE TO PROPERLY ATTACH WHEEL ASSEMBLY COULD CAUSE THE WHEELS TO FALL OFF, RESULTING IN ANFAILURE TO PROPERLY ATTACH WHEEL ASSEMBLY COULD CAUSE THE WHEELS TO FALL OFF, RESULTING IN AN
ACCIDENT AND SERIOUS INJURY.ACCIDENT AND SERIOUS INJURY.
Figure 4Figure 4 Figure 5Figure 5
B.B. ASSEMBLAGE DES ROUESASSEMBLAGE DES ROUES
4. Insérer les bras de roues dans les fixations des bras de roues. Si elles sont posées comme il faut, les pattes de fixation des roues devraient
être situées sous les bras de roues et l'embout du bras devrait être visible à l'arrière de les fixations des bras de roues. Figure 4.Figure 4.
5. Insérer la goupille de sécurité au travers des trous des fixations ET des bras de roues. Fixer la boucle Fixer la boucle sur lasur la
goupille de goupille de sécurité.sécurité.
6. Fixez l’essieu à dégagement rapide dans l’essieu creux dans la roue, en gardant un ressort de chaque côté de la
roue et en vissant un boulon de l’autre côté.
7. Après avoir placé le levier de dégagement rapide en position ouverte à 90º sur les supports de montage de la roue (c'est-à-dire pointé
directement vers l'extérieur), resserrez à la main l'écrou à l'arrière de la cheville de dégagement rapide.
8. Fermez le levier de dégagement rapide en le poussant à plat contre les supports de montage de la roue. Pour vous assurer que l'écrou
est bien ajusté, vous devez sentir une résistance jusqu'à mi-chemin lorsque vous poussez le levier contre la roue. Assurez-vous que
lorsqu'il est repoussé, le levier pointe vers l'arrière de la poussette. Figure 5.Figure 5.
9. Gonflez les pneus à une pression de 30 à 35 lb/po2.
MISE EN GARDE!MISE EN GARDE! SI LES ROUES NE SONT PAS FIXÉES COMME IL FAUT, ELLES POURRAIENT SE DÉTACHER DE LA POUSSETTE ETSI LES ROUES NE SONT PAS FIXÉES COMME IL FAUT, ELLES POURRAIENT SE DÉTACHER DE LA POUSSETTE ET
CAUSER UN ACCIDENT OU DES BLESSURES GRAVES.CAUSER UN ACCIDENT OU DES BLESSURES GRAVES.
Quick Release
Lever
Tige à
déclenchement
rapide
Wheel Bracket
Support de
montage de
la roue
Wheel
Arm
Bras de
roue
Wheel arm
attachment
bracket
Fixation du
bras de
roue
OuvertOuvert VerouilléVerouillé