


ENGLISH
3
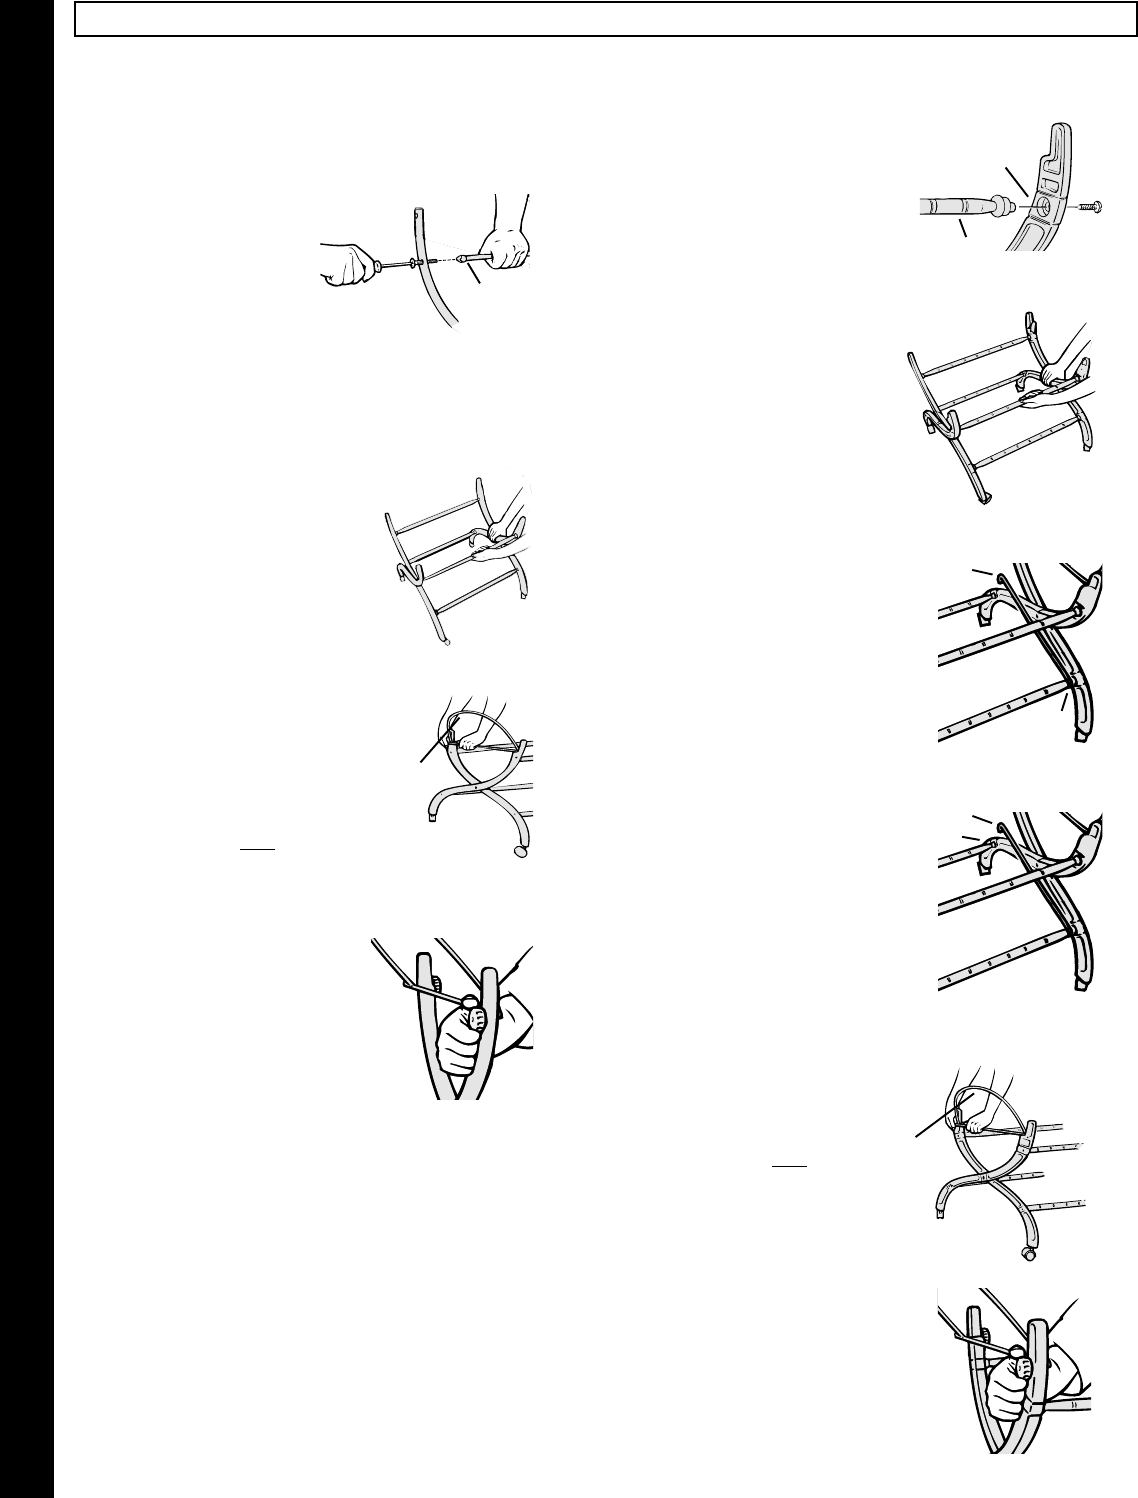
ASSEMBLY
For proper stand assembly, follow the
instructions for your model.
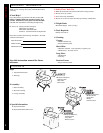
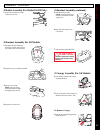
❃ Model 10-440 Series Stand Assembly:
1 Using screws, attach four (4) cross
braces to one set of curved legs.
Do not over tighten screws.
2 Using screws, attach four (4)
cross braces and spacers to
second curved leg section.
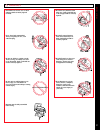
3 With casters on floor, insert
ends of Cradle Support Rod
through holes in top of
curved leg section.
NOTE: Curved edge of
Cradle Support Rod
must be
angled outward as shown.
4 Screw knobs over ends of
Cradle Support Rod
until knob is tight against legs.
Hand tighten only.
Repeat steps 3 & 4 for second
curved leg section.
B
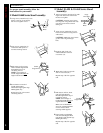
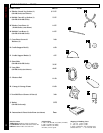
❃ Model 10-450 & 10-460 Series Stand
Assembly:
1 Insert cross braces into side of leg with
larger hole and secure with screws.
Do not over tighten.
CAUTION: Inserting cross braces
in wrong side of leg (small hole side)
can cause cross braces to break
during use.
2 Using screws, attach four (4) cross
braces to second curved leg section
with screws.
CAUTION: Make sure cross braces
go into side of leg with larger
hole.
3 Hook one end of rod over
small indentation at end of
cross brace (A).
4 Hook end of rod over opposite
side of cross brace (B).
Repeat steps 3 & 4 for opposite
end.
5 With casters on floor, insert
ends of Cradle Support
Rod through holes in top of
curved leg section.
NOTE: Curved edge of
Cradle Support Rod must be
angled outward as shown.
Make sure rod installed in
steps 3 & 4 remains hooked
on cross braces before
securing cradle supports.
6 Screw knobs over threaded
ends of Cradle Support Rod
until knob is tight against legs.
Hand tighten only.
Repeat steps 5 & 6 for opposite
end.
Cradle
Support Rod
Cross
Brace
A
Rod
Rod
Large
Hole Side
Cradle
Support Rod
Cross
Brace