


Installation: Rear Facing
Installation: Rear Facing
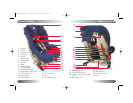
Rear Facing
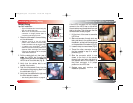
Lap-Shoulder Belt Installation
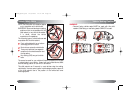
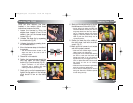
• Figure A illustrates a typical rear facing
lap-shoulder belt installation.
•
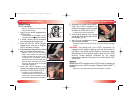
When not in use, always store the LATCH
connectors in storage pouches sewn in
cover above rear facing lock-offs.
1 Place the child restraint rear facing and
in full recline position on the vehicle
seat.
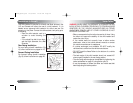
2 Open rear facing lock-off farthest from
where the vehicle belt will be buckled.
3
Pull the vehicle belt out, then pass it through
the first rear facing belt slot
(Fig. B)
.
•
The vehicle belt can be routed over or
under the cover.
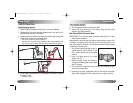
4
Route vehicle belt behind and under
the buckle strap, then through the
second rear facing belt slot.
5
Verify that the vehicle belt is not
twisted, then buckle (
Fig. C)
.
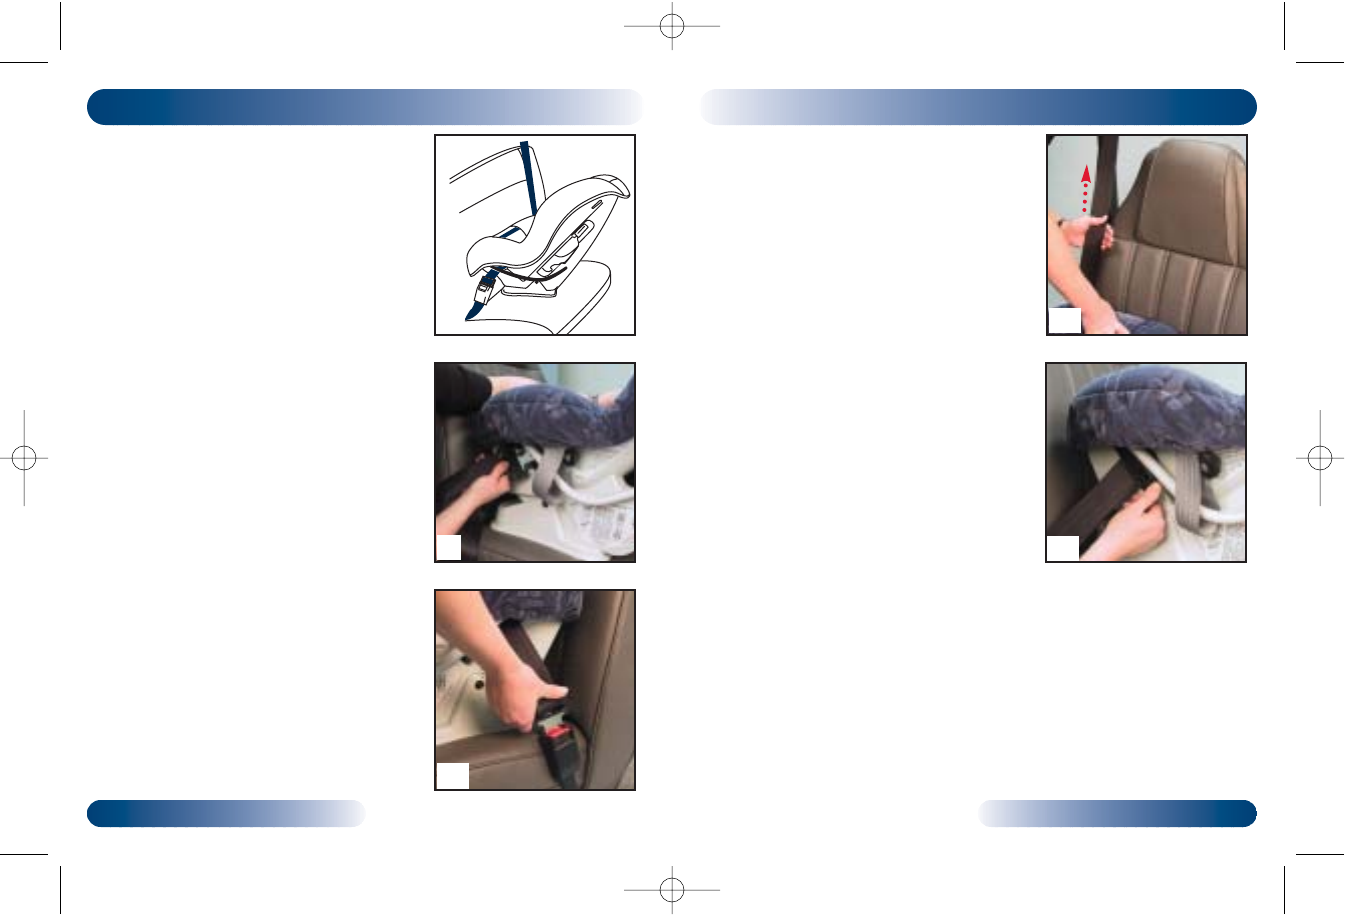
6 Push the restraint firmly into the seat
while removing slack from the lap
portion of the vehicle belt, then the
shoulder portion
(
Fig. D).
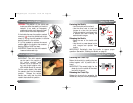
7
Position both sections of vehicle belt
through the rear facing lock-off
farthest from vehicle buckle, then
close lock-off arm
(
Fig. E)
.
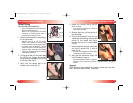
•
Lock-off is properly closed when a
positive click is heard.
•
To prevent breakage, never bend the lock-
off arm up or down.
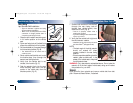
8 Verify that the vehicle belt is tight and
the child restraint is stable.
•
Installation can be improved by the use of
the Versa-Tether
®
(see pages 23–25).
NOTE:
•
The back angle of the child restraint
should not exceed 45º when
properly installed in the rear facing
position.
•
If there is a problem stabilizing the child
restraint, place a rolled towel in the
crease of the vehicle seat to help level
the child restraint base.
WARNING: Only raise restraint as described above. Do not raise the
restraint off of the front edge of vehicle seat; doing so will reduce
the protection for your child.
RReemmoovvaall::
Open lock-offs, then unbuckle and remove vehicle belt from belt
path. Disconnect Versa-Tether
®
, if attached.
B
C
A
D
E
1312
P2285_R02c.qxd 12/8/2003 12:18 PM Page 14