1.0/0309/TGPage 3 of 4
PICTURE 3
PICTURE 2
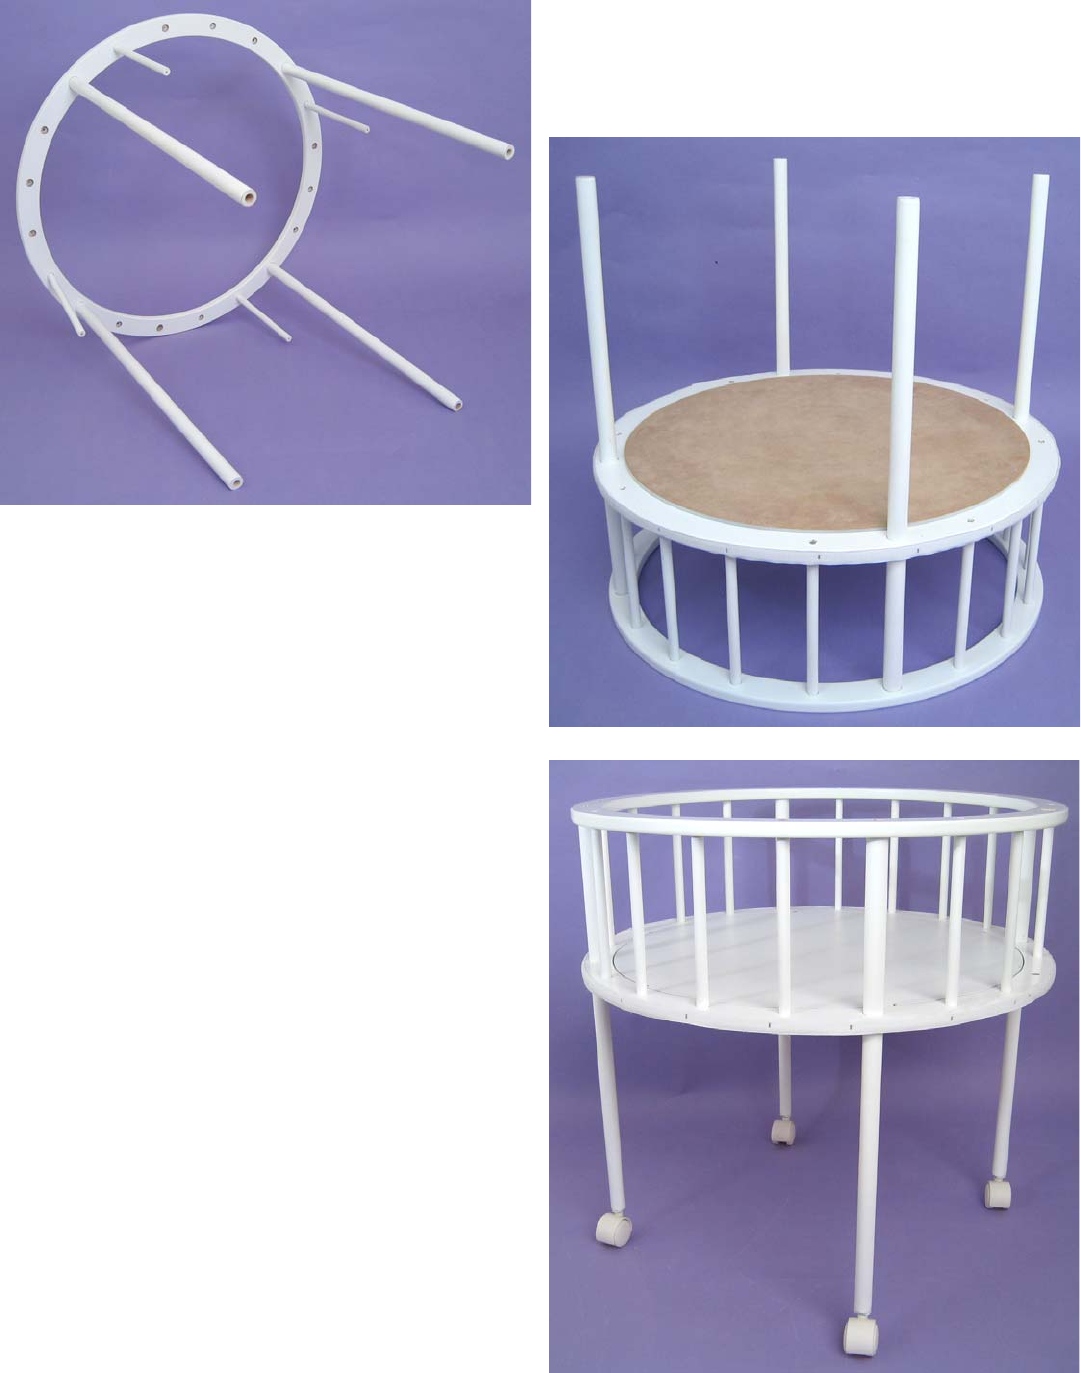
STEP 1: See PICTURE 1. Attach the FOUR LEG
POSTS (B) to their designated spots on the TOP RING
(A) using the FOUR SCREWS (N).
Attach the FOUR DOWELS WITH TWO HOLES (D)
using FOUR SCREWS (N). The positions of these
four dowels may vary from shown in Picture 1.
STEP 2: See PICTURE 2. Turn the crib upside down.
Insert the FOUR LEG POSTS (B) through the large
holes on the BOTTOM RING (F) and slide the bottom
ring down until it rests on the DOWELS WITH TWO
HOLES (D).
Be sure screw and dowel holes on the bottom ring are
in the right place, and the white side of the bottom
platform is facing down (white side will face up when
the crib is in the upright position).
Starting at any dowel, work your way around the ring
and alternately screw down the FOUR DOWELS
WITH TWO HOLES (D) using FOUR SCREWS (N)
and insert the remaining ELEVEN DOWELS (D)
sandwiched between the top and bottom rings.
There is one hole for the canopy pole that you will
leave open.
STEP 3: See PICTURE 3. Turn the crib right side up.
Insert the FOUR CASTER WHEELS (G) into the
holes on the bottom of the LEG POSTS (B). Grasp
each leg and gently but firmly press each wheel
against the floor to snap it into place.
F
G
G
G
G
PICTURE 1
A
B
B
B
B
D
D
D
D


