


3
Figure 3
Pre-Application Preparation
1. Inspect cutting blades, clean and adjust if nec-
essary. See Maintenance.
2. Check all fastening hardware and tighten if
necessary. Do not overtighten. Use self-lock-
ing hardware if replacing missing nuts or bolts.
3. Engine pre-operation check. See Maintenance
for maintenance intervals.
A. Oil: Use Honda 4-stroke oil, or equivalent
detergent, premium quality motor oil. SAE
10W/30 is recommended for general all-tempera-
ture use.
- Remove the oil filler cap/dipstick and wipe clean.
- Insert the dipstick into the oil filler neck, but do
not screw it in.
- If oil level is low, fill to the top of the oil filler
neck with recommended oil.
B. Air Cleaner: Check the air cleaner elements to
be sure they are clean and in good condition.
Clean or replace the elements if necessary.
C. Fuel: Remove the filler cap and check the fuel
level. Refill the tank if the fuel level is low. Do
not fill above the shoulder of the fuel strainer.
Tape Application
1. Determine where the first skip or long line
starts by measuring from the last existing skip
or reference mark and the side of the road.
Offset the premarked chain at least 12 inches
(30 cm) from the center of where the new
markings will be applied.
2. Lay the guideline out and adjust the pointer to
the side of the applicator. Position the applica-
tor even with the pre-marking chain, and posi-
tion the pointer to the side as shown.
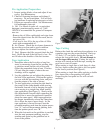
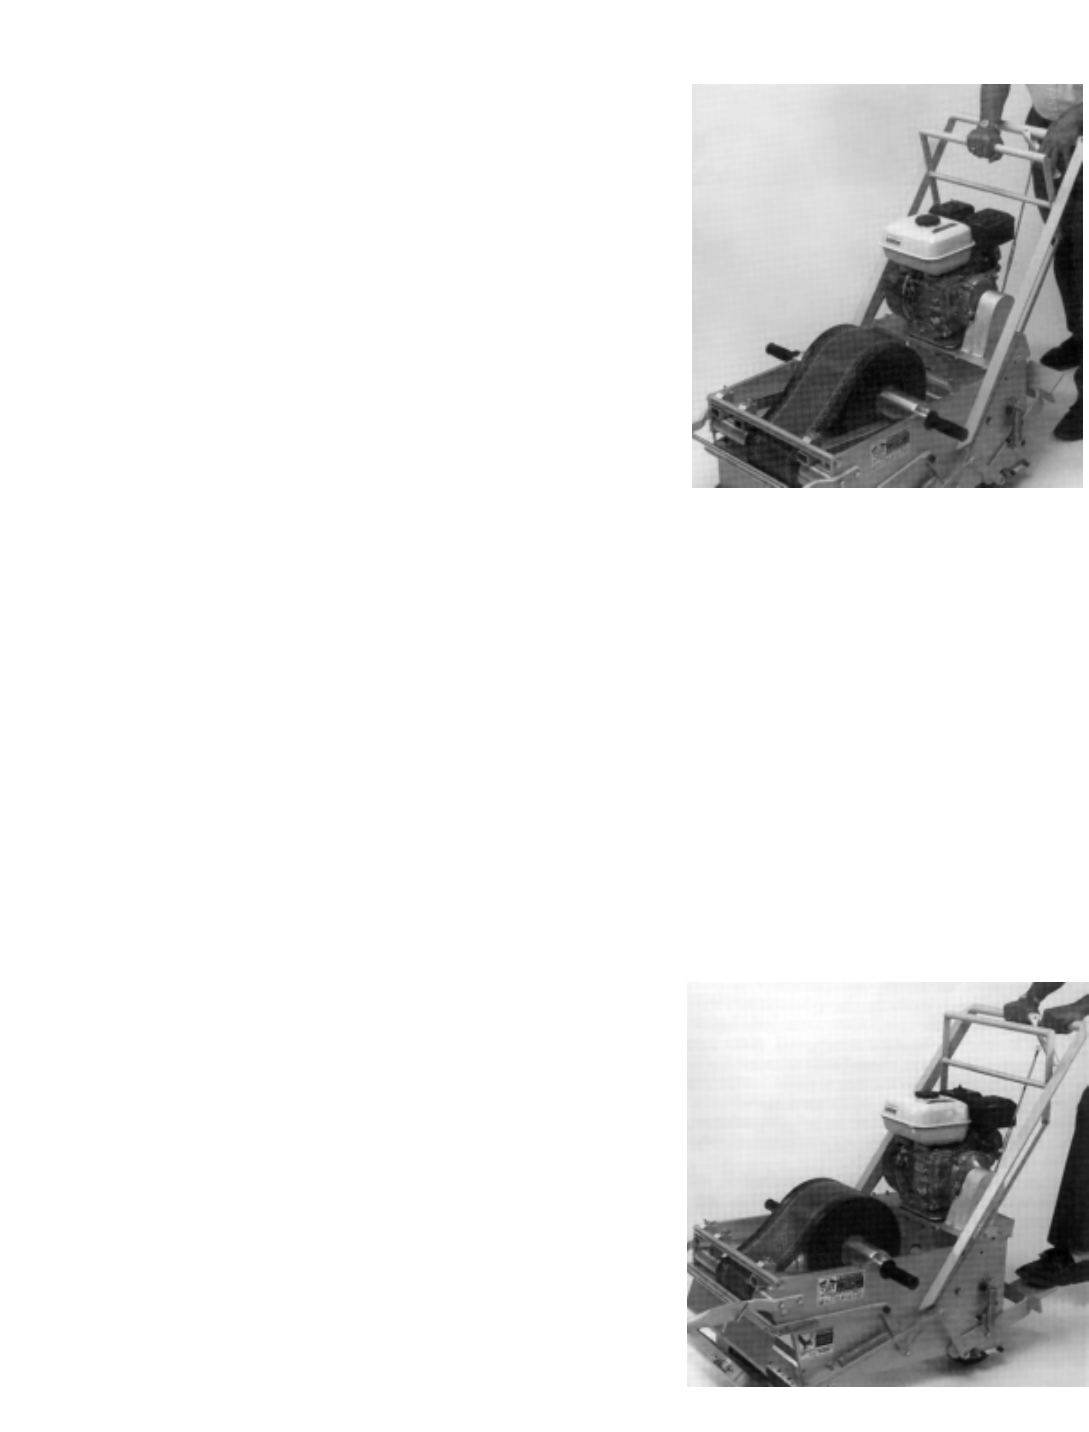
3. To start application, position the right hand in
the center of the clamp handle when moving
the handle forward to aid in keeping the appli-
cator moving in a straight line when starting
tape application (See Figure 3). Slowly move
the clamp handle forward while squeezing the
clutch lever to move the applicator forward at
about the same speed. After tape application
has begun, immediately release the clamp han-
dle to allow the tape to move freely. As the
tape applicator is moved forward, start the
pavement marking each time the pointer passes
over “A,” and cut the pavement marking each
time the pointer passes over “B.”
4. When the last mark on the guideline is reached,
start the next pavement marking, stop the
machine and again lay the guideline out in
front of the pointer.
Tape Cutting
Release the clutch bar and bring the applicator to a
complete stop over the proper marking. Back-up
1/2 inch (1.27 cm) before cutting the tape and
release the foot pedal slowly. Do not attempt to
cut the tape while moving. Cutting the tape in
motion will stretch and tear the tape, causing the
next line to start off center.
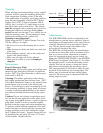
When cutting a single line or both lines of a dou-
ble line, depress either the right or left foot pedal
to the lowest position (See Figure 4).
When cutting a single line while applying a double
line, depress the corresponding foot pedal.
Depressing the foot pedal too far will cut both
markings.
Figure 4