Page 7
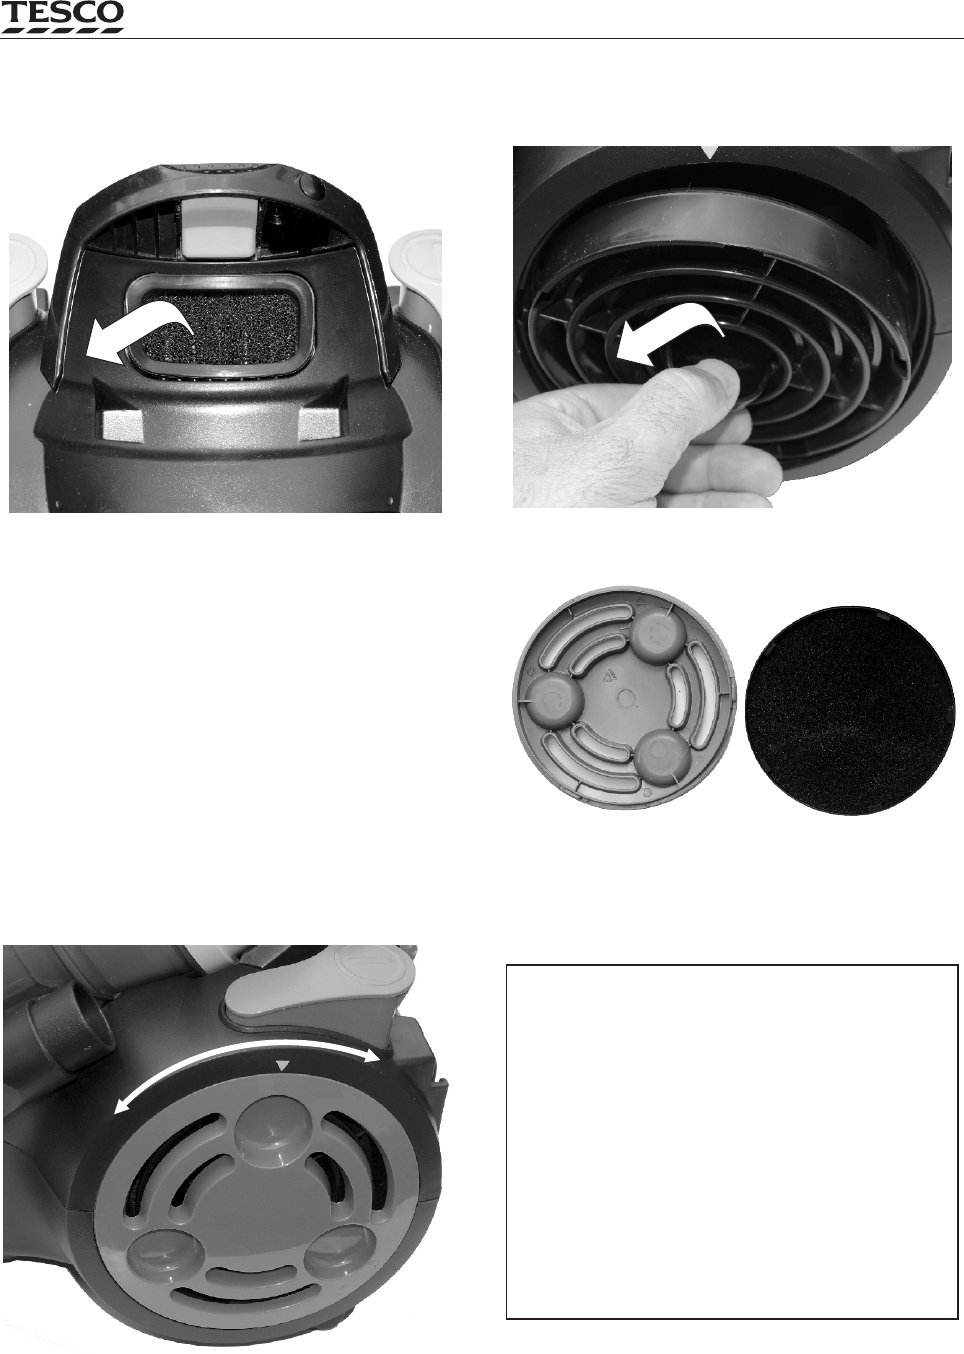
Cleaning the Inlet Filter
The Inlet filter is inside the cleaner. Whenever you remove
the Dust Cup, you should inspect this filter and clean it.
This filter should be cleaned regularly, and whenever it shows
any signs of dirt.
Lift the filter out, brush it thoroughly and if necessary wash it
under running water. Allow to dry fully.
If there is any dirt around the inlet cavity carefully brush it out.
This will help keep the internal airways clean and maintain top
cleaner performance.
When the filter is thoroughly dry replace it in the inlet. Press the
filter firmly in to ensure it is firmly trapped in place by the two
tetaining tabs in the inlet cavity.
NEVER replace a filter when it is wet or even damp.
Cleaning the Exhaust Filter
The Exhaust filter is located at the right of the cleaner,
This filter should be cleaned regularly, and whenever it shows
any signs of dirt.
Rotate the filter cover to the left to open it. Remove the cover
Remove the filter cage which is behind the cover.
Lift the filter out of the cage, and wash it under running water.
Allow to dry fully.
Brush the outlet cavity out. This will help keep the internal
airways clean and maintain cleaner performance.
When the filter is dry, replace it in the cage.
NEVER replace a filter when it is wet or even damp.
VC1811 Vacuum Cleaner User Guide
UNLOCK
LOCK
It is essential to inspect clean the filters regularly. The period
between inspections will depend on how often and for how
long you use the cleaner. The filter and debris screen in
the dust cup should be cleaned whenever you empty
the dust. The motor inlet and exhaust filters should be
checked after every three cleaning sessions.
If the cleaner shows any sign of losing suction, switch off,
check and clean the filters and if necessary, clear any
blockage.
NEVER operate the cleaner with clogged filters, you
could damage the cleaner motor.
If a filter shows any sign of wear or damage, or clogging
that ordinary cleaning cannot remove it should be
replaced. Contact the Tesco helpline number on the last
page of this manual for assistance.
